


 Программное обеспечение
Похожие презентации:


Mobile automation basic tools for working with mobile devices
1.
Automationof mobile testing:
basic tools
2.
PlanBasic tools
Physical devices, emulators and cloud solutions
Appium
• How to write auto-tests
• Basics of Mobile Cloud Services
• Tips and tricks
2
3.
Physical devices,emulators and
cloud solutions
3
4.
Device vs emulatorPhysical device
Emulator
Pros:
• Expected user experience
Pros:
• Cheap
• A lot of parameters can be adjusted:
dimensions, RAM, disk space, set of
sensors, ...
• No power and space consumption
Contras:
Contras:
• Expensive
• You need a lot of physical items
• Power and space consumption
Not realistic behaviour
Computing consumption
Performance issues
Additional software
4
5.
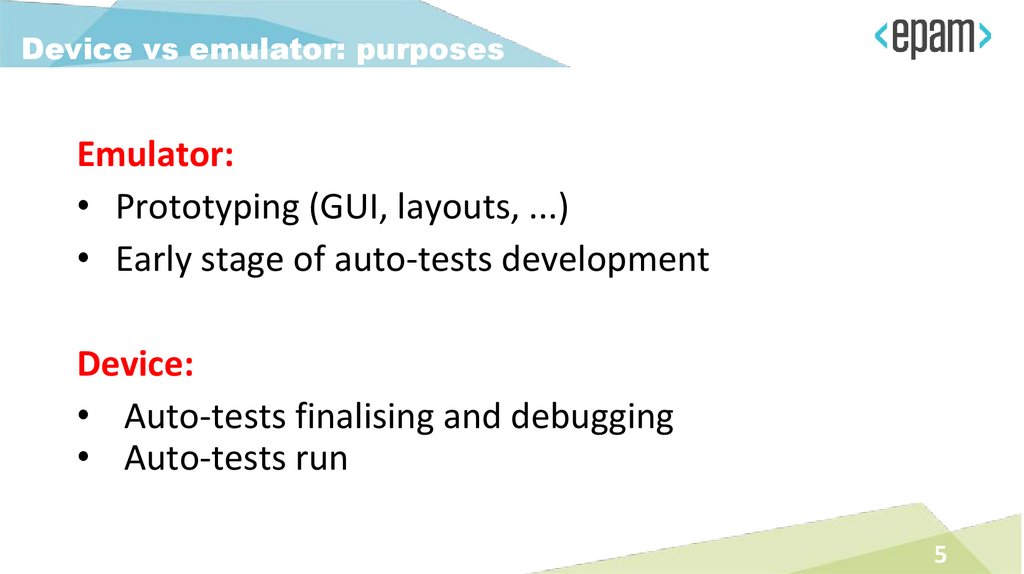
Device vs emulator: purposesEmulator:
• Prototyping (GUI, layouts, ...)
• Early stage of auto-tests development
Device:
• Auto-tests finalising and debugging
• Auto-tests run
5
6.
Mobile cloud servicesMobile cloud services (mobile farms) are the modern
approach
They provide developers and testers with remote access to
sets of physical devices for fixed prices
Remote access to set of emulators can be provided as well
for less prices
6
7.
Mobile platforms• IOS
• You have to be a registered Android developer
• You have to use Apple/Mac environment (Xcode)
• Android
• You can use free open-source tools on Win/Mac/Linux
• Occupied most of mobile market at the moment
7
8.
General environmentsettings
for Android platform
8
9.
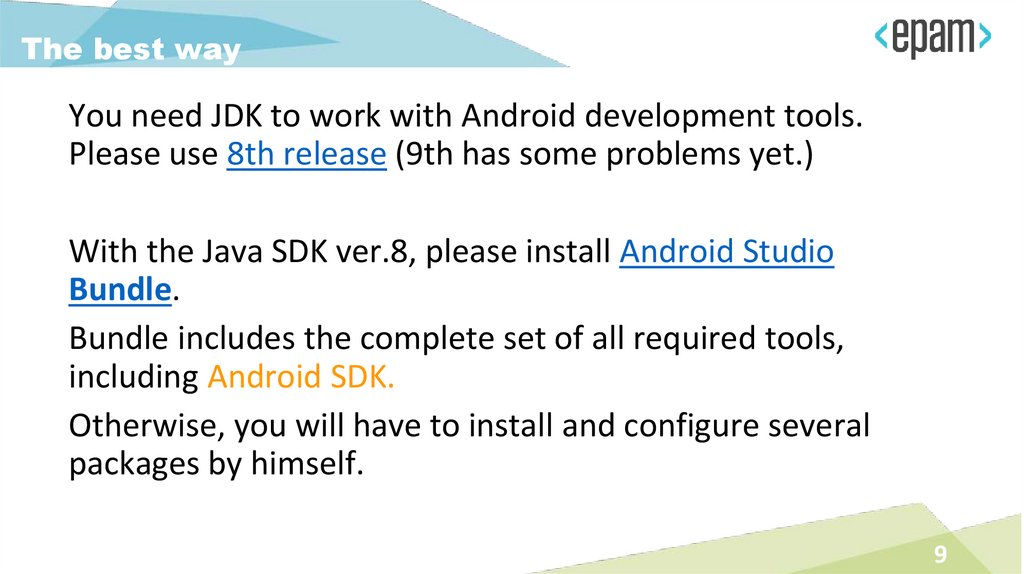
The best wayYou need JDK to work with Android development tools.
Please use 8th release (9th has some problems yet.)
With the Java SDK ver.8, please install Android Studio
Bundle.
Bundle includes the complete set of all required tools,
including Android SDK.
Otherwise, you will have to install and configure several
packages by himself.
9
10.
Android basic toolsetAndroid Studio is the common toolset
Android SDK (includes some CLI tools)
Android Debug Bridge - ADB
Android Virtual Device - AVD, and AVD Manager
Android Device Monitor
10
11.
Android StudioCurrently,
Android Studio
is used for
most tasks to
develop,
debug
and test
Android
applications
https://developer.android.com/studio/intro/index.html
11
12.
Environment variables• JAVA_HOME = Program Files\Java\jdkXX.YY (actual JDK location)
• ANDROID_HOME = ~\AppData\Local\Android\sdk
(actual path to Android SDK)
• PATH = %PATH%, %ANDROID_HOME%\tools,
%ANDROID_HOME%\platform-tools
12
13.
Android emulatorssetting up
13
14.
Android Virtual DeviceThis is emulator of a certain Android device.
NOTE: AVD emulates mobile hardware (instead of iOS
simulator)- first of all, ARM-based processor.
You can create a set of emulator that have different
capabilities:
• Dimensions and form-factor
• Display parameters
• API level (Android version)
• RAM and disk space size
• Set of sensors
14
15.
Consist of AVD• Hardware profile: pre-sets of characteristics of a (real) devices.
Some profiles include Play Store (indicated). Could be created
and/or imported as well
• System image: set of software options - certain API version, set
of applications
• Storage area: dedicated storage area on host computer. It
stores the device user data (apps and settings), emulated SD
card
• Skin: the appearance of a device. The AVD Manager provides
some predefined skins. User can define his own skins or use 3dparty ones
15
16.
Access to AVD managerTo open the AVD Manager in Android Studio, do one of the following:
• Select Tools > Android > AVD Manager
• Click AVD Manager icon in the toolbar
16
17.
Start to create an AVDClick Create Virtual
Device at the bottom of
the AVD Manager dialog
The Select Hardware
page appears.
17
18.
Select hardware profile● Select a hardware
profile
● Click Next
The System Image
page appears.
18
19.
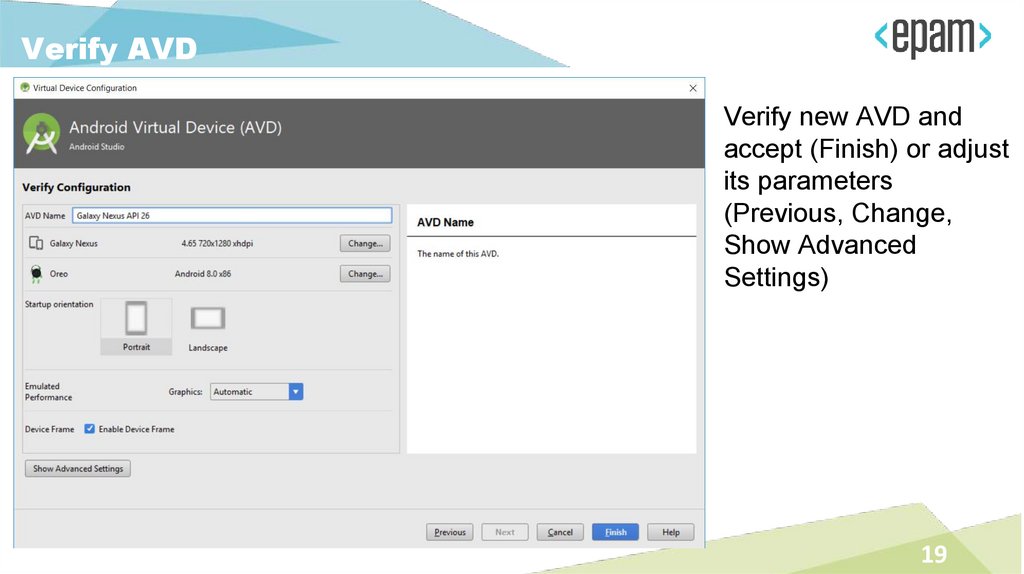
Verify AVDVerify new AVD and
accept (Finish) or adjust
its parameters
(Previous, Change,
Show Advanced
Settings)
19
20.
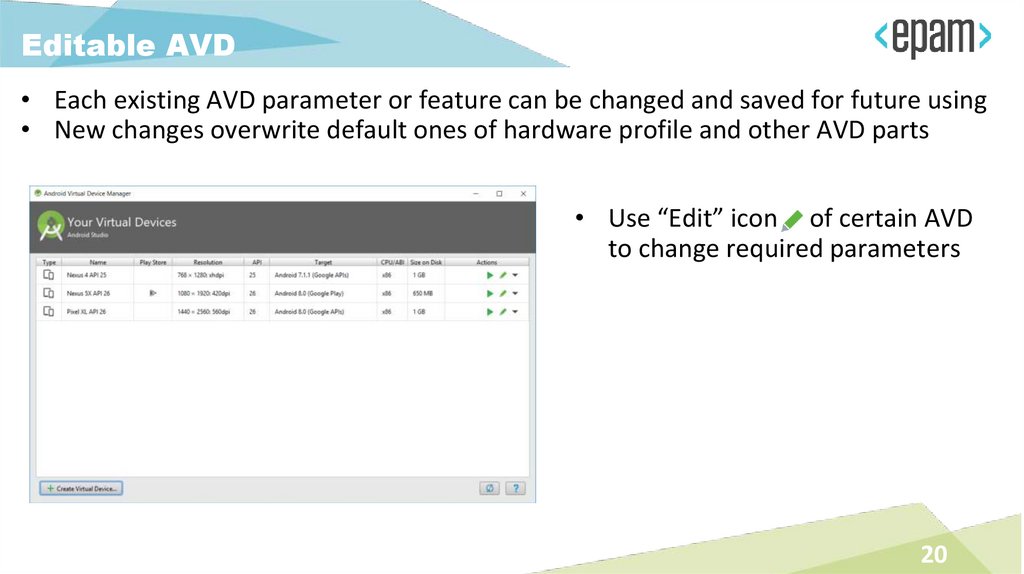
Editable AVD• Each existing AVD parameter or feature can be changed and saved for future using
• New changes overwrite default ones of hardware profile and other AVD parts
• Use “Edit” icon of certain AVD
to change required parameters
20
21.
Advanced settings of AVDClick
“Show Advanced Settings“
button to get access to
more editable settings.
Scroll down to see full list
of ones.
21
22.
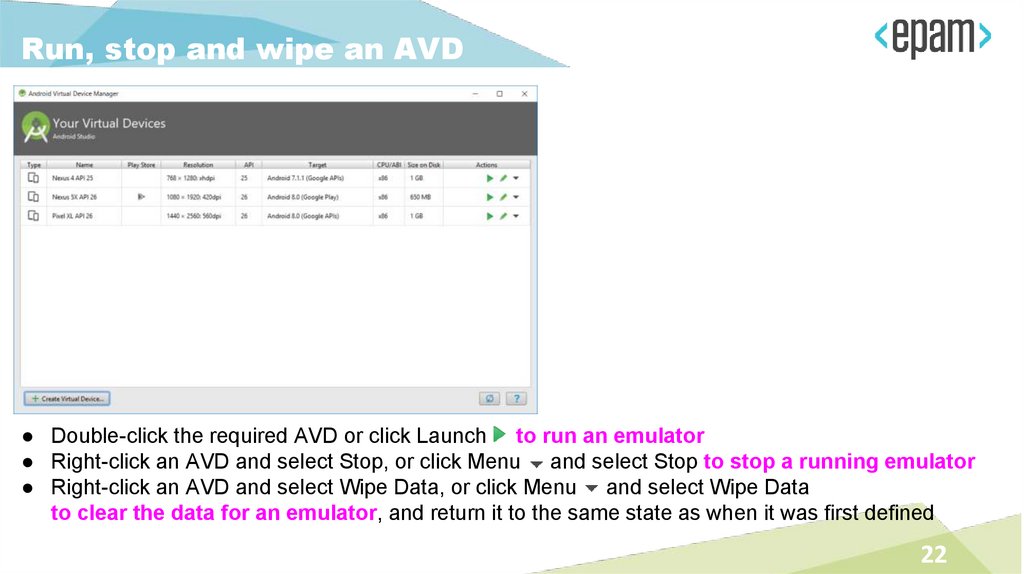
Run, stop and wipe an AVD● Double-click the required AVD or click Launch to run an emulator
● Right-click an AVD and select Stop, or click Menu and select Stop to stop a running emulator
● Right-click an AVD and select Wipe Data, or click Menu and select Wipe Data
to clear the data for an emulator, and return it to the same state as when it was first defined
22
23.
Access to emulator via ADB• Set up the environment for ADB as
described before (if not yet)
• Run AVD instance from Android
Studio AVD Manager
23
24.
Androidphysical devices
setting up
24
25.
Enable Developer OptionsIf not yet
(starting from ver. 4.2):
• Settings > About device >
Software Info
• Press Build Number 7 times
25
26.
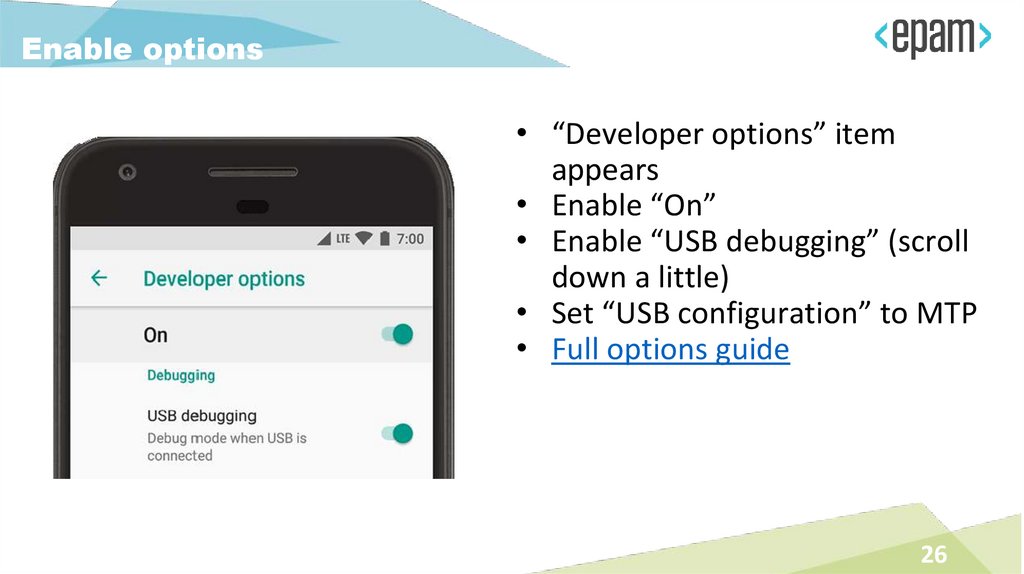
Enable options• “Developer options” item
appears
• Enable “On”
• Enable “USB debugging” (scroll
down a little)
• Set “USB configuration” to MTP
• Full options guide
26
27.
Checkconnection
27
28.
Android Debug BridgeUse ADB to get access to Android device under testing
via USB or WiFi (TCP/IP)
Install and delete applications
Add and remove files
Get logs and dumps
Get information about state of device and processes
28
29.
Access via USBIf you have properly configured environment:
• Connect Android device to computer
by USB
• Open command-line terminal
• Use adb devices command to verify
connection
29
30.
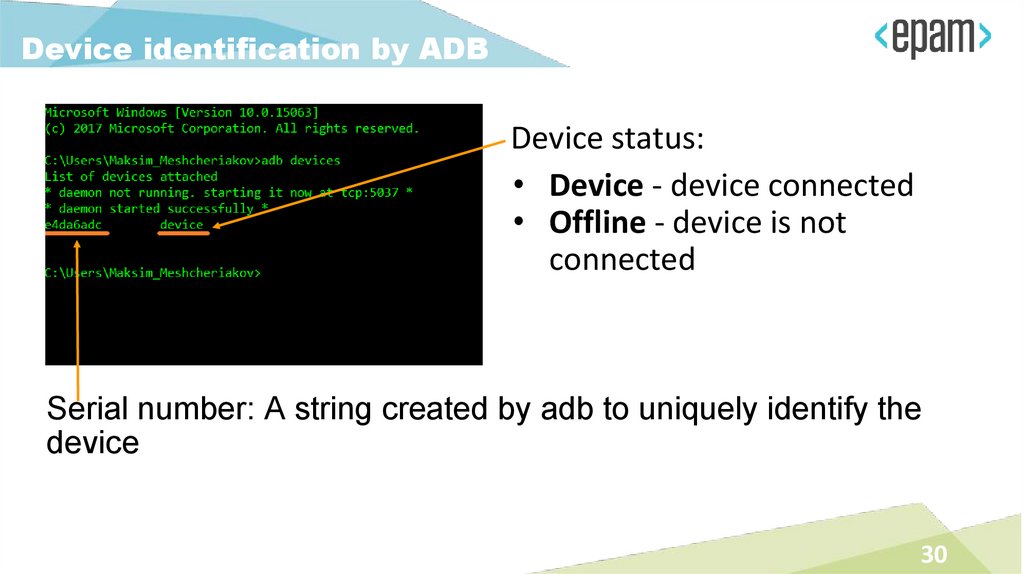
Device identification by ADBDevice status:
• Device - device connected
• Offline - device is not
connected
Serial number: A string created by adb to uniquely identify the
device
30
31.
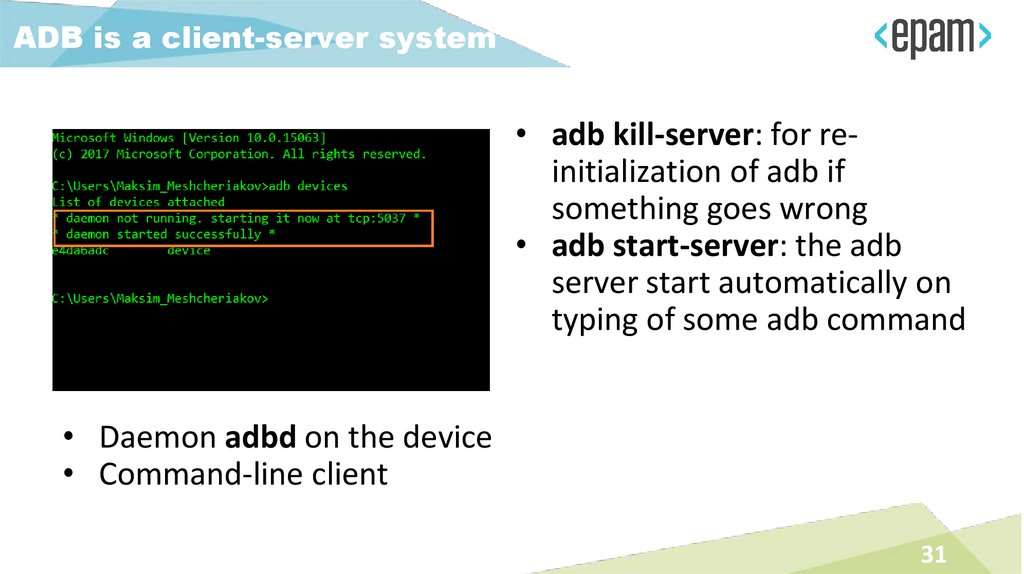
ADB is a client-server system• adb kill-server: for reinitialization of adb if
something goes wrong
• adb start-server: the adb
server start automatically on
typing of some adb command
• Daemon adbd on the device
• Command-line client
31
32.
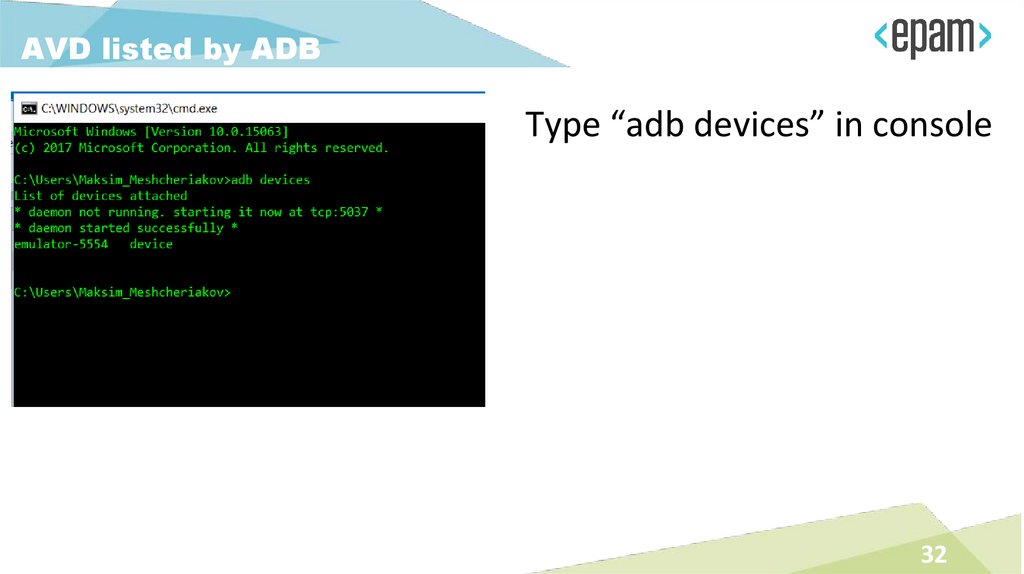
AVD listed by ADBType “adb devices” in console
32
33.
Get another one AVDRun another one
AVD instance from
Android Studio
AVD Manager
33
34.
2 AVDs listed by ADBType “adb devices” in
console once again
34
35.
2 emulators and real device• Connect physical device to USB (do not stop running AVDs)
• Type “adb devices” in console once again
35
36.
Run AVD via CLI36
37.
CLI for AVDYou can use CLI AVD tools as well:
• tools/bin/avdmanager.bat
to create and maintain AVD instances
• ANDROID_HOME/emulator
to run certain AVD instance
https://developer.android.com/studio/run/emulator
-commandline.html
37
38.
Install and remove application$ adb install path_to_apk
$ adb uninstall package
In case of uninstallation you have to use Java package name
instead of .apk filename.
$ adb shell pm list packages -f
38
39.
Copy files to/from device• Push a file to device
$ adb push path2local_file path2remote_file
• Pull a file from device
$ adb pull path2remote_file path2local_file
• Example:
$ adb push foo.txt /sdcard/foo.txt
39
40.
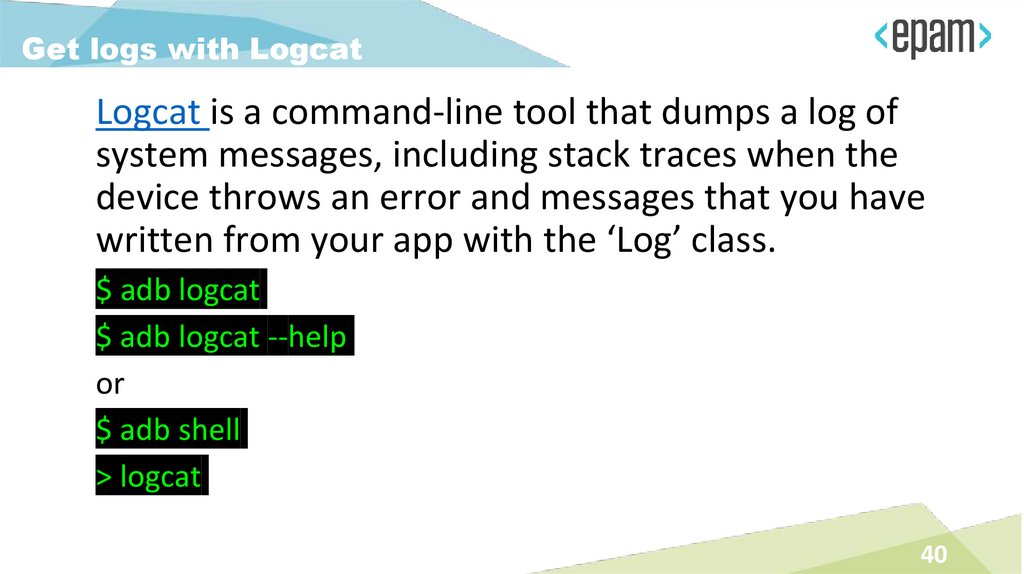
Get logs with LogcatLogcat is a command-line tool that dumps a log of
system messages, including stack traces when the
device throws an error and messages that you have
written from your app with the ‘Log’ class.
$ adb logcat
$ adb logcat --help
or
$ adb shell
> logcat
40
41.
Logcat options• Default output is ‘stdout’, but you can write output
down to required file with -f <filename> option
• output filtering:
Verbose (lowest) / Debug / Info / Warning / Error /
Fatal / Silent (highest))
• output formatting with -v <format> option
The full syntax description:
https://developer.android.com/studio/commandline/logcat.html$Syntax
41
42.
Command line tools infoThe root of information about Android-related
command line tools:
https://developer.android.com/studio/commandline/index.html
42
43.
Update platformsTools >
Android >
SDK Manager >
SDK Platforms
43
44.
Update toolsTools >
Android >
SDK Manager >
SDK Tools
44
45.
Appium45
46.
Business needs• EPAM as a global IT service company needs in clear
and easy to learn and implement procedure(s) of
mobile test automation that will be applicable
worldwide
• These procedures should be based on a limited set of
tools. These tools should be easy to learn and
implement as well
• Engineers can’t learn cute new tools again and again:
it’s OK for personal professional development, not to
meet business needs
46
47.
Required features of toolImportant: we are talking about corporate-wide tool for
hundreds engineers who are working on hundreds projects
with their own peculiarities
• Covers main target mobile platforms
Android, iOS
• Use the investments made
knowledge, expertise, processes, infrastructure, software, hardware
• Not expensive
free open source is preferable
• Easy to learn
47
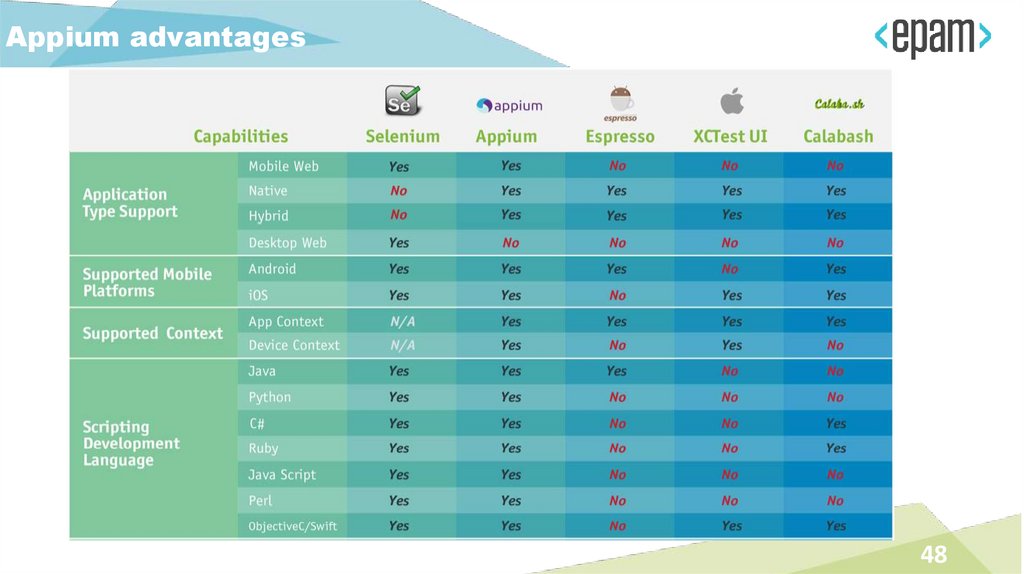
48.
Appium advantages48
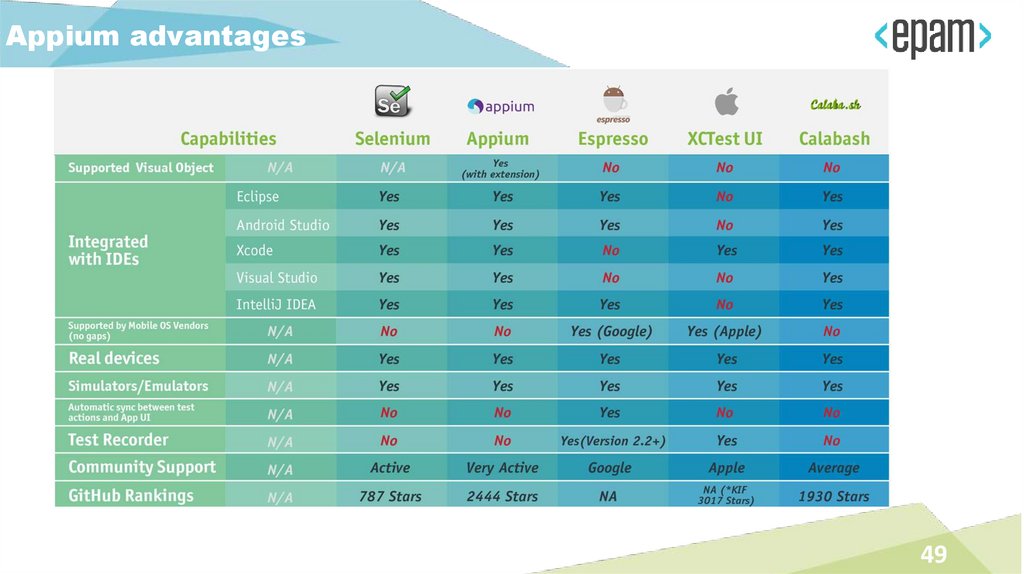
49.
Appium advantages49
50.
Layers of test automation harnessDriver
DSL
Basic
automation API
Appium
Test runner
xUnit/testNG
Entities
Page Object pattern
Scenario
Business
logic
Cucumber/Gherkin, DDT
Reporting and logging
ReportPortal/Allure/CI
Test scripts
Java/JS/Python/ObjectiveC
(implementation of test cases)
50
51.
The essence of AppiumAppium server
Appium client: libraries (in Java, Ruby, Python, PHP, JavaScript,
and C#) which support Appium's extensions to the WebDriver
protocol
51
52.
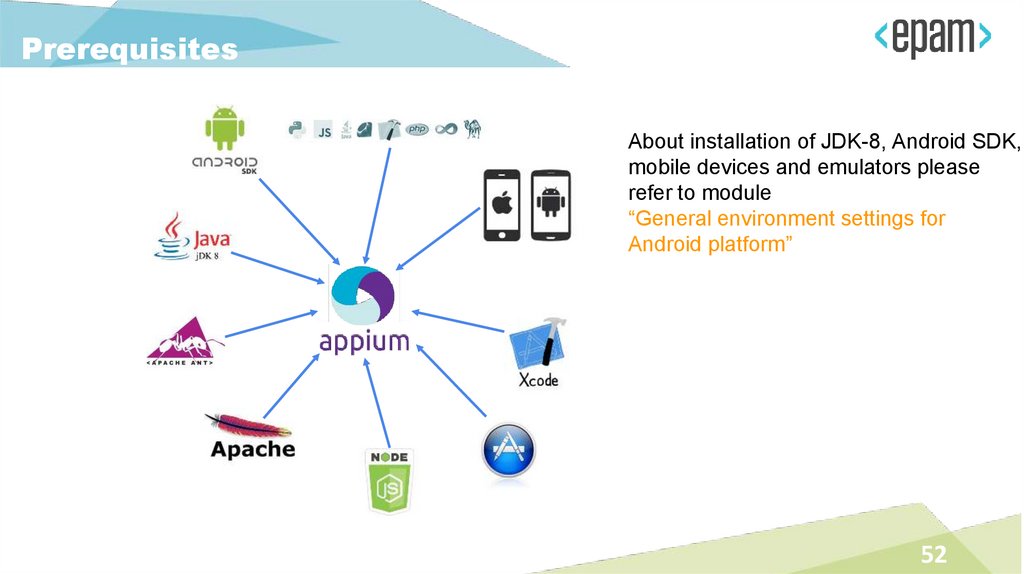
PrerequisitesAbout installation of JDK-8, Android SDK,
mobile devices and emulators please
refer to module
“General environment settings for
Android platform”
52
53.
Node.jsThe most efficient, cross-platform way to use Appium
as a node module.
1. Download Node.js package suitable for your
computer: https://nodejs.org/en/download/, and
install it.
2. Use appium-doctor to check Appium preconditions:
a. Install: > npm install -g appium-doctor
b. Check: > appium-doctor
53
54.
Appium Desktop installationAppium Server and Inspector in desktop GUIs for Mac, Windows,
and Linux
1. Download Appium Desktop from here:
https://github.com/appium/appium-desktop/releases
2. Short usage instructions (scroll down to text):
https://github.com/appium/appium-desktop
3. Install Appium desktop according your system rules
4. Find other Appium-related software packages here:
https://github.com/appium
5. Visit appium.io to get more information
54
55.
Run Appium with default settings1. Start an emulator or attach a
device
2. Run Appium DT by clicking
on desktop
3. Use default “simple”
settings: Appium server will
run locally (0.0.0.0:4723)
4. Press “Start Server x.x.x”
55
56.
Start Appium InspectorClick to start an Inspector
session
56
57.
Default capabilities screen57
58.
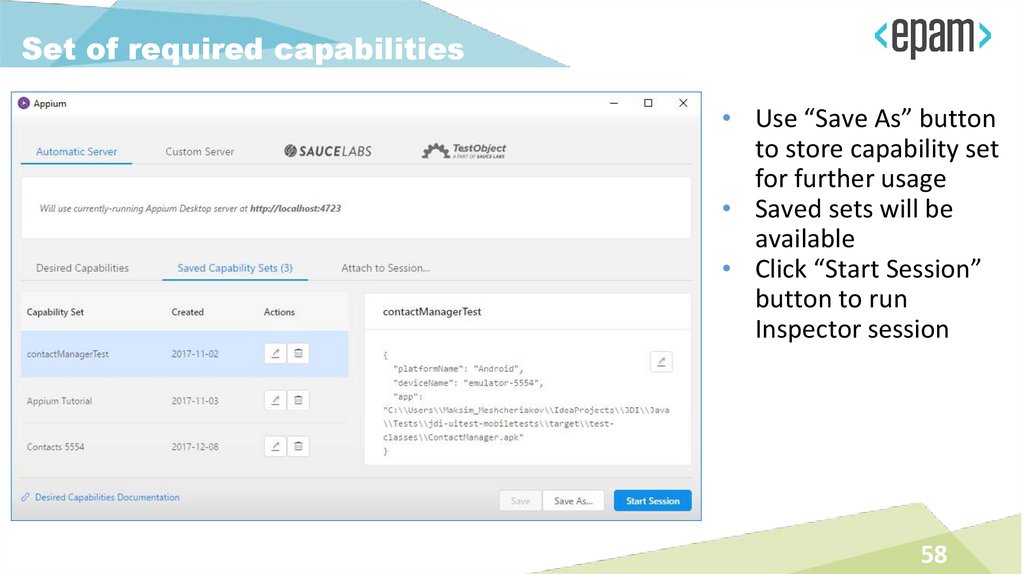
Set of required capabilities• Use “Save As” button
to store capability set
for further usage
• Saved sets will be
available
• Click “Start Session”
button to run
Inspector session
58
59.
Select desired elementAppium Inspector tool more convenient than Device Monitor one
59
60.
RecorderRecorder tool:
• not for production
code
• help explore
Appium API
• demonstration
It is a learning
tool, not a robust
code generation
feature
60
61.
PlanBasic tools
Physical devices, emulators and cloud solutions
Appium
• How to write auto-tests
• Basics of Mobile Cloud Services
• Tips and tricks
61
62.
QUESTIONSmaxim.mescheryakov
[email protected]
62