


 Программное обеспечение
Похожие презентации:


")


Practice -1. Installing Windows Server 2022. Windows System Administration
1.
Practice -1 - Installing Windows Server 2022Windows System Administration
Lecturer: Akhmet Tussupov, PhD in Information Systems
email: Akhmet.Tussupov@astanait.edu.kz
Aliya Aubakirova
email: Aliya.Aubakirova@astanait.edu.kz
2.
Task:Installing and Configuring Windows Server:
• Set up a virtualized environment using Hyper-V or VirtualBox
• Install and configure Windows Server
This practice lesson is designed to provide you with detailed instructions for installing Windows Server 2022. These
step-by-step instructions, illustrated with easy-to-understand graphics, explain and show you how to master the
installation of Windows Server 2022. With the guidance provided by this easy-to-follow and you will quickly learn
the installation process without any obstacles.
3.
Technical requirements for Windows Server 2022Technical requirements
To complete the hands-on lab for this assignment you will need the following equipment:
• A PC with Windows 11 Pro, at least 16 GB of RAM, 1 TB of HDD, and access to the internet
• A virtual machine with Windows Server 2022 Standard or Datacenter (Desktop Experience), at least 4 GB of
RAM, 100 GB of HDD, and access to the internet
• Microsoft has a free trial for Windows servers with a 180-day free trial.
4.
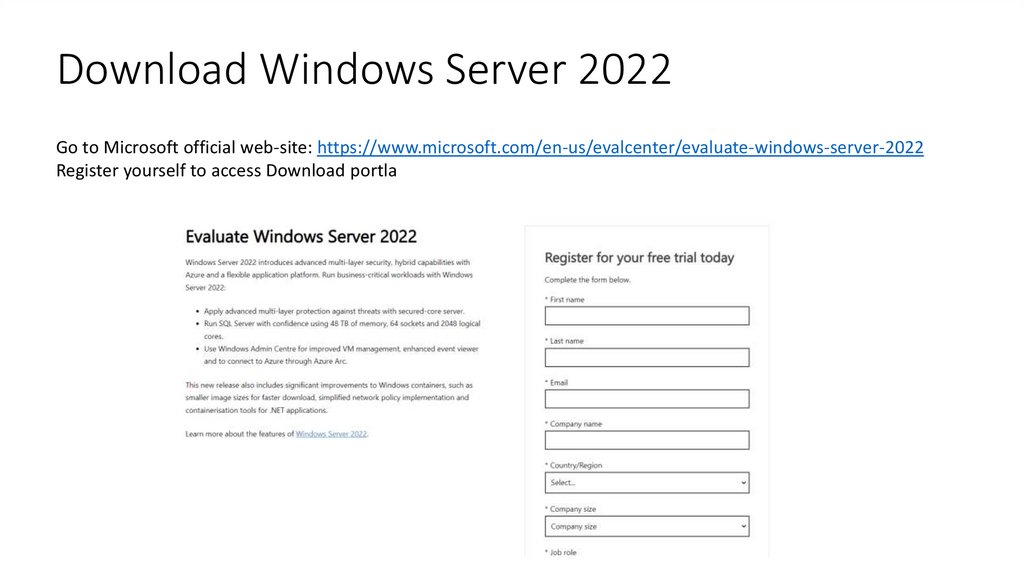
Download Windows Server 2022Go to Microsoft official web-site: https://www.microsoft.com/en-us/evalcenter/evaluate-windows-server-2022
Register yourself to access Download portla
5.
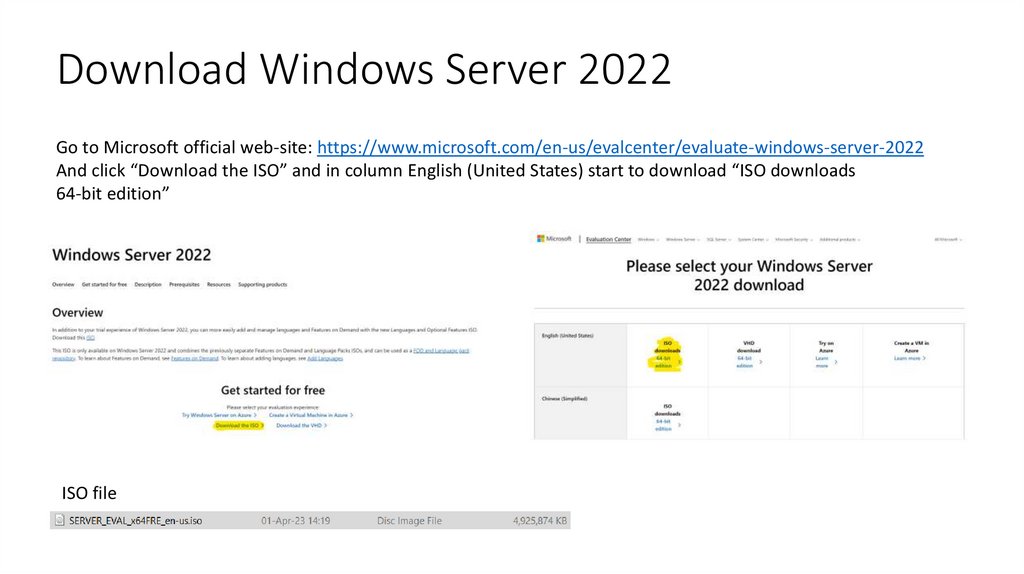
Download Windows Server 2022Go to Microsoft official web-site: https://www.microsoft.com/en-us/evalcenter/evaluate-windows-server-2022
And click “Download the ISO” and in column English (United States) start to download “ISO downloads
64-bit edition”
ISO file
6.
Set up a virtualized environment using Hyper-VThe Hyper-V role in Windows Server lets you create a virtualized computing
environment where you can create and manage virtual machines. You can run
multiple operating systems on one physical computer and isolate the operating
systems from each other. With this technology, you can improve the efficiency
of your computing resources and free up your hardware resources.
The following is a list of hardware resources that the host needs to run VMs:
•Processor. Ensure the host has sufficient processor cores to support the VMs you plan to run.
•Memory. Ensure there's enough memory in the host to support the number of VMs you intend to run.
•Storage. Ensure your host has enough storage for the virtual hard disks (VHDs) used by your VMs. The storage
subsystem also requires high throughput to support multiple VMs concurrently accessing the storage.
•Network. The Hyper-V host must allocate sufficient network capacity to each VM. In some cases, you might
need to allocate different network adapters in the host for dedicated purposes.
7.
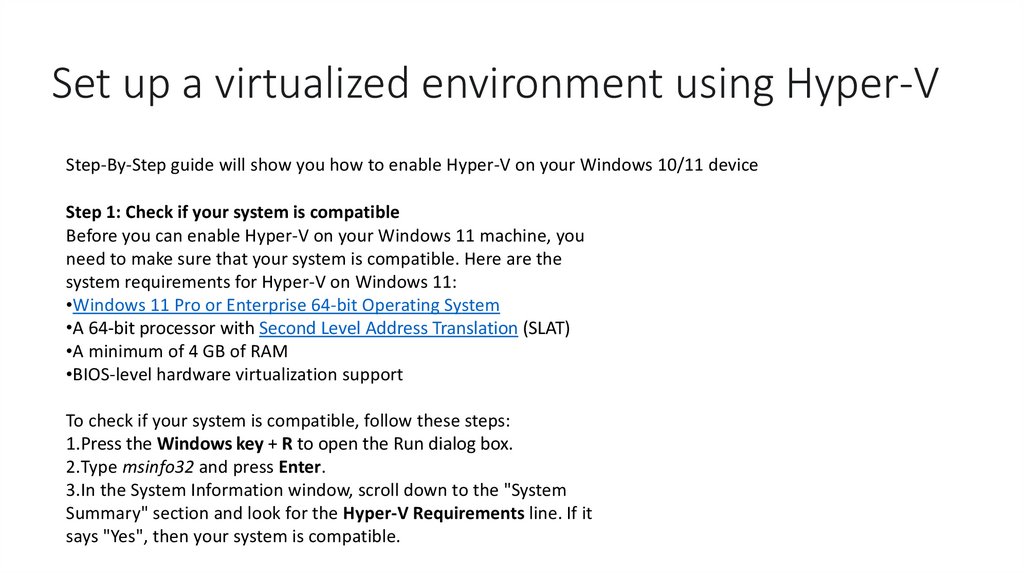
Set up a virtualized environment using Hyper-VStep-By-Step guide will show you how to enable Hyper-V on your Windows 10/11 device
Step 1: Check if your system is compatible
Before you can enable Hyper-V on your Windows 11 machine, you
need to make sure that your system is compatible. Here are the
system requirements for Hyper-V on Windows 11:
•Windows 11 Pro or Enterprise 64-bit Operating System
•A 64-bit processor with Second Level Address Translation (SLAT)
•A minimum of 4 GB of RAM
•BIOS-level hardware virtualization support
To check if your system is compatible, follow these steps:
1.Press the Windows key + R to open the Run dialog box.
2.Type msinfo32 and press Enter.
3.In the System Information window, scroll down to the "System
Summary" section and look for the Hyper-V Requirements line. If it
says "Yes", then your system is compatible.
8.
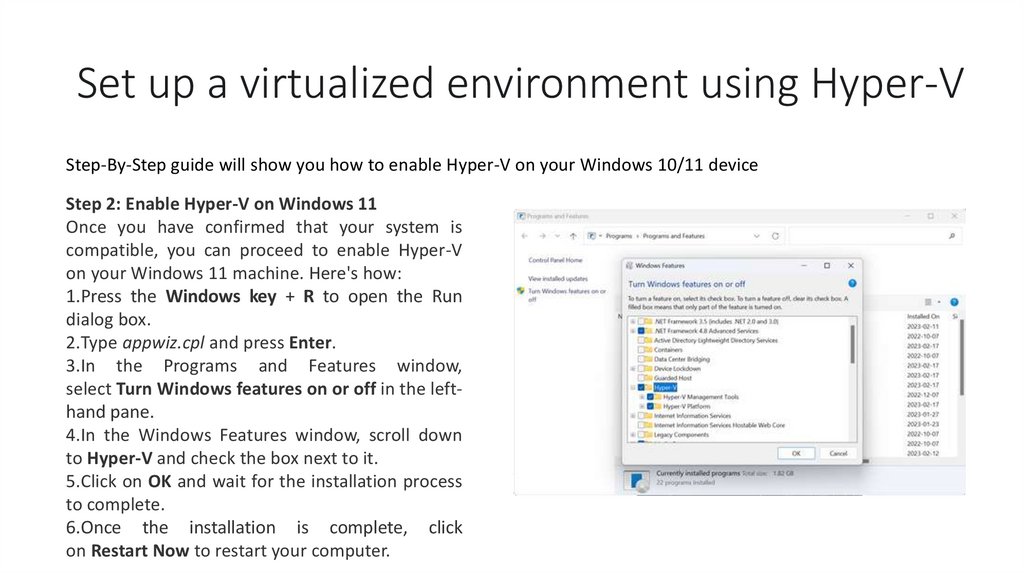
Set up a virtualized environment using Hyper-VStep-By-Step guide will show you how to enable Hyper-V on your Windows 10/11 device
Step 2: Enable Hyper-V on Windows 11
Once you have confirmed that your system is
compatible, you can proceed to enable Hyper-V
on your Windows 11 machine. Here's how:
1.Press the Windows key + R to open the Run
dialog box.
2.Type appwiz.cpl and press Enter.
3.In the Programs and Features window,
select Turn Windows features on or off in the lefthand pane.
4.In the Windows Features window, scroll down
to Hyper-V and check the box next to it.
5.Click on OK and wait for the installation process
to complete.
6.Once the installation is complete, click
on Restart Now to restart your computer.
9.
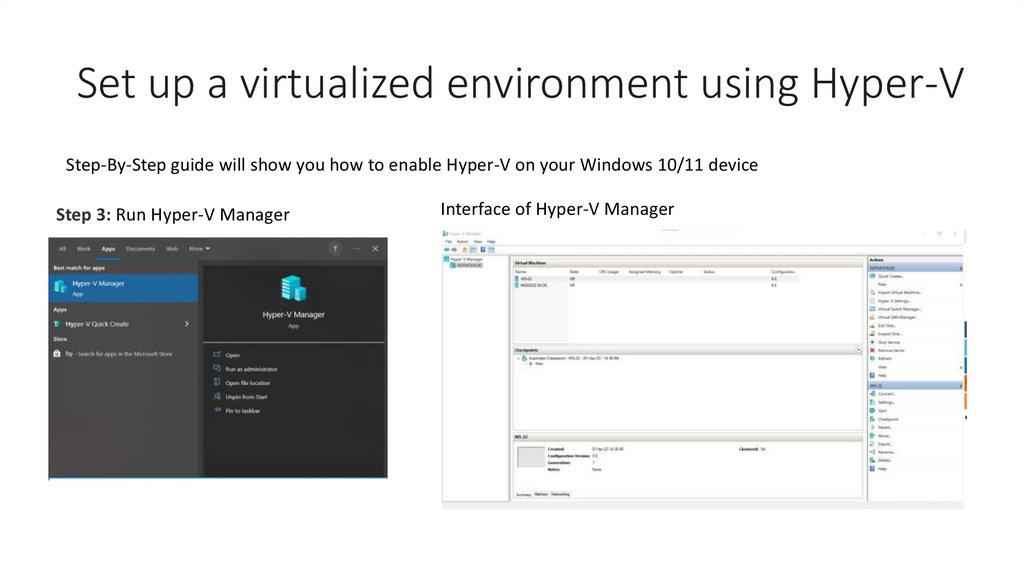
Set up a virtualized environment using Hyper-VStep-By-Step guide will show you how to enable Hyper-V on your Windows 10/11 device
Step 3: Run Hyper-V Manager
Interface of Hyper-V Manager
10.
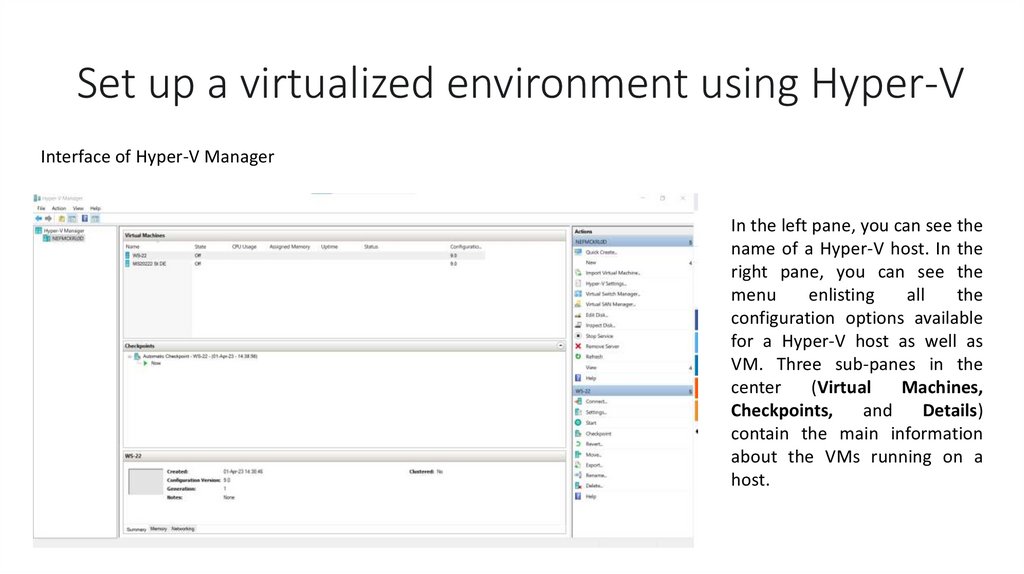
Set up a virtualized environment using Hyper-VInterface of Hyper-V Manager
In the left pane, you can see the
name of a Hyper-V host. In the
right pane, you can see the
menu
enlisting
all
the
configuration options available
for a Hyper-V host as well as
VM. Three sub-panes in the
center
(Virtual
Machines,
Checkpoints,
and
Details)
contain the main information
about the VMs running on a
host.
11.
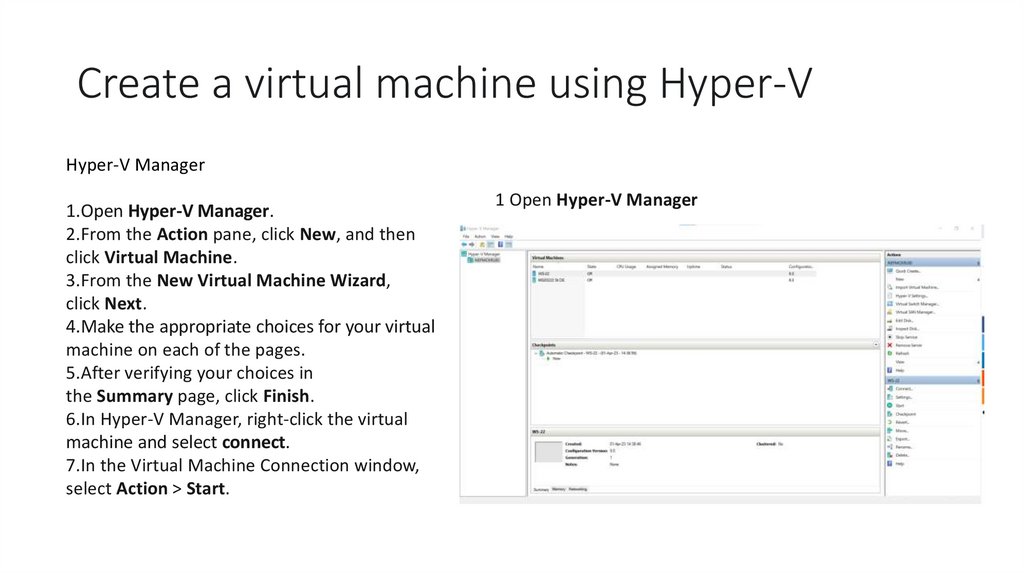
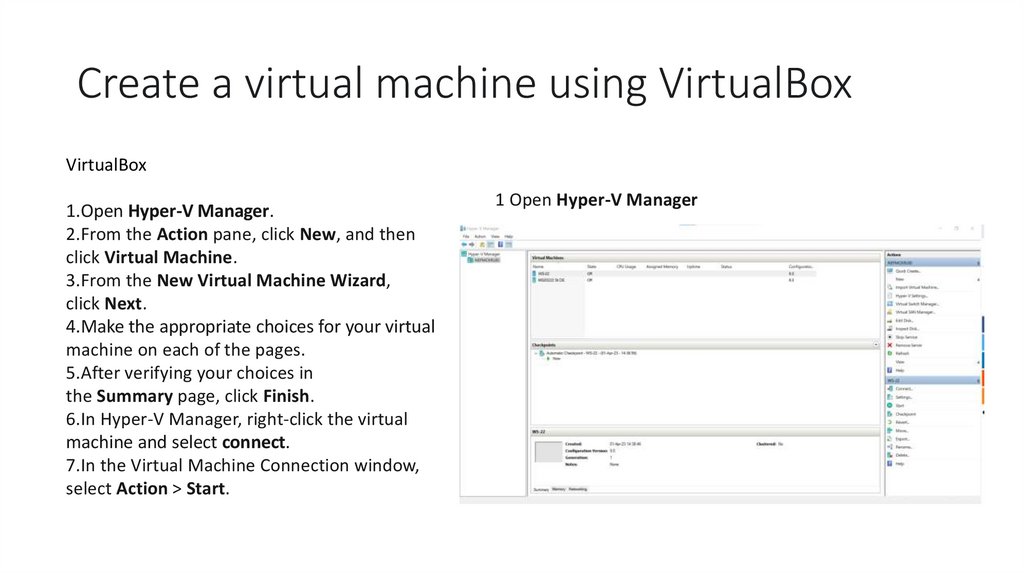
Create a virtual machine using Hyper-VHyper-V Manager
1.Open Hyper-V Manager.
2.From the Action pane, click New, and then
click Virtual Machine.
3.From the New Virtual Machine Wizard,
click Next.
4.Make the appropriate choices for your virtual
machine on each of the pages.
5.After verifying your choices in
the Summary page, click Finish.
6.In Hyper-V Manager, right-click the virtual
machine and select connect.
7.In the Virtual Machine Connection window,
select Action > Start.
1 Open Hyper-V Manager
12.
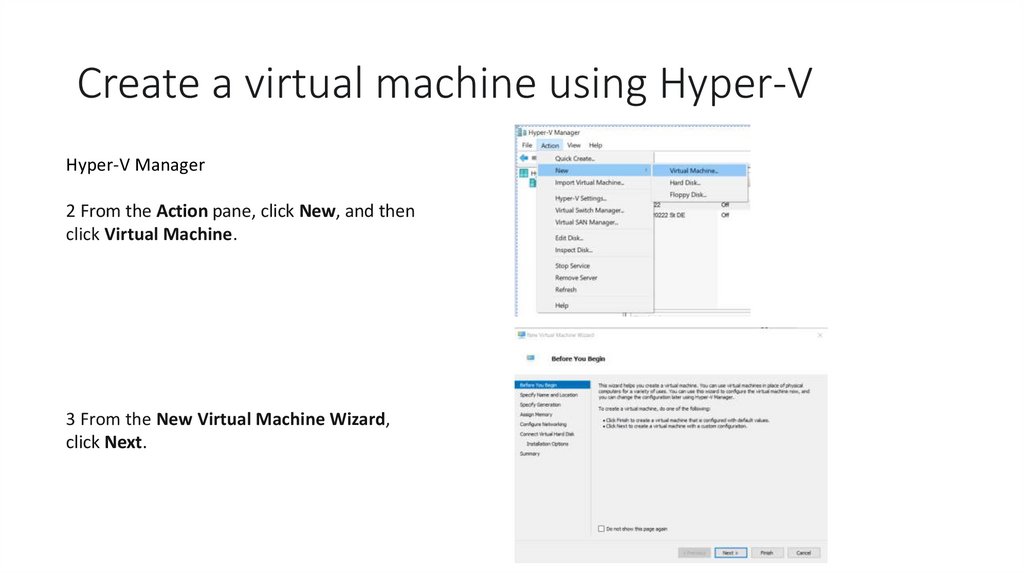
Create a virtual machine using Hyper-VHyper-V Manager
2 From the Action pane, click New, and then
click Virtual Machine.
3 From the New Virtual Machine Wizard,
click Next.
13.
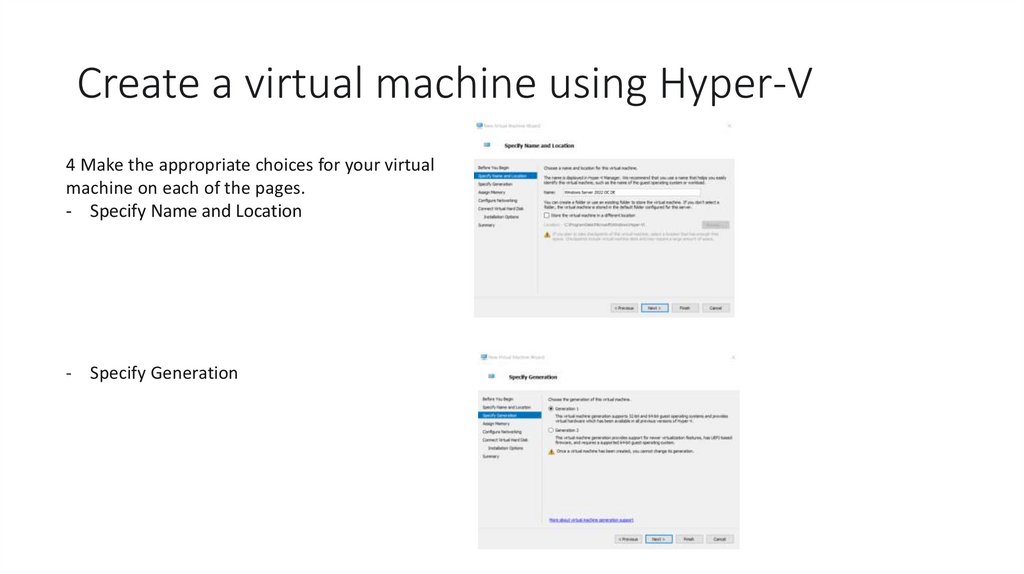
Create a virtual machine using Hyper-V4 Make the appropriate choices for your virtual
machine on each of the pages.
- Specify Name and Location
- Specify Generation
14.
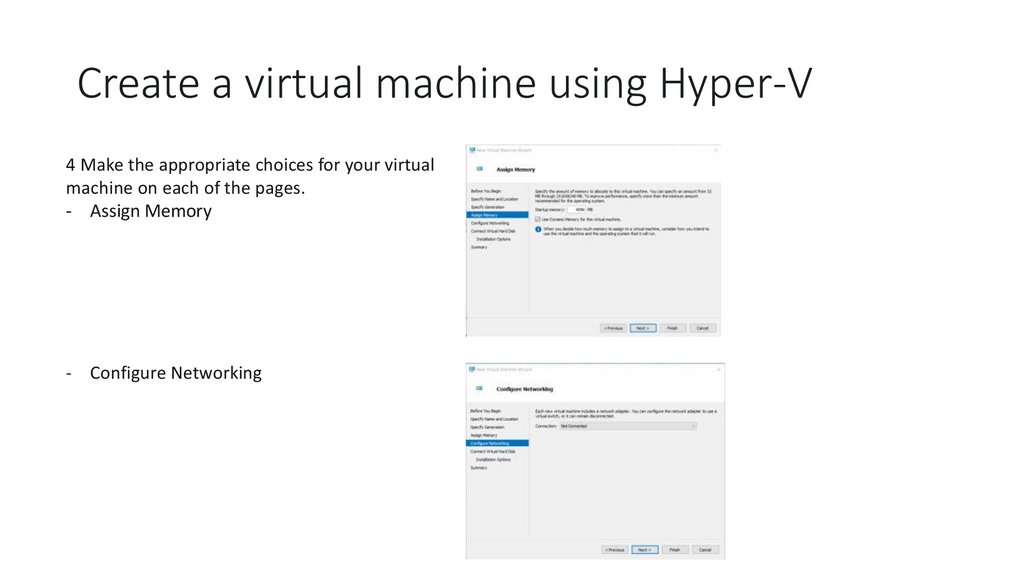
Create a virtual machine using Hyper-V4 Make the appropriate choices for your virtual
machine on each of the pages.
- Assign Memory
- Configure Networking
15.
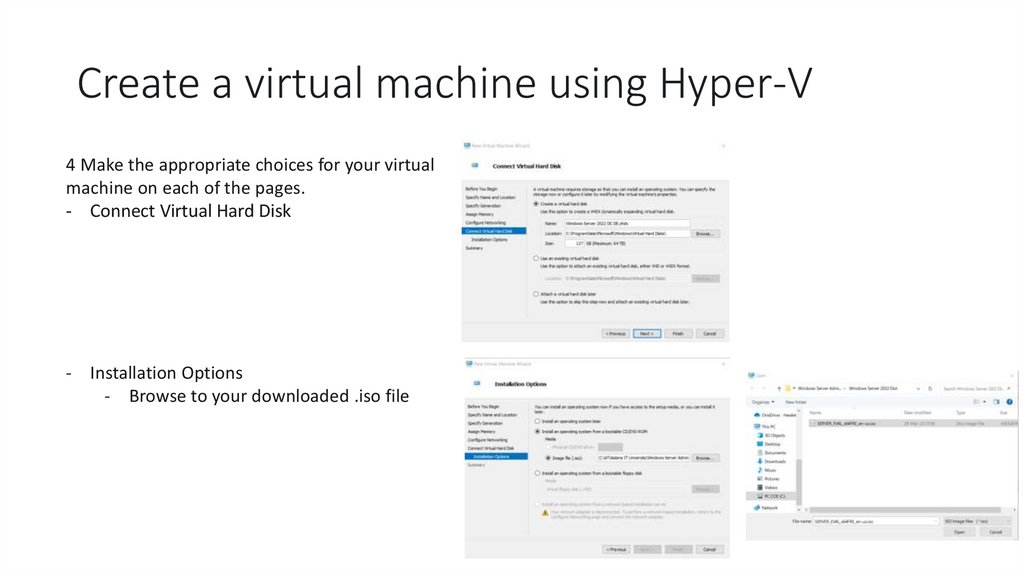
Create a virtual machine using Hyper-V4 Make the appropriate choices for your virtual
machine on each of the pages.
- Connect Virtual Hard Disk
- Installation Options
- Browse to your downloaded .iso file
16.
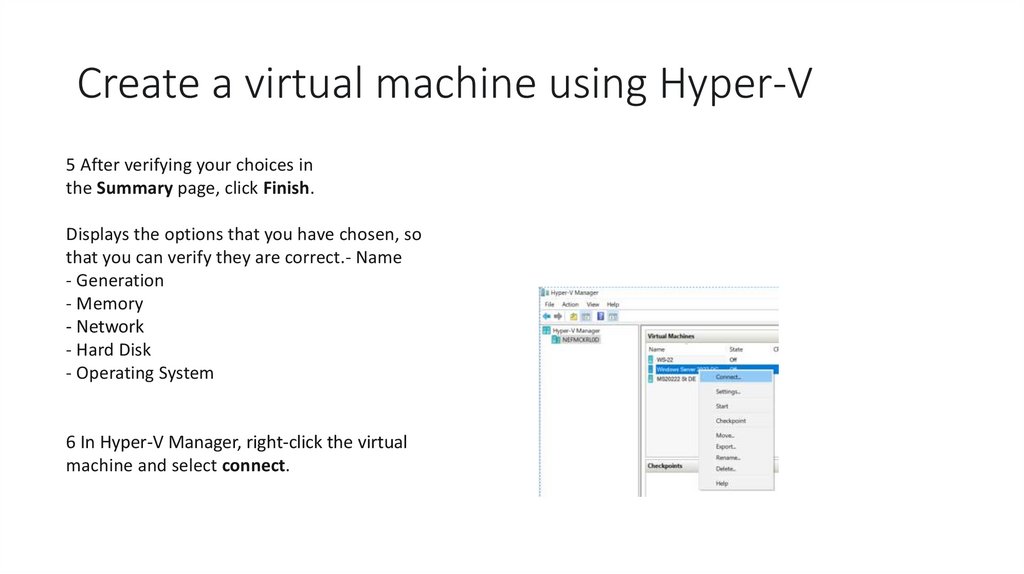
Create a virtual machine using Hyper-V5 After verifying your choices in
the Summary page, click Finish.
Displays the options that you have chosen, so
that you can verify they are correct.- Name
- Generation
- Memory
- Network
- Hard Disk
- Operating System
6 In Hyper-V Manager, right-click the virtual
machine and select connect.
17.
Install Windows Server on a Hyper-V virtualmachine
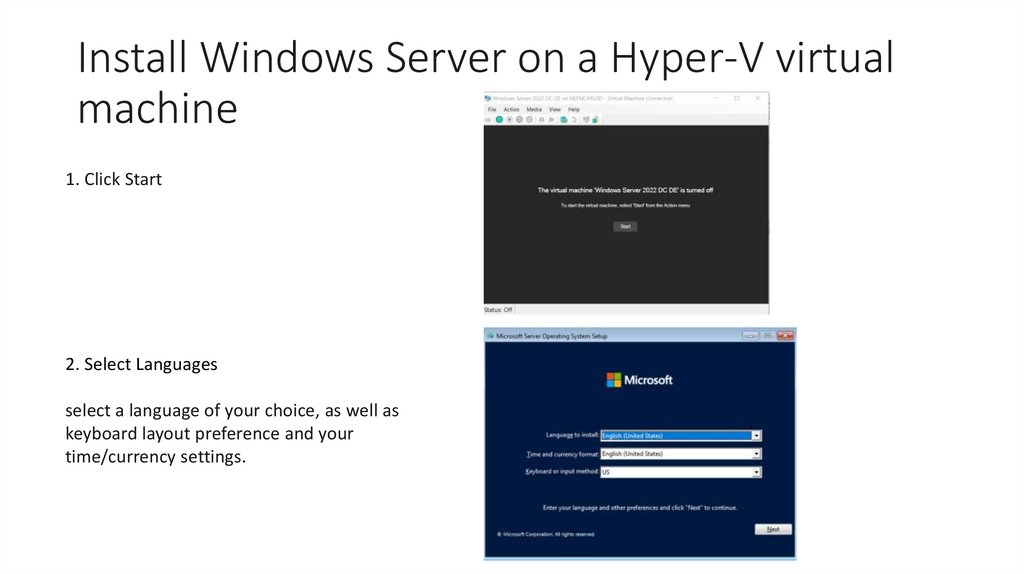
1. Click Start
2. Select Languages
select a language of your choice, as well as
keyboard layout preference and your
time/currency settings.
18.
Install Windows Server on a Hyper-V virtualmachine
3. Click Install Now button
This initiate the installation process for
Windows Server 2022.
4. Select Operating System you want to install
Choose the Windows Server 2022 server option
you want to install
19.
Install Windows Server on a Hyper-V virtualmachine
4. Choose an edition and an installation option:
This ISO evaluation is for the Datacenter and Standard editions. The Datacenter edition is the most complete edition
and includes the new Datacenter-specific features (Shielded Virtual Machines, Storage Spaces Direct, and SoftwareDefined Networking) in addition to unlimited server virtualization.
Choosing Desktop Experience or Server Core installation
Windows Server 2022 offers installation options. However, the selected installation option affects the availability of
roles and features, and therefore, you should consider the options before choosing your desired installation option:
Desktop Experience: This installation option contains everything from Windows Server 2022, so choosing Desktop
Experience means you have installed everything on Windows Server 2022. However, your hardware needs to exceed
the minimum requirements to benefit from the full-featured Graphical User Interface (GUI).
Server Core: This is an installation option recommended by Microsoft due to its minimal hardware resource
consumption and higher security. The roles and features can be installed locally through Windows PowerShell or
remotely through Server Manager.
20.
Install Windows Server on a Hyper-V virtualmachine
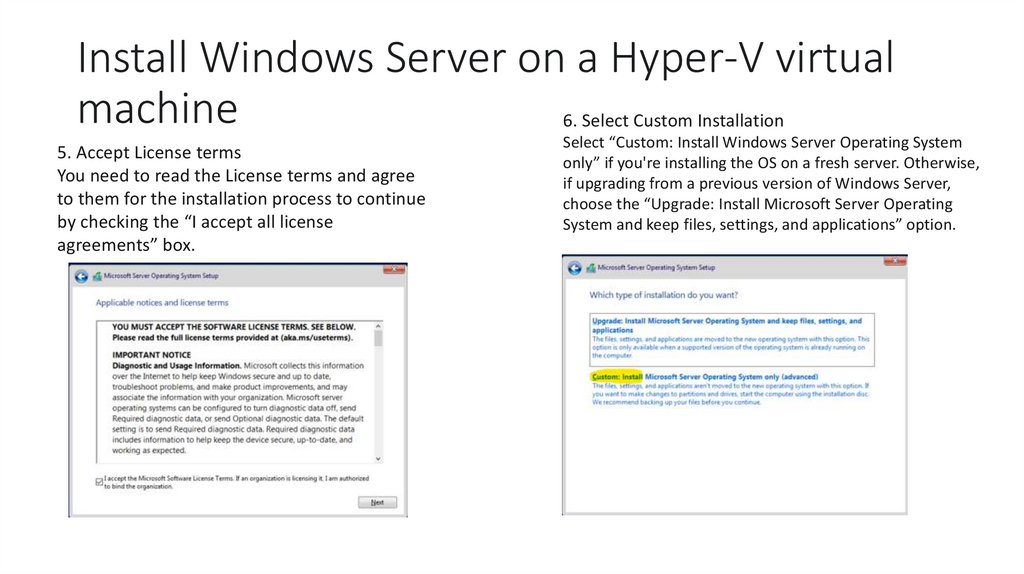
6. Select Custom Installation
5. Accept License terms
You need to read the License terms and agree
to them for the installation process to continue
by checking the “I accept all license
agreements” box.
Select “Custom: Install Windows Server Operating System
only” if you're installing the OS on a fresh server. Otherwise,
if upgrading from a previous version of Windows Server,
choose the “Upgrade: Install Microsoft Server Operating
System and keep files, settings, and applications” option.
21.
Install Windows Server on a Hyper-V virtualmachine
7. Select a partition to install Windows Server
onto. You can optionally create a new partition
or use the entire drive size. When done
selecting the designated OS partition, proceed
by clicking “Next.”
8. The installer will begin installing the
necessary system files. You’ll see when it’s
completed, and the system reboots
automatically.
22.
Install Windows Server on a Hyper-V virtualmachine
9. After a successful installation, the system
should immediately reboot and prompt you for
an administrator password. Enter this
information before re-entering it once again to
verify it, and then continue.
10. Select Display Configuration
11. The login screen will appear when you press
Ctrl + Alt + Del. Enter the password set in the
previous step to continue accessing your server.
23.
Install Windows Server on a Hyper-V virtualmachine
12. You should see the Server Manager launch
11. The login screen will appear when you press
Ctrl + Alt + Del. Enter the password set in the
previous step to continue accessing your server.
by default. You can begin configuring your
server here or explore more options in the
Control Panel accessible in the same way as it is
on regular Windows operating systems.
24.
Install Windows Server on a Hyper-V virtualmachine
13. Check installation settings and operating
system version
Congratulations! You have successfully install
Windows Server 2022
25.
Set up a virtualized environment using OracleVirtualBox
VirtualBox is open-source and cross-platform virtualization software. The Oracle VM Virtualbox allows users
to run multiple virtual machines on a single host operating system. This software is free for personal and
business use. Therefore, users can install it almost on all operating systems such as Linux, Microsoft Windows,
Mac, and Solaris.
26.
Set up a virtualized environment using OracleVirtualBox
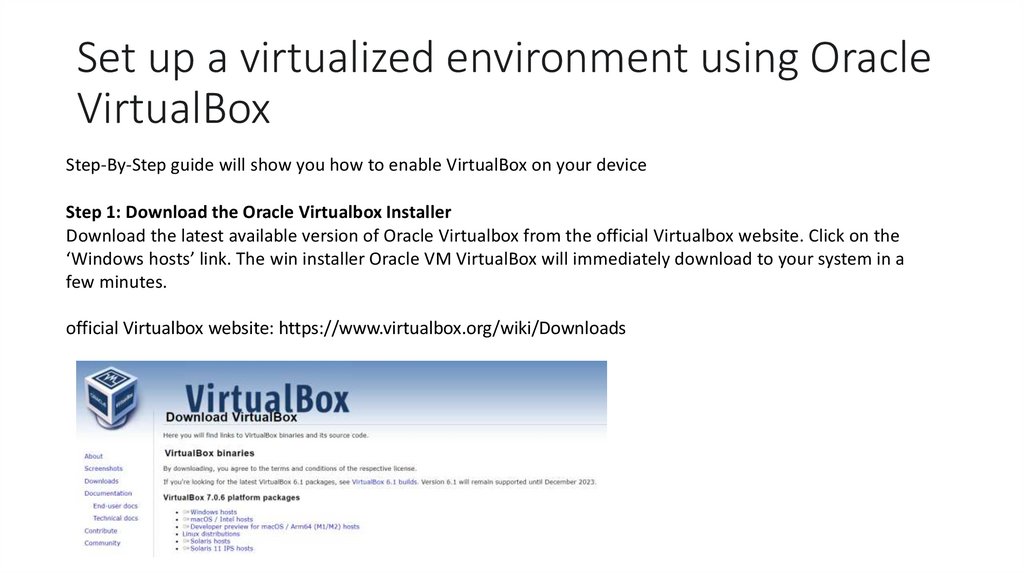
Step-By-Step guide will show you how to enable VirtualBox on your device
Step 1: Download the Oracle Virtualbox Installer
Download the latest available version of Oracle Virtualbox from the official Virtualbox website. Click on the
‘Windows hosts’ link. The win installer Oracle VM VirtualBox will immediately download to your system in a
few minutes.
official Virtualbox website: https://www.virtualbox.org/wiki/Downloads
27.
Set up a virtualized environment using OracleVirtualBox
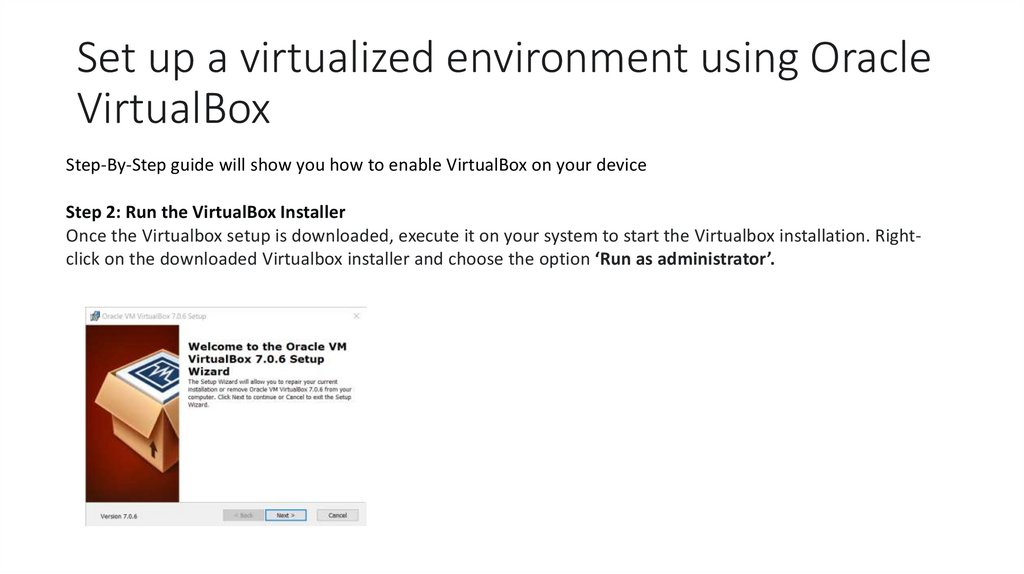
Step-By-Step guide will show you how to enable VirtualBox on your device
Step 2: Run the VirtualBox Installer
Once the Virtualbox setup is downloaded, execute it on your system to start the Virtualbox installation. Rightclick on the downloaded Virtualbox installer and choose the option ‘Run as administrator’.
28.
Set up a virtualized environment using OracleVirtualBox
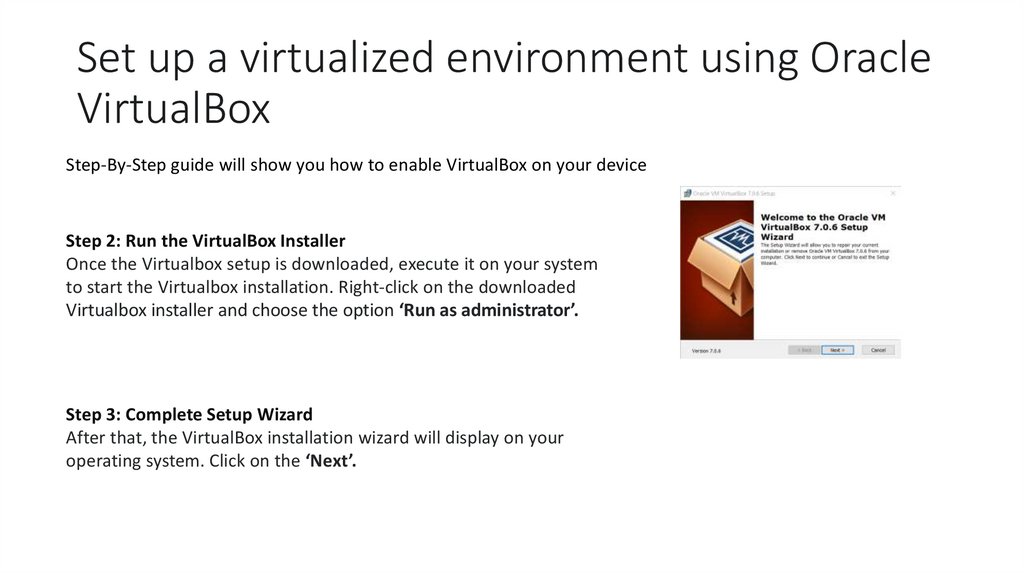
Step-By-Step guide will show you how to enable VirtualBox on your device
Step 2: Run the VirtualBox Installer
Once the Virtualbox setup is downloaded, execute it on your system
to start the Virtualbox installation. Right-click on the downloaded
Virtualbox installer and choose the option ‘Run as administrator’.
Step 3: Complete Setup Wizard
After that, the VirtualBox installation wizard will display on your
operating system. Click on the ‘Next’.
29.
Create a virtual machine using VirtualBoxVirtualBox
1.Open Hyper-V Manager.
2.From the Action pane, click New, and then
click Virtual Machine.
3.From the New Virtual Machine Wizard,
click Next.
4.Make the appropriate choices for your virtual
machine on each of the pages.
5.After verifying your choices in
the Summary page, click Finish.
6.In Hyper-V Manager, right-click the virtual
machine and select connect.
7.In the Virtual Machine Connection window,
select Action > Start.
1 Open Hyper-V Manager
30.
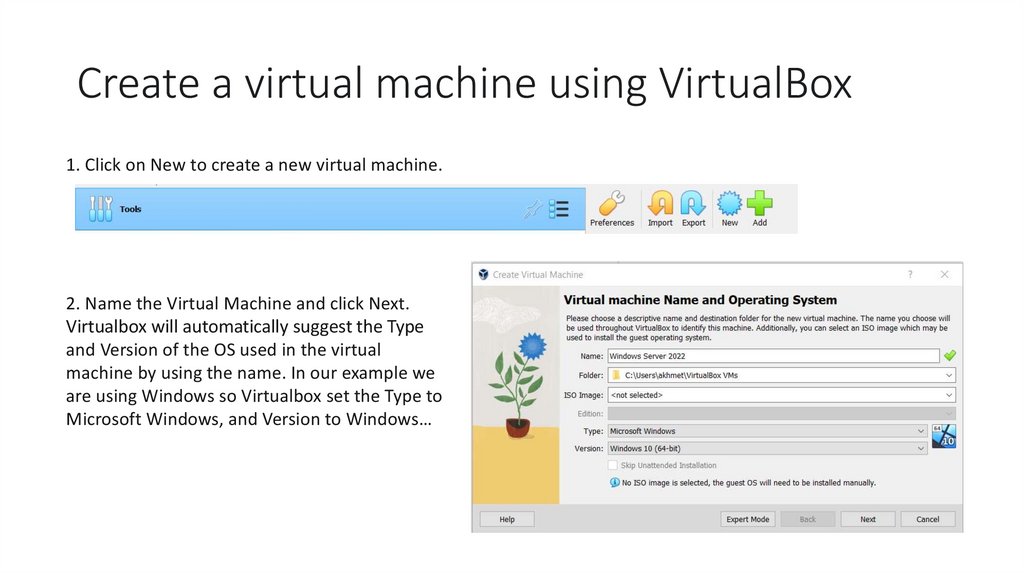
Create a virtual machine using VirtualBox1. Click on New to create a new virtual machine.
2. Name the Virtual Machine and click Next.
Virtualbox will automatically suggest the Type
and Version of the OS used in the virtual
machine by using the name. In our example we
are using Windows so Virtualbox set the Type to
Microsoft Windows, and Version to Windows…
31.
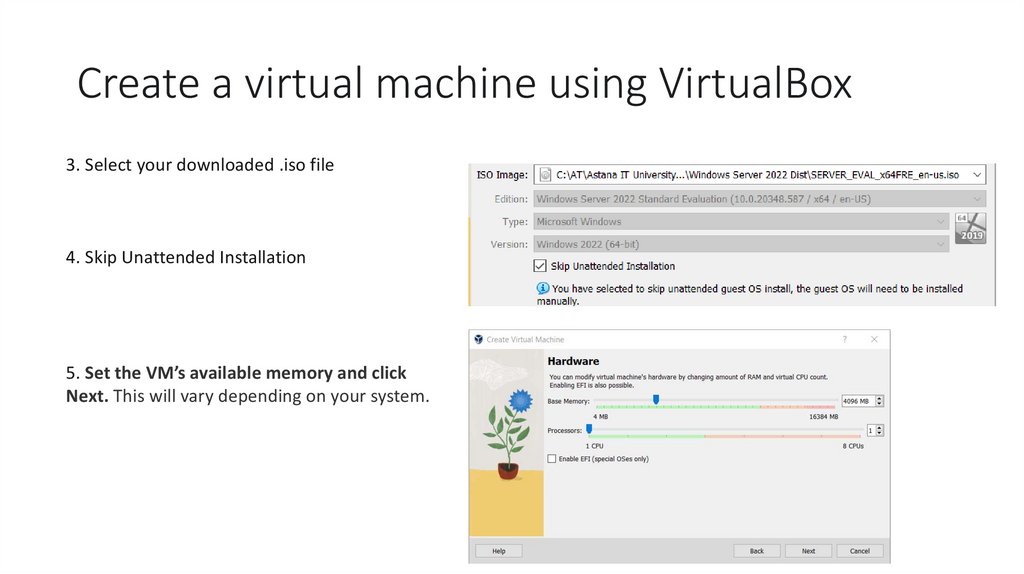
Create a virtual machine using VirtualBox3. Select your downloaded .iso file
4. Skip Unattended Installation
5. Set the VM’s available memory and click
Next. This will vary depending on your system.
32.
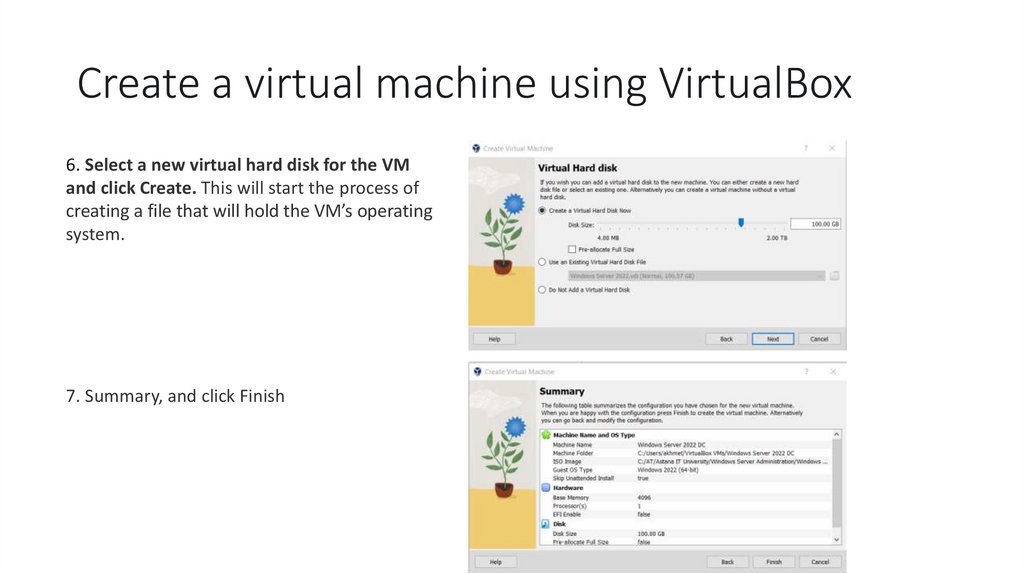
Create a virtual machine using VirtualBox6. Select a new virtual hard disk for the VM
and click Create. This will start the process of
creating a file that will hold the VM’s operating
system.
7. Summary, and click Finish
33.
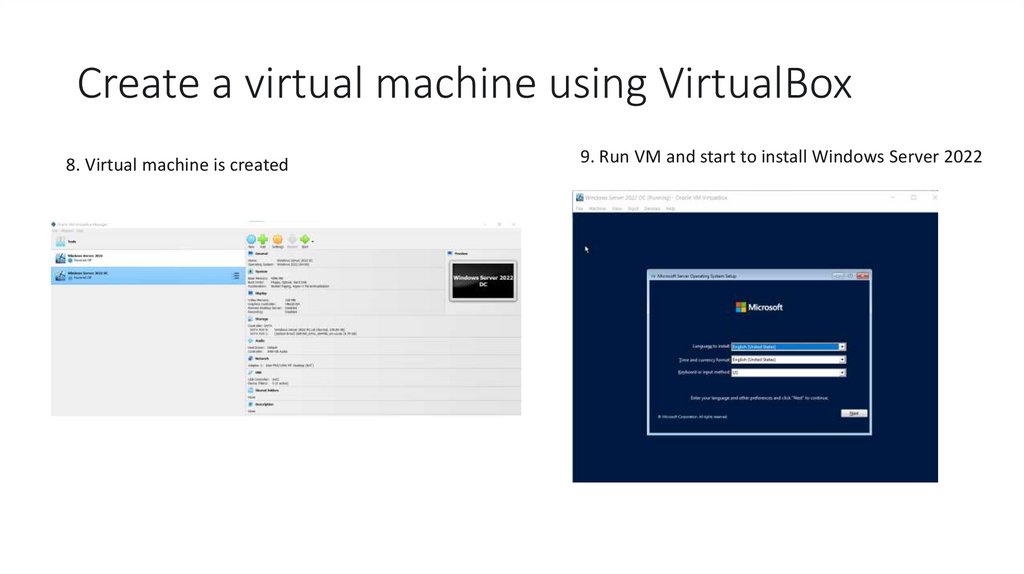
Create a virtual machine using VirtualBox8. Virtual machine is created
9. Run VM and start to install Windows Server 2022
34.
Install Windows Server on a VirtualBox virtualmachine
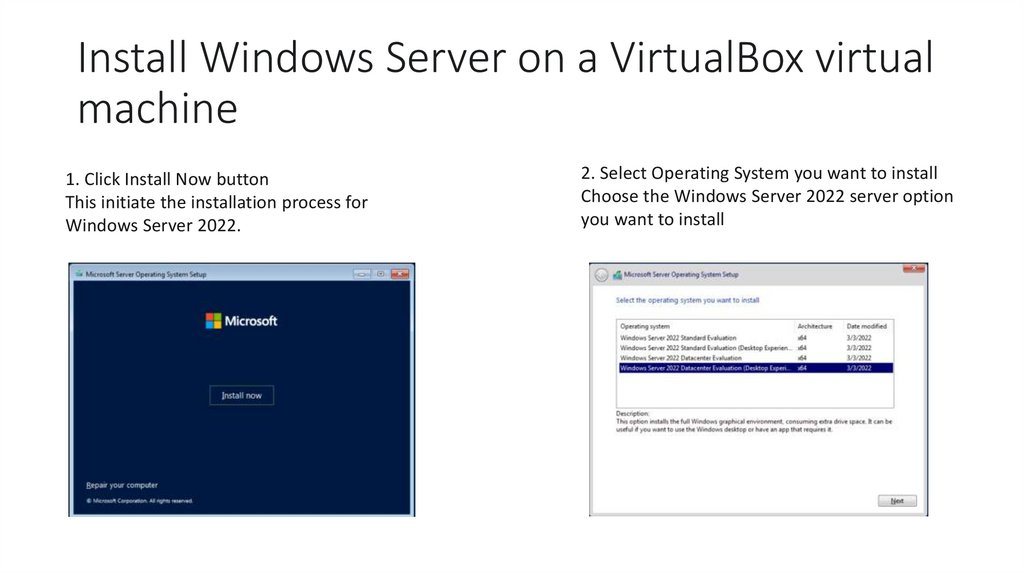
1. Click Install Now button
This initiate the installation process for
Windows Server 2022.
2. Select Operating System you want to install
Choose the Windows Server 2022 server option
you want to install
35.
Install Windows Server on a VirtualBox virtualmachine
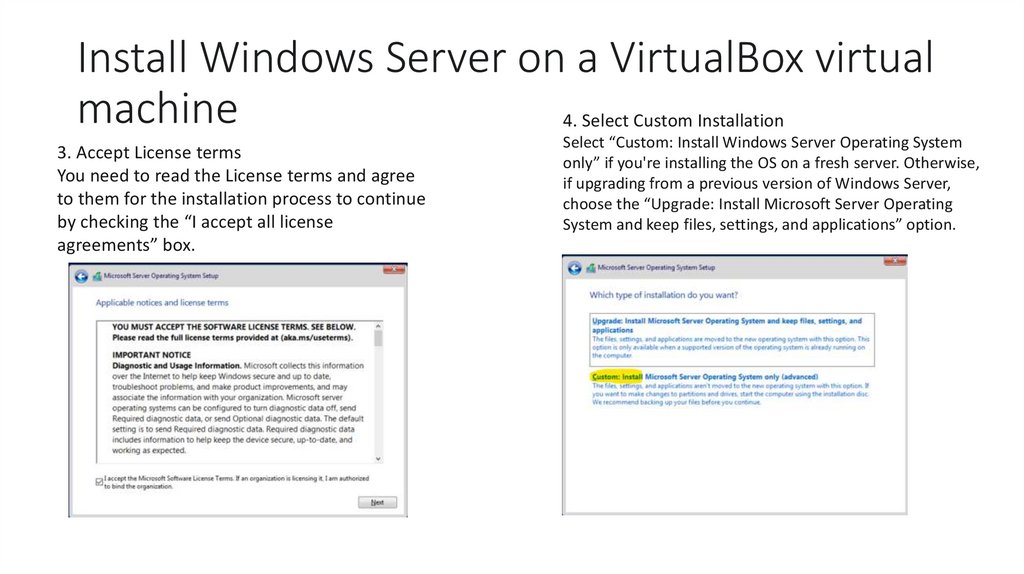
4. Select Custom Installation
3. Accept License terms
You need to read the License terms and agree
to them for the installation process to continue
by checking the “I accept all license
agreements” box.
Select “Custom: Install Windows Server Operating System
only” if you're installing the OS on a fresh server. Otherwise,
if upgrading from a previous version of Windows Server,
choose the “Upgrade: Install Microsoft Server Operating
System and keep files, settings, and applications” option.
36.
Install Windows Server on a VirtualBox virtualmachine
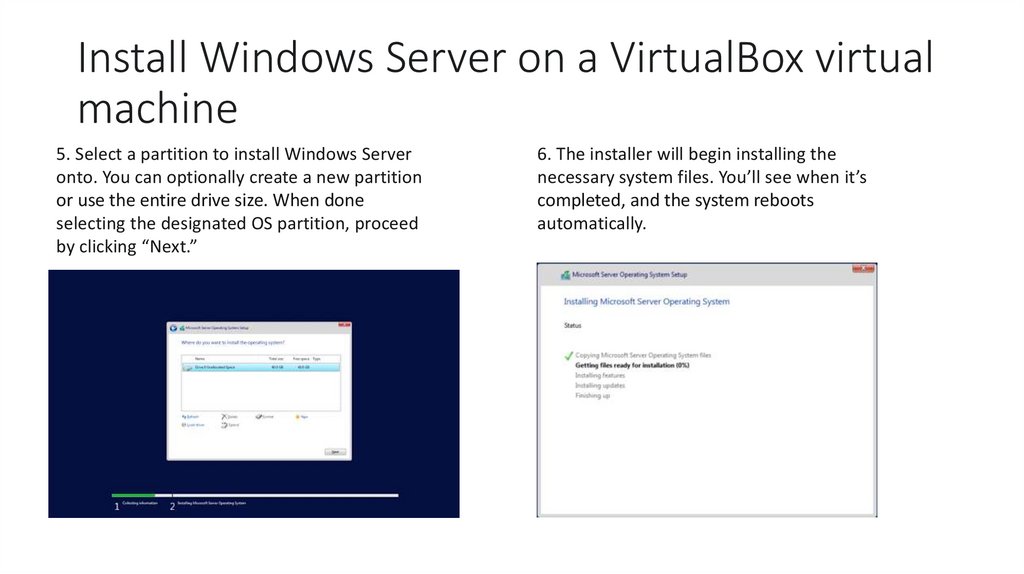
5. Select a partition to install Windows Server
onto. You can optionally create a new partition
or use the entire drive size. When done
selecting the designated OS partition, proceed
by clicking “Next.”
6. The installer will begin installing the
necessary system files. You’ll see when it’s
completed, and the system reboots
automatically.
37.
Install Windows Server on a VirtualBox virtualmachine
7. After a successful installation, the system
should immediately reboot and prompt you for
an administrator password. Enter this
information before re-entering it once again to
verify it, and then continue.
8. Select Display Configuration
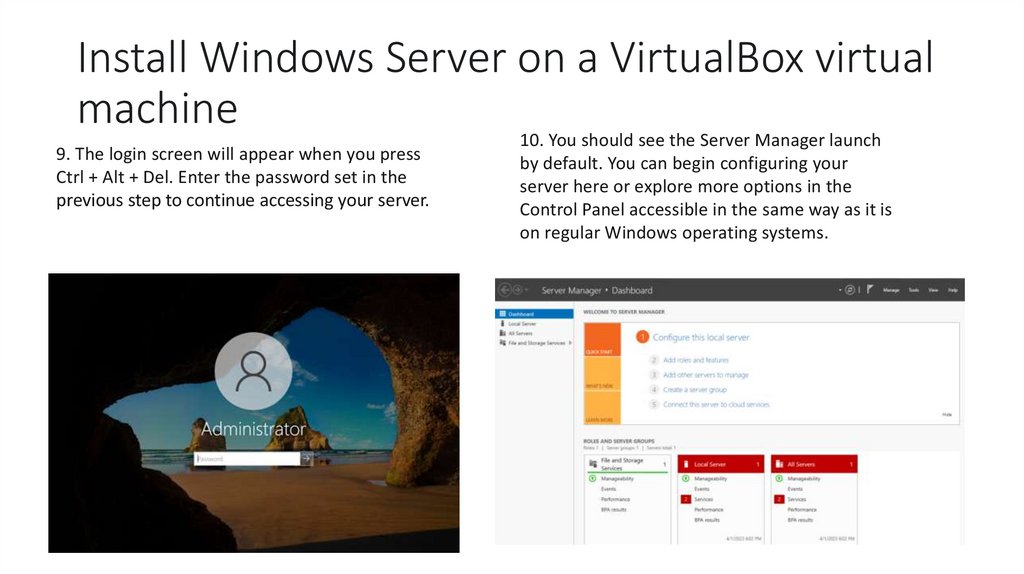
11. The login screen will appear when you press
Ctrl + Alt + Del. Enter the password set in the
previous step to continue accessing your server.
38.
Install Windows Server on a VirtualBox virtualmachine
10. You should see the Server Manager launch
9. The login screen will appear when you press
Ctrl + Alt + Del. Enter the password set in the
previous step to continue accessing your server.
by default. You can begin configuring your
server here or explore more options in the
Control Panel accessible in the same way as it is
on regular Windows operating systems.
39.
Install Windows Server on a VirtualBox virtualmachine
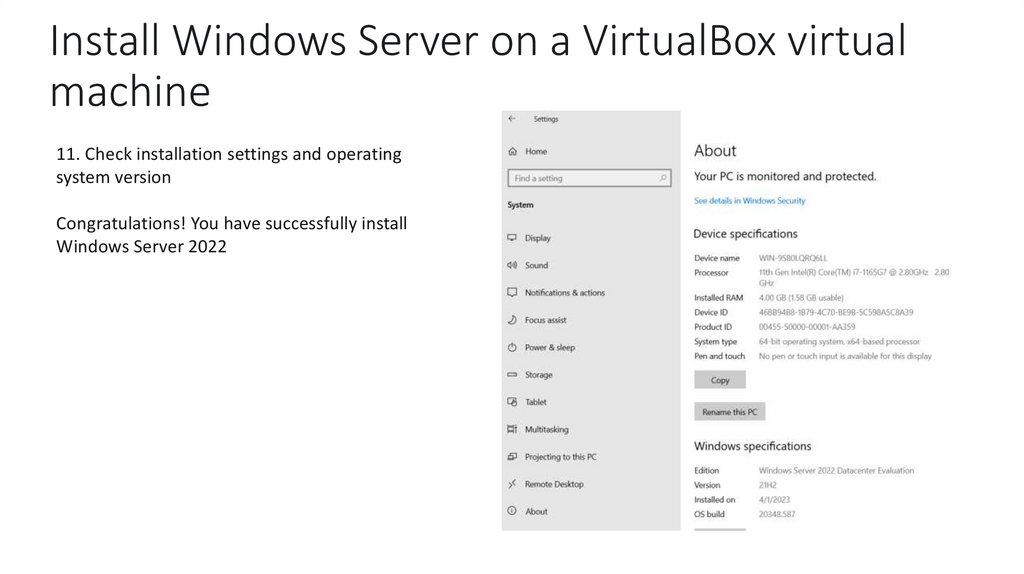
11. Check installation settings and operating
system version
Congratulations! You have successfully install
Windows Server 2022
40.
Practice-1 exercisePerforming an initial Windows Server configuration
This exercises will teach you how to perform Windows Server initial configuration using Server Manager, as well as
Windows Server initial configuration using Server Configuration.
41.
Performing Windows Server initial configurationusing Server Manager
This exercise explains the initial configuration of Windows Server 2022 Standard (Desktop Experience) using Server
Manager.
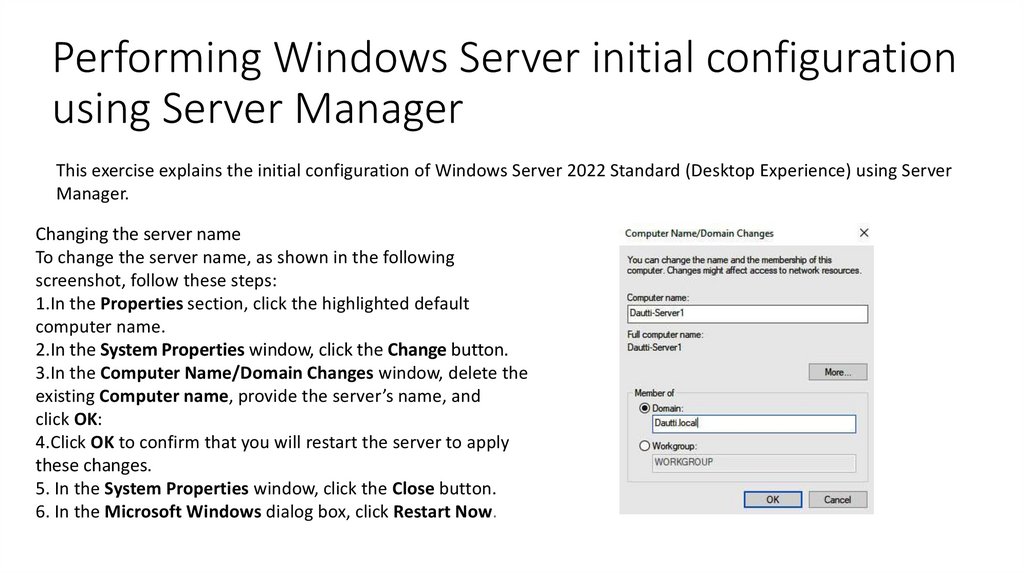
Changing the server name
To change the server name, as shown in the following
screenshot, follow these steps:
1.In the Properties section, click the highlighted default
computer name.
2.In the System Properties window, click the Change button.
3.In the Computer Name/Domain Changes window, delete the
existing Computer name, provide the server’s name, and
click OK:
4.Click OK to confirm that you will restart the server to apply
these changes.
5. In the System Properties window, click the Close button.
6. In the Microsoft Windows dialog box, click Restart Now.
42.
Performing Windows Server initial configurationusing Server Manager
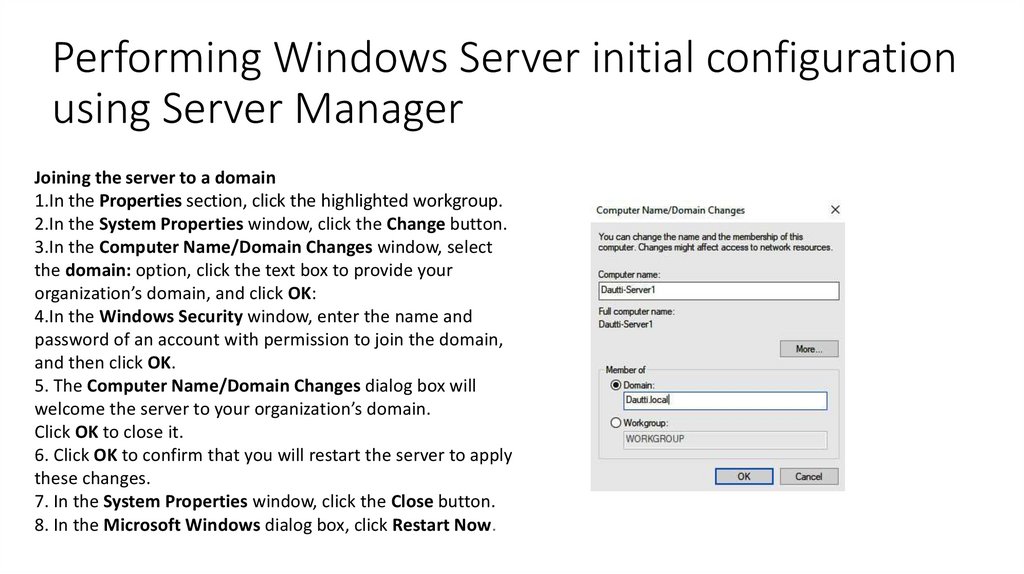
Joining the server to a domain
1.In the Properties section, click the highlighted workgroup.
2.In the System Properties window, click the Change button.
3.In the Computer Name/Domain Changes window, select
the domain: option, click the text box to provide your
organization’s domain, and click OK:
4.In the Windows Security window, enter the name and
password of an account with permission to join the domain,
and then click OK.
5. The Computer Name/Domain Changes dialog box will
welcome the server to your organization’s domain.
Click OK to close it.
6. Click OK to confirm that you will restart the server to apply
these changes.
7. In the System Properties window, click the Close button.
8. In the Microsoft Windows dialog box, click Restart Now.
43.
Performing Windows Server initial configurationusing Server Manager
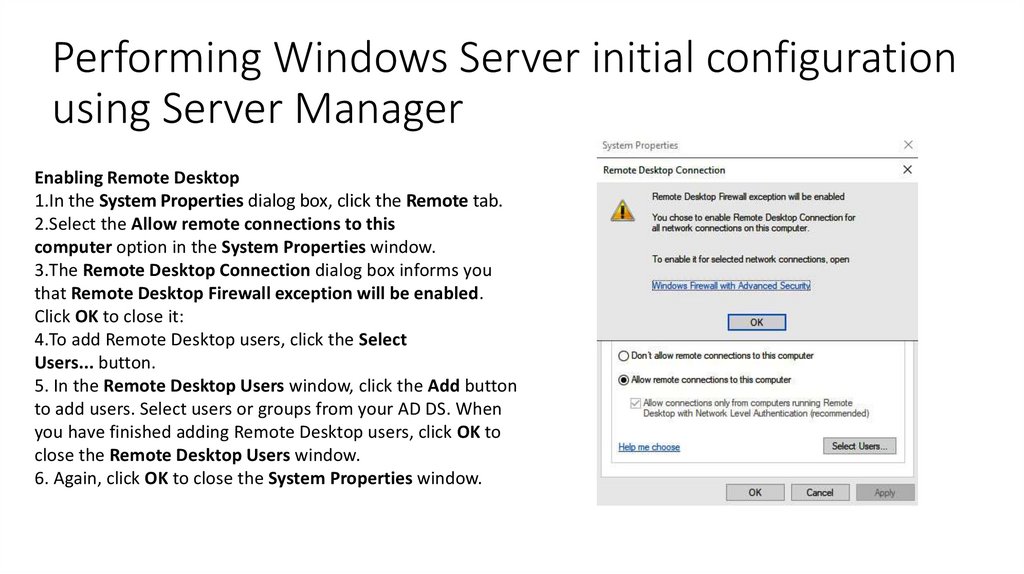
Enabling Remote Desktop
1.In the System Properties dialog box, click the Remote tab.
2.Select the Allow remote connections to this
computer option in the System Properties window.
3.The Remote Desktop Connection dialog box informs you
that Remote Desktop Firewall exception will be enabled.
Click OK to close it:
4.To add Remote Desktop users, click the Select
Users... button.
5. In the Remote Desktop Users window, click the Add button
to add users. Select users or groups from your AD DS. When
you have finished adding Remote Desktop users, click OK to
close the Remote Desktop Users window.
6. Again, click OK to close the System Properties window.
44.
Performing Windows Server initial configurationusing Server Manager
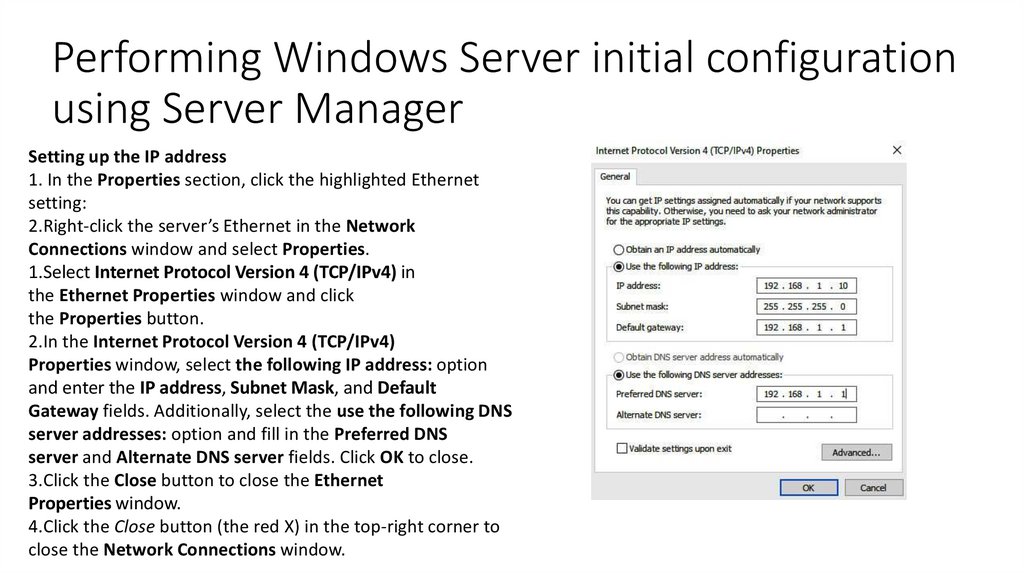
Setting up the IP address
1. In the Properties section, click the highlighted Ethernet
setting:
2.Right-click the server’s Ethernet in the Network
Connections window and select Properties.
1.Select Internet Protocol Version 4 (TCP/IPv4) in
the Ethernet Properties window and click
the Properties button.
2.In the Internet Protocol Version 4 (TCP/IPv4)
Properties window, select the following IP address: option
and enter the IP address, Subnet Mask, and Default
Gateway fields. Additionally, select the use the following DNS
server addresses: option and fill in the Preferred DNS
server and Alternate DNS server fields. Click OK to close.
3.Click the Close button to close the Ethernet
Properties window.
4.Click the Close button (the red X) in the top-right corner to
close the Network Connections window.
45.
Performing Windows Server initial configurationusing Server Manager
Checking for updates
1.In the Properties section, click the highlighted Last checked
for updates setting.
2.In the Settings window on the right-hand side of
the Windows Update section, the available updates are listed
(if any). If any updates are ready to be installed, click
the Install now button:
3.Installing updates may take some time! In addition,
when the installation is done, you will often be asked to
restart the server for the updates to occur.
46.
Performing Windows Server initial configurationusing Server Manager
Turning off IE enhanced security
1.In the Properties section, click the highlighted IE enhanced
security configuration setting.
2.Select the Off option in the Internet Explorer Enhanced
Security Configuration window within the Administrators:
section.
3.Click OK to close the Internet Explorer Enhanced Security
Configuration window:
47.
Performing Windows Server initial configurationusing Server Manager
Changing the time zone
1.In the Properties section, click the highlighted time zone
setting.
2.Click the Change time zone... button in the Date and
Time window.
3.Click the drop-down list in the Time Zone Settings window
to select your time zone.
4.Click OK to close the Time Zone Settings window.
5.Again, click OK to close the Date and Time window:
48.
Performing Windows Server initial configurationusing Server Manager
Changing the time zone
1.In the Properties section, click the highlighted time zone
setting.
2.Click the Change time zone... button in the Date and
Time window.
3.Click the drop-down list in the Time Zone Settings window
to select your time zone.
4.Click OK to close the Time Zone Settings window.
5.Again, click OK to close the Date and Time window: