

 Английский язык
Похожие презентации:


")
")

Danalock
1.
www.saltosystems.comSmarten up your Home
SALTO Systems HQ, Spain
Polígono Lanbarren - C/ Arkotz, 9
20180 Oiartzun, Spain
T: +34 943 344 550
www.saltosystems.com
1
2.
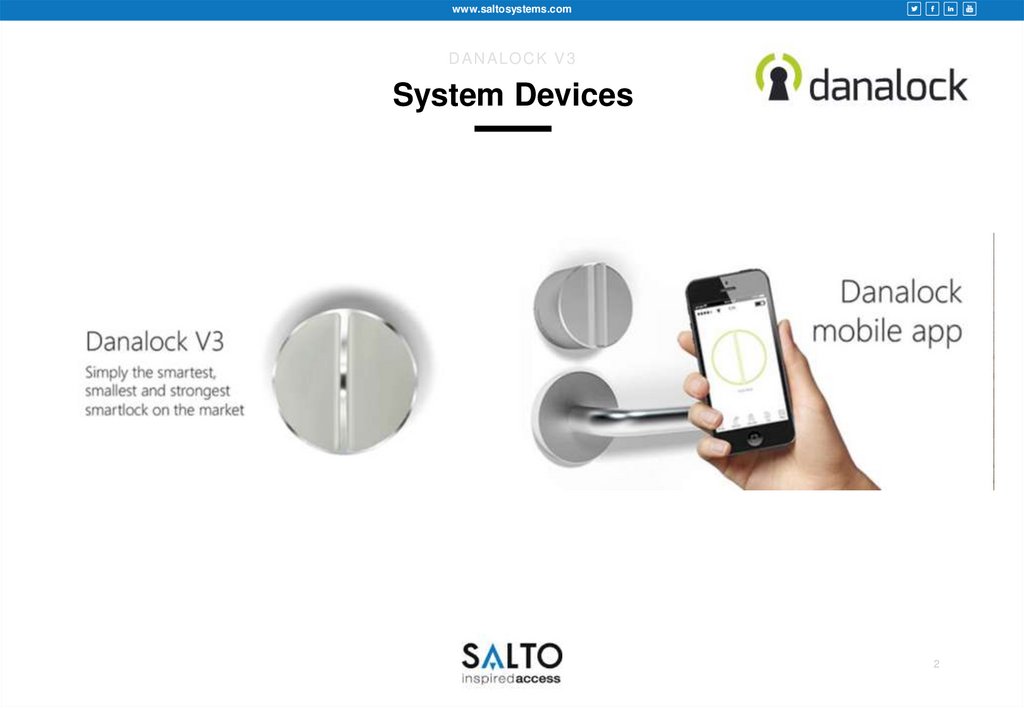
www.saltosystems.comDA NA L O CK V 3
System Devices
2
3.
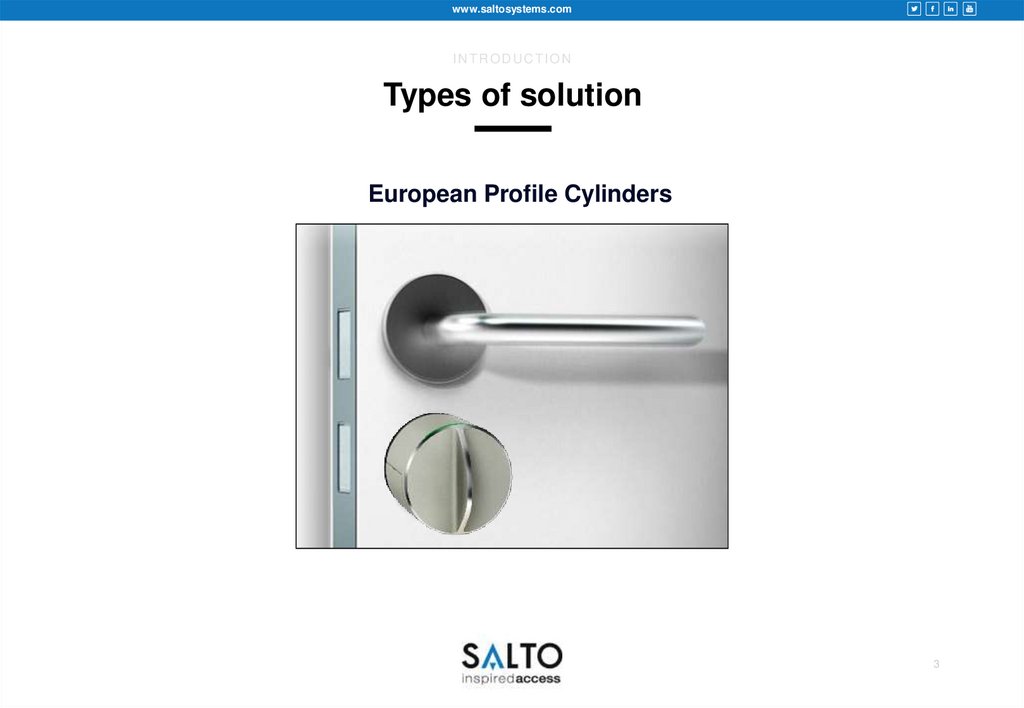
www.saltosystems.comINTRODUCTION
Types of solution
European Profile Cylinders
3
4.
www.saltosystems.comINTRODUCTION
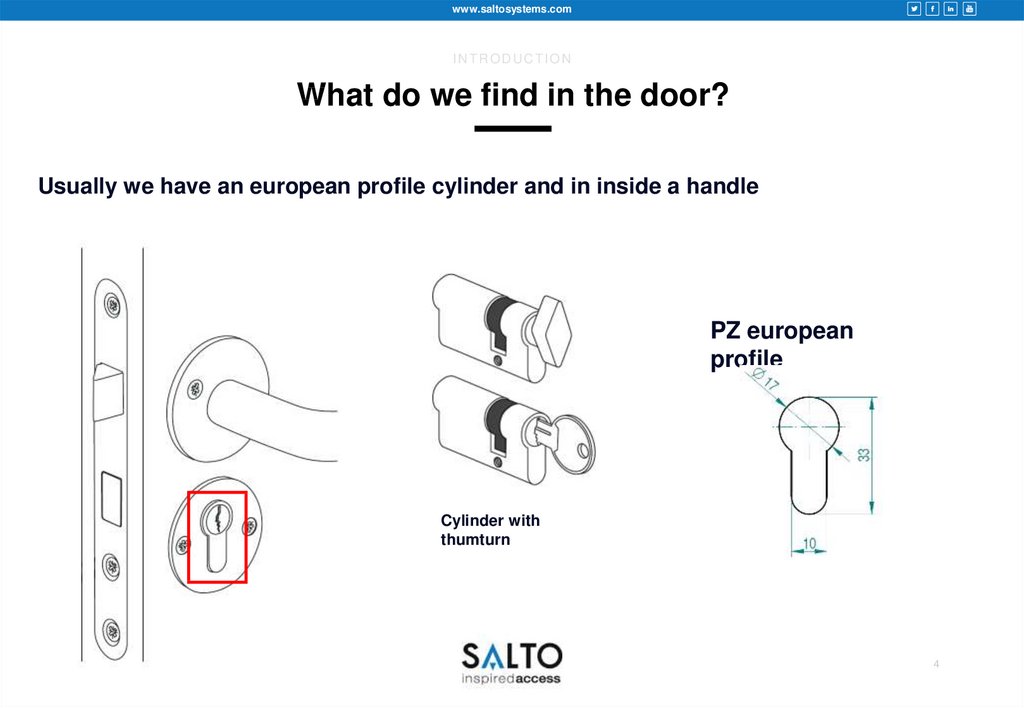
What do we find in the door?
Usually we have an european profile cylinder and in inside a handle
PZ european
profile
Cylinder with
thumturn
4
5.
www.saltosystems.comINTRODUCTION
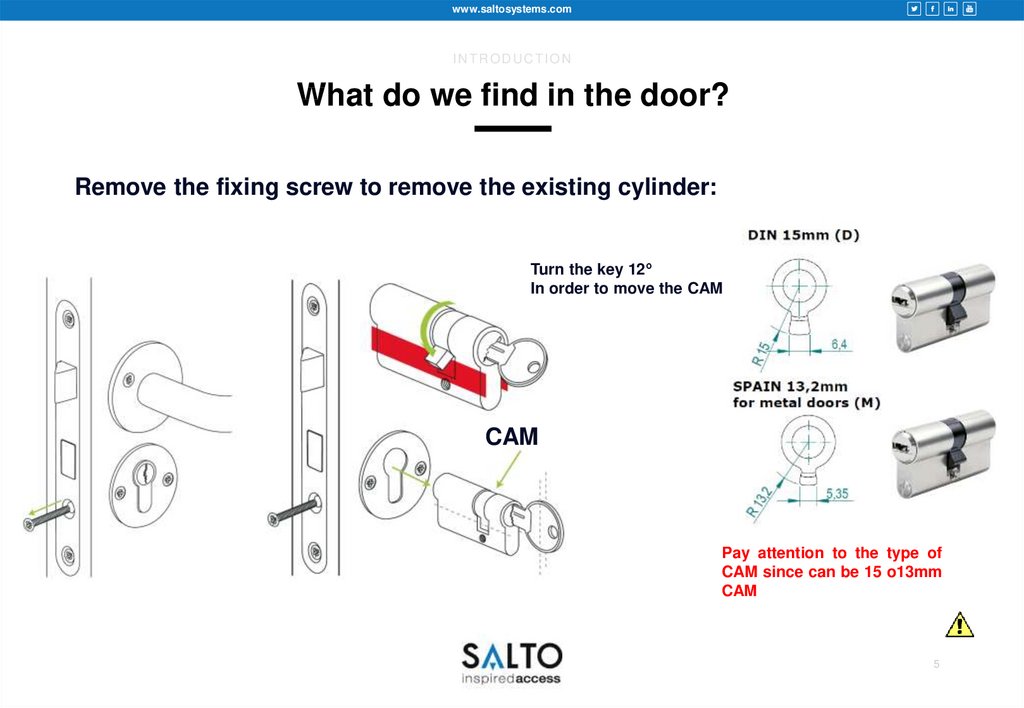
What do we find in the door?
Remove the fixing screw to remove the existing cylinder:
Turn the key 12º
In order to move the CAM
CAM
Pay attention to the type of
CAM since can be 15 o13mm
CAM
5
6.
www.saltosystems.comINTRODUCTION
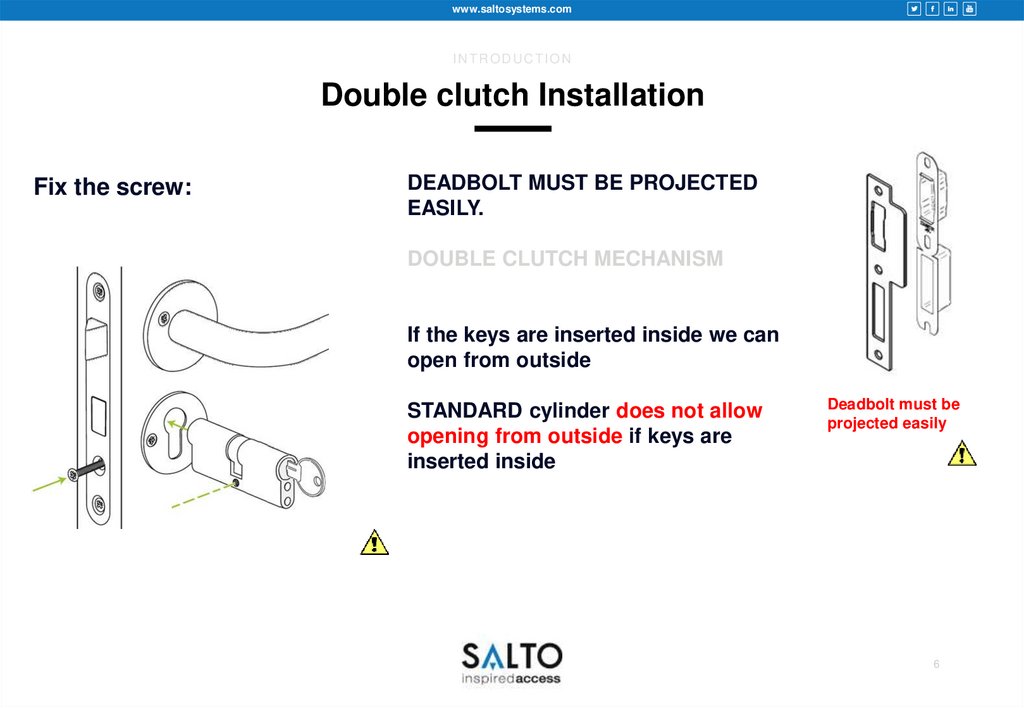
Double clutch Installation
Fix the screw:
DEADBOLT MUST BE PROJECTED
EASILY.
DOUBLE CLUTCH MECHANISM
If the keys are inserted inside we can
open from outside
STANDARD cylinder does not allow
opening from outside if keys are
inserted inside
Deadbolt must be
projected easily
6
7.
www.saltosystems.comINTRODUCTION
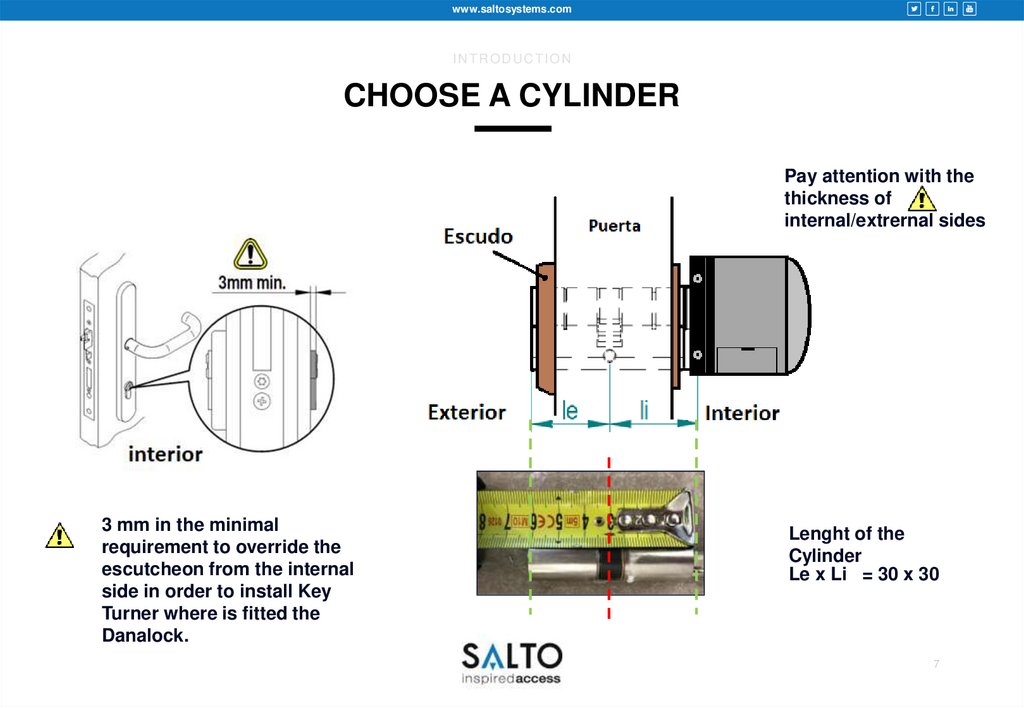
CHOOSE A CYLINDER
Pay attention with the
thickness of
internal/extrernal sides
3 mm in the minimal
requirement to override the
escutcheon from the internal
side in order to install Key
Turner where is fitted the
Danalock.
Lenght of the
Cylinder
Le x Li = 30 x 30
7
8.
www.saltosystems.comINTRODUCTION
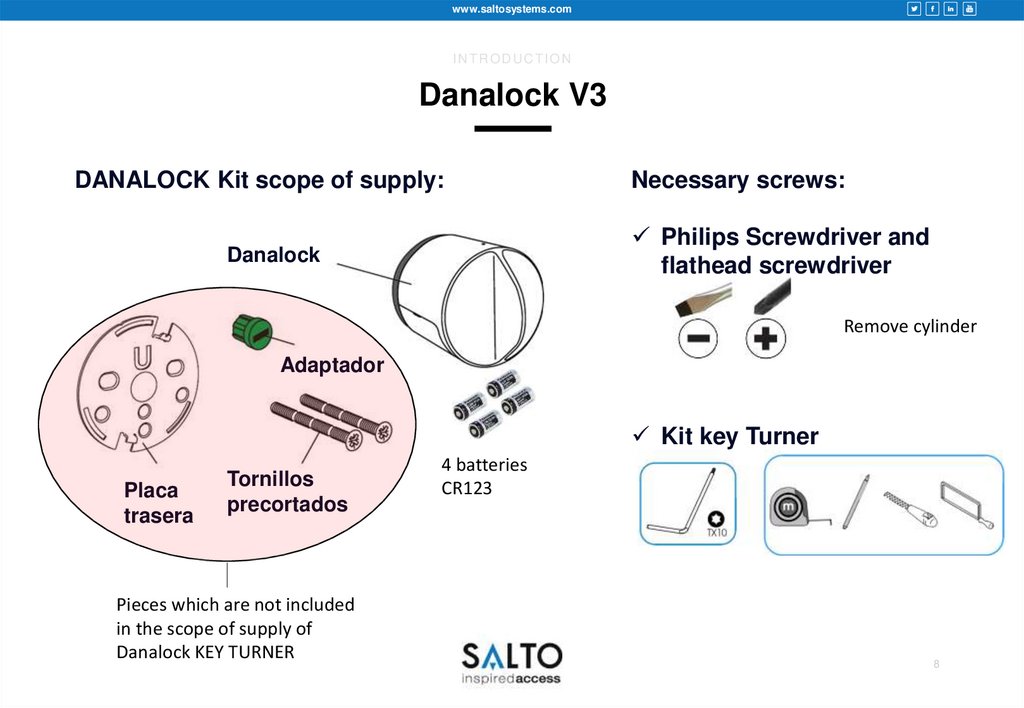
Danalock V3
DANALOCK Kit scope of supply:
Necessary screws:
Philips Screwdriver and
flathead screwdriver
Danalock
Remove cylinder
Adaptador
Kit key Turner
Placa
trasera
Tornillos
precortados
Pieces which are not included
in the scope of supply of
Danalock KEY TURNER
4 batteries
CR123
8
9.
www.saltosystems.comINTRODUCTION
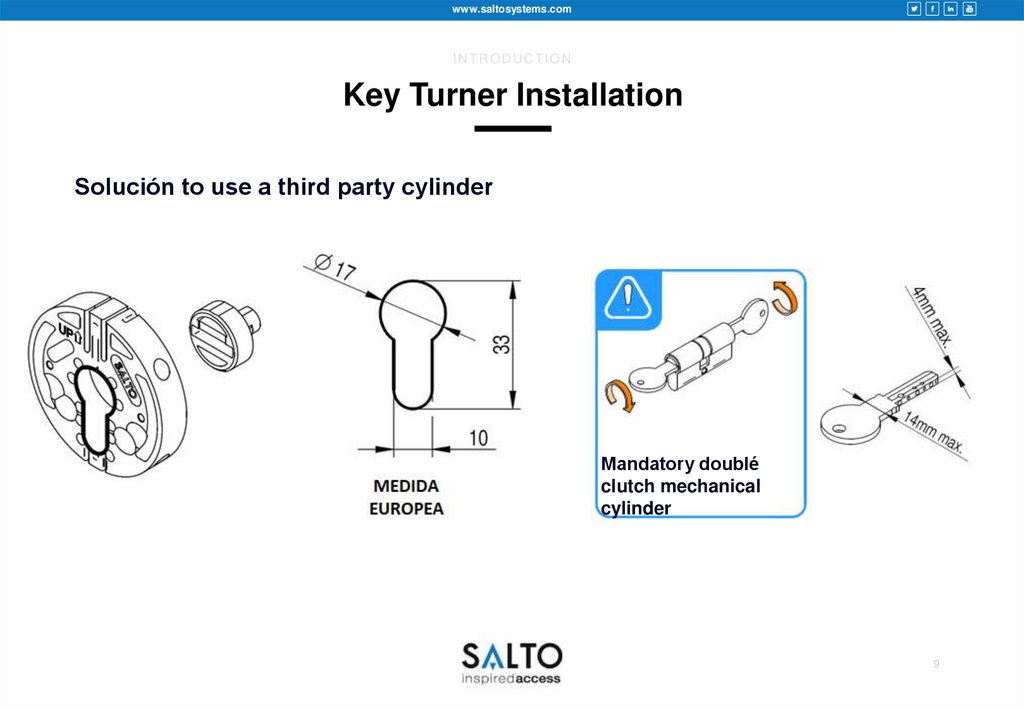
Key Turner Installation
Solución to use a third party cylinder
Mandatory doublé
clutch mechanical
cylinder
9
10.
www.saltosystems.comINTRODUCTION
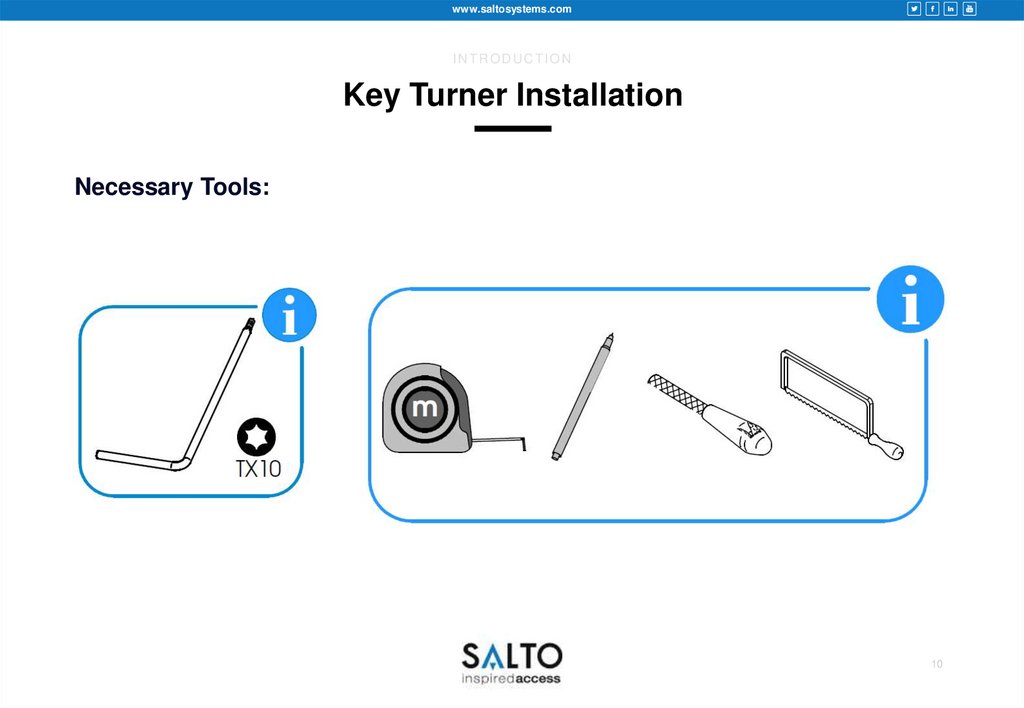
Key Turner Installation
Necessary Tools:
10
11.
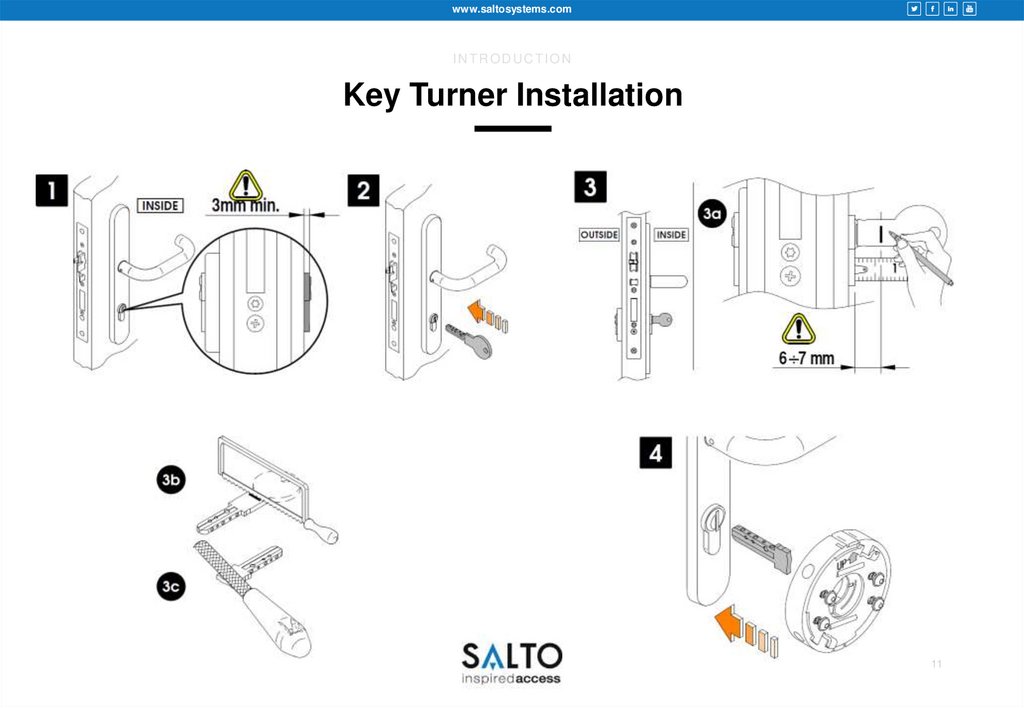
www.saltosystems.comINTRODUCTION
Key Turner Installation
11
12.
www.saltosystems.comINTRODUCTION
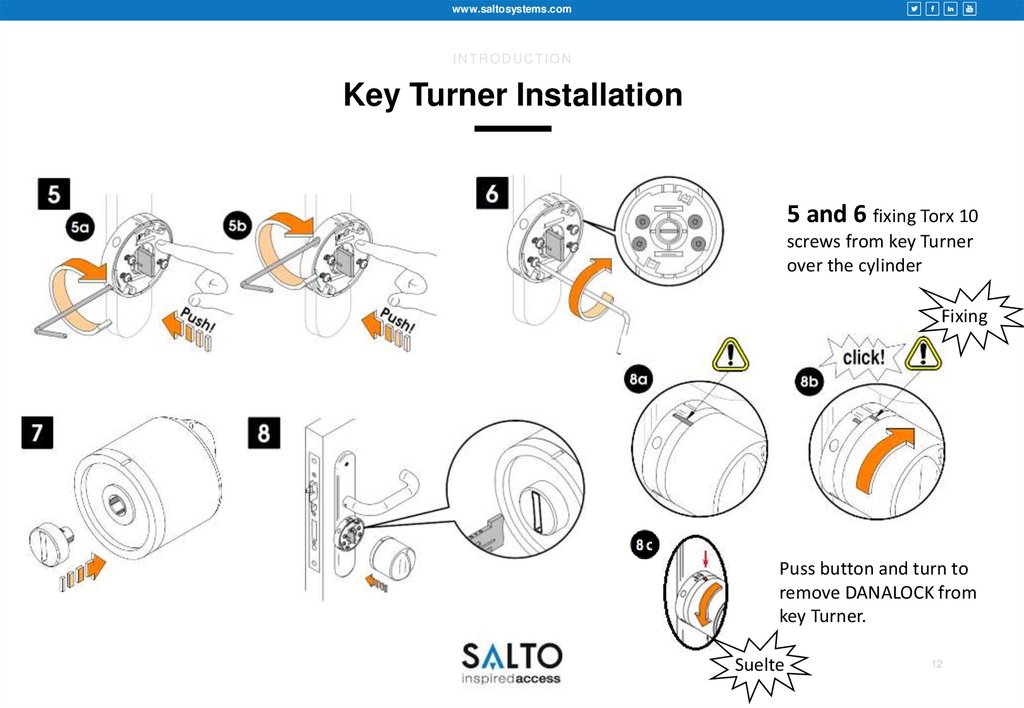
Key Turner Installation
5 and 6 fixing Torx 10
screws from key Turner
over the cylinder
Fixing
Puss button and turn to
remove DANALOCK from
key Turner.
Suelte
12
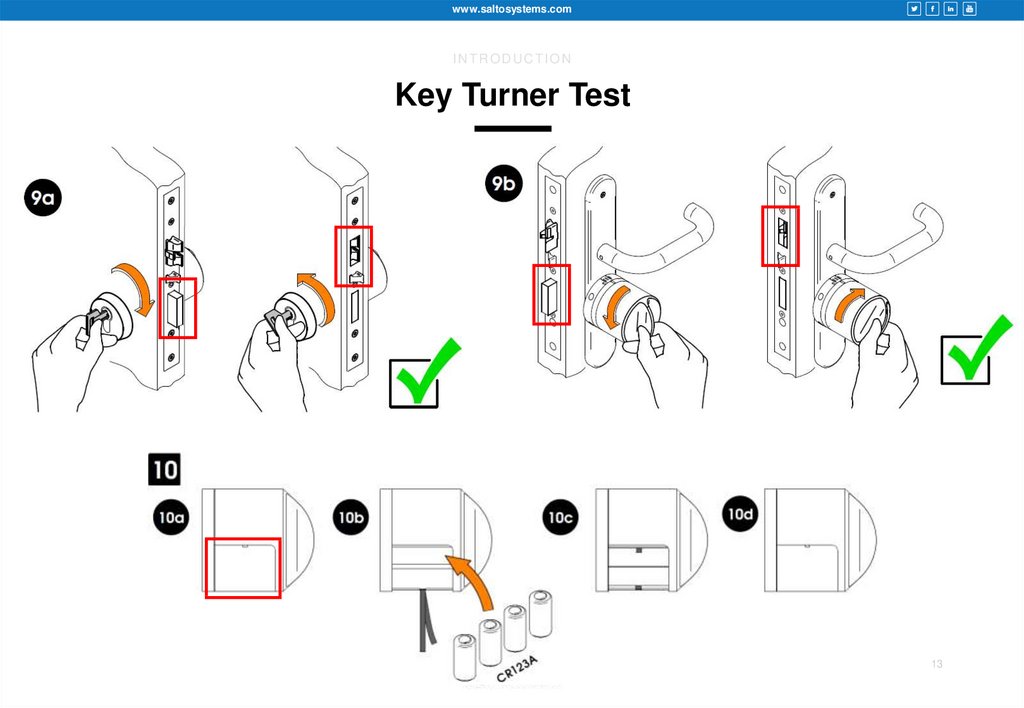
13.
www.saltosystems.comINTRODUCTION
Key Turner Test
13
14.
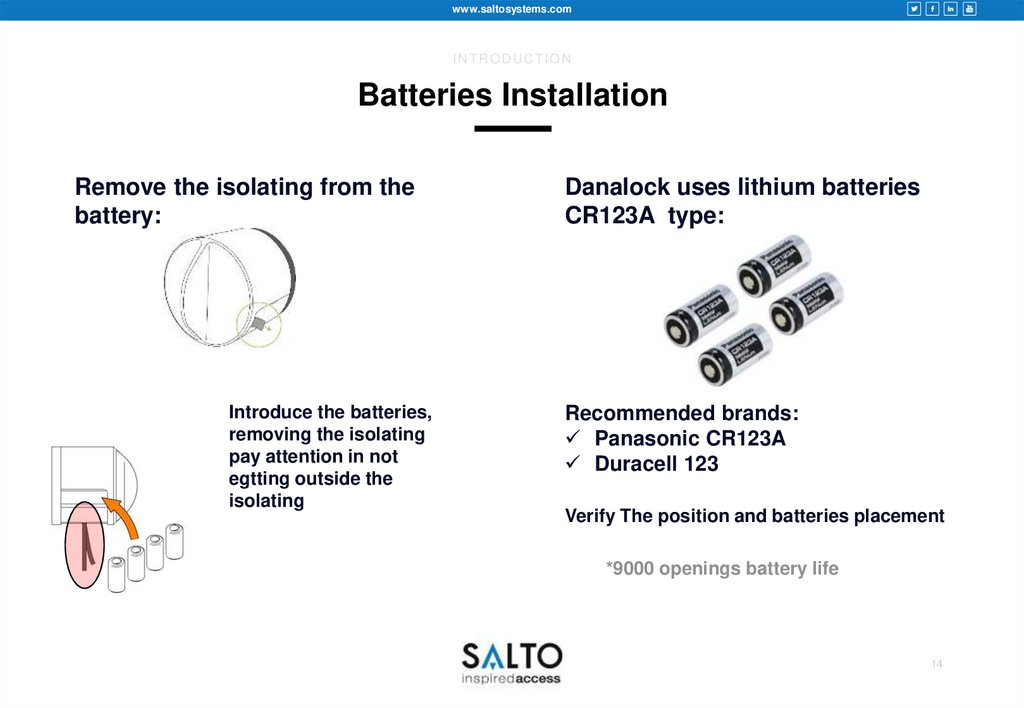
www.saltosystems.comINTRODUCTION
Batteries Installation
Remove the isolating from the
battery:
Introduce the batteries,
removing the isolating
pay attention in not
egtting outside the
isolating
Danalock uses lithium batteries
CR123A type:
Recommended brands:
Panasonic CR123A
Duracell 123
Verify The position and batteries placement
*9000 openings battery life
14
15.
www.saltosystems.comINTRODUCTION
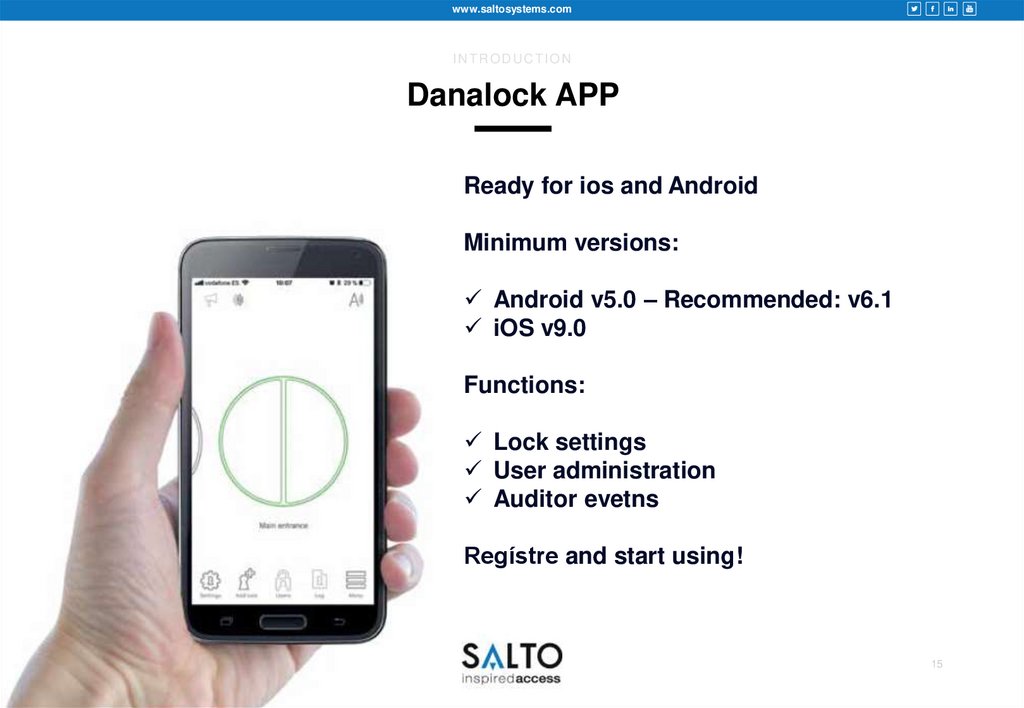
Danalock APP
Ready for ios and Android
Minimum versions:
Android v5.0 – Recommended: v6.1
iOS v9.0
Functions:
Lock settings
User administration
Auditor evetns
Regístre and start using!
15
16.
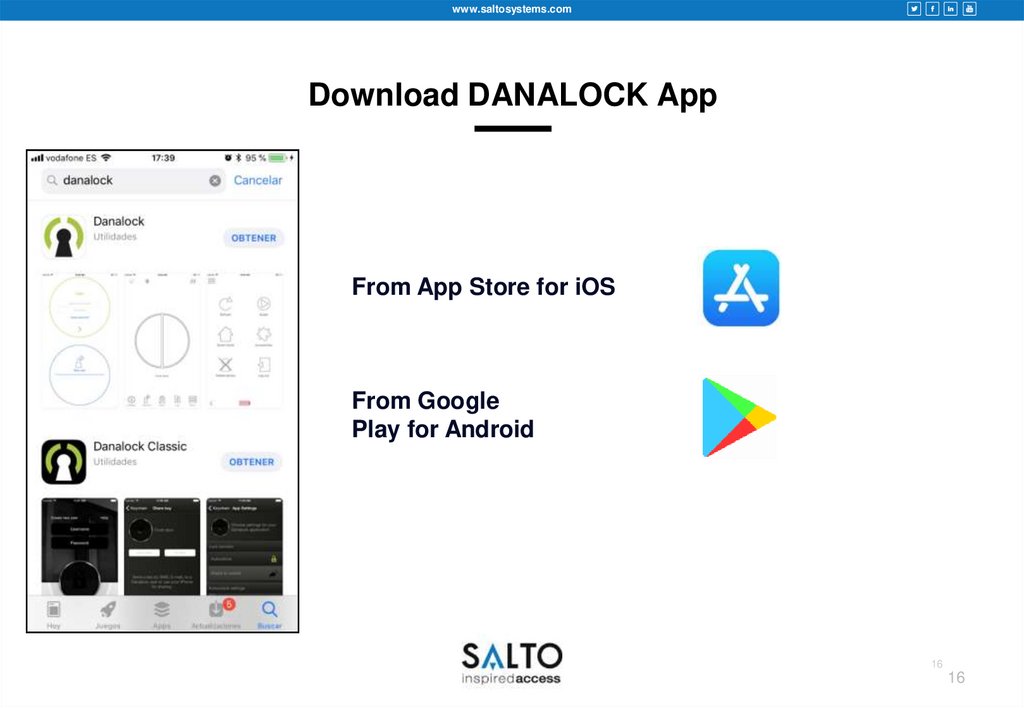
www.saltosystems.comDownload DANALOCK App
From App Store for iOS
From Google
Play for Android
16
16
17.
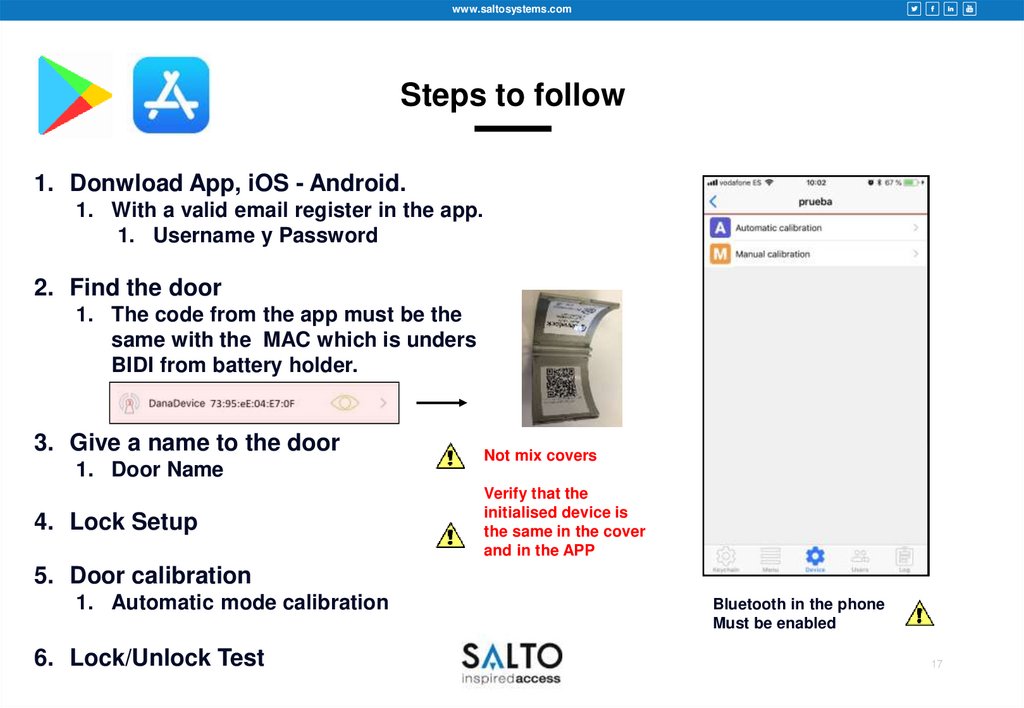
www.saltosystems.comSteps to follow
1. Donwload App, iOS - Android.
1. With a valid email register in the app.
1. Username y Password
2. Find the door
1. The code from the app must be the
same with the MAC which is unders
BIDI from battery holder.
3. Give a name to the door
1. Door Name
4. Lock Setup
Not mix covers
Verify that the
initialised device is
the same in the cover
and in the APP
5. Door calibration
1. Automatic mode calibration
6. Lock/Unlock Test
Bluetooth in the phone
Must be enabled
17
18.
www.saltosystems.comINTRODUCTION
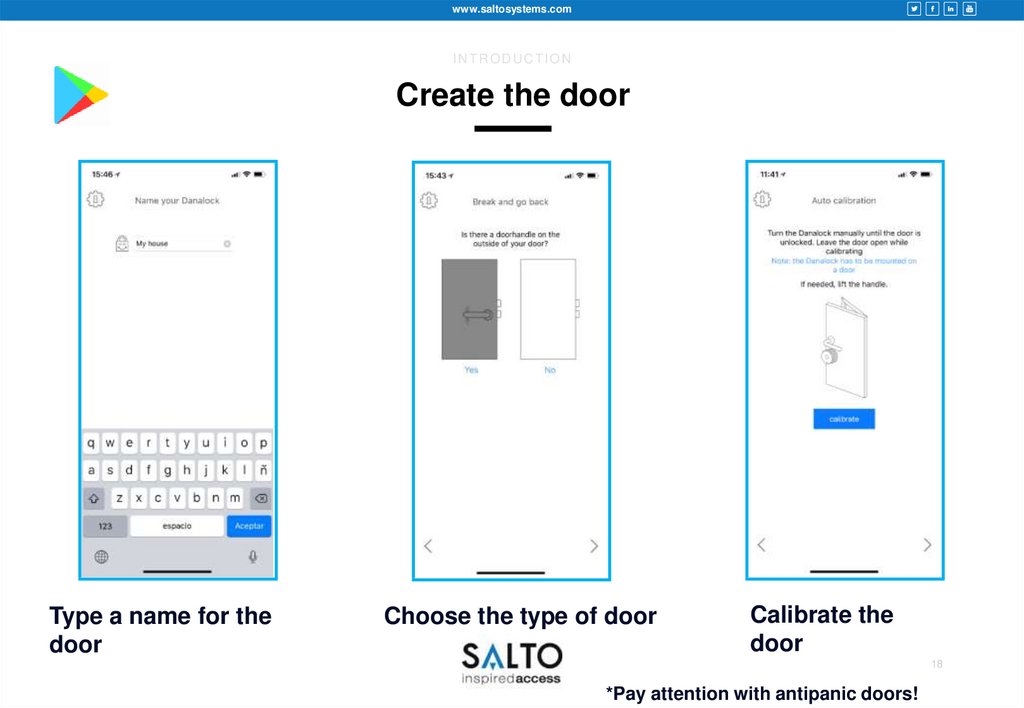
Create the door
Type a name for the
door
Choose the type of door
Calibrate the
door
18
*Pay attention with antipanic doors!
19.
www.saltosystems.comINTRODUCTION
Setup the door
Auto unlock
Twist assist
Auto lock
19
20.
www.saltosystems.comINTRODUCTION
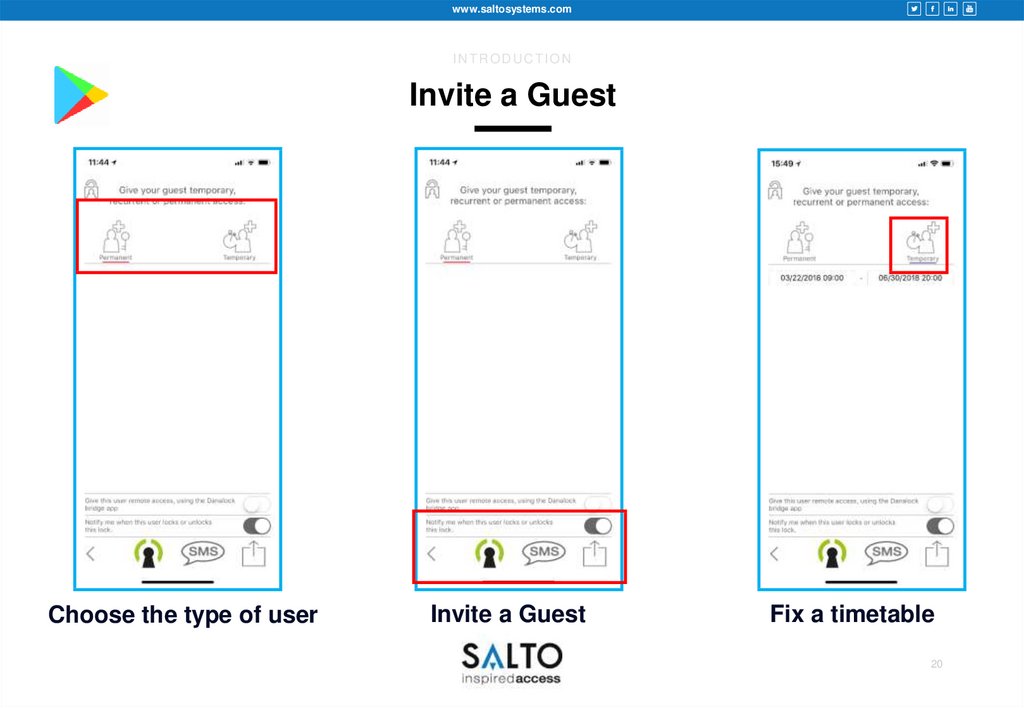
Invite a Guest
Choose the type of user
Invite a Guest
Fix a timetable
20
21.
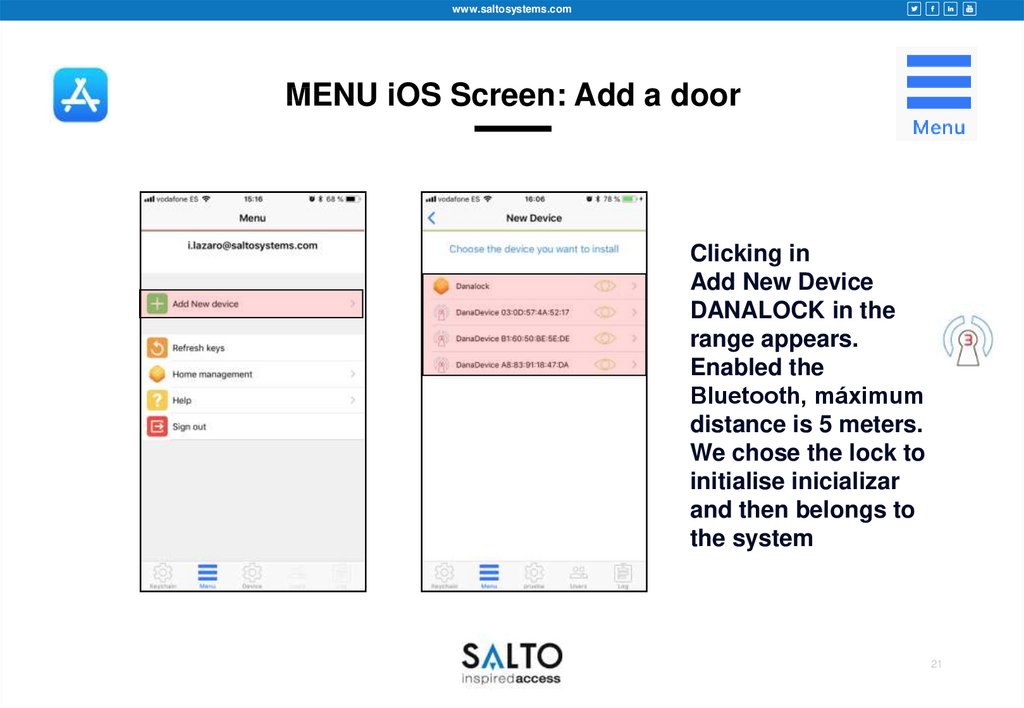
www.saltosystems.comMENU iOS Screen: Add a door
Clicking in
Add New Device
DANALOCK in the
range appears.
Enabled the
Bluetooth, máximum
distance is 5 meters.
We chose the lock to
initialise inicializar
and then belongs to
the system
21
22.
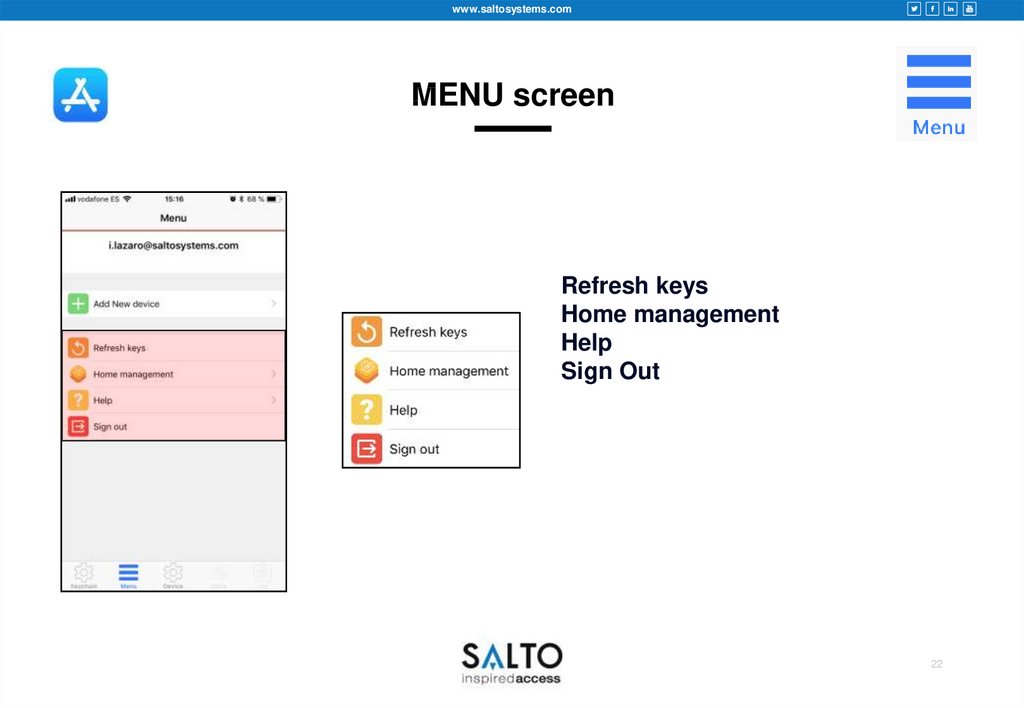
www.saltosystems.comMENU screen
Refresh keys
Home management
Help
Sign Out
22
23.
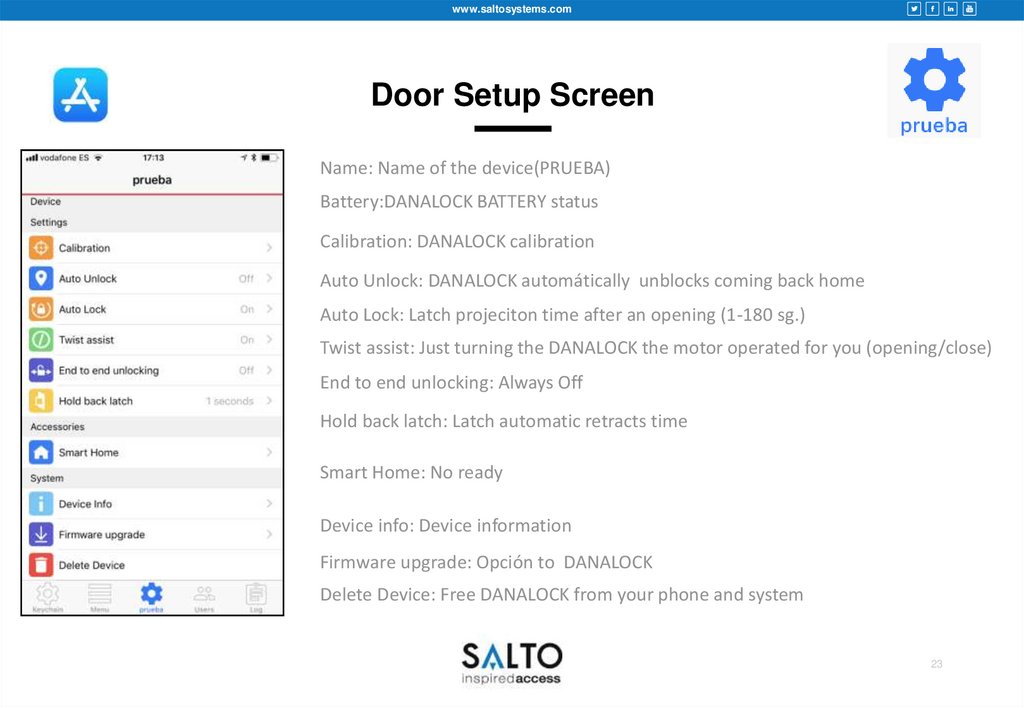
www.saltosystems.comDoor Setup Screen
Name: Name of the device(PRUEBA)
Battery:DANALOCK BATTERY status
Calibration: DANALOCK calibration
Auto Unlock: DANALOCK automátically unblocks coming back home
Auto Lock: Latch projeciton time after an opening (1-180 sg.)
Twist assist: Just turning the DANALOCK the motor operated for you (opening/close)
End to end unlocking: Always Off
Hold back latch: Latch automatic retracts time
Smart Home: No ready
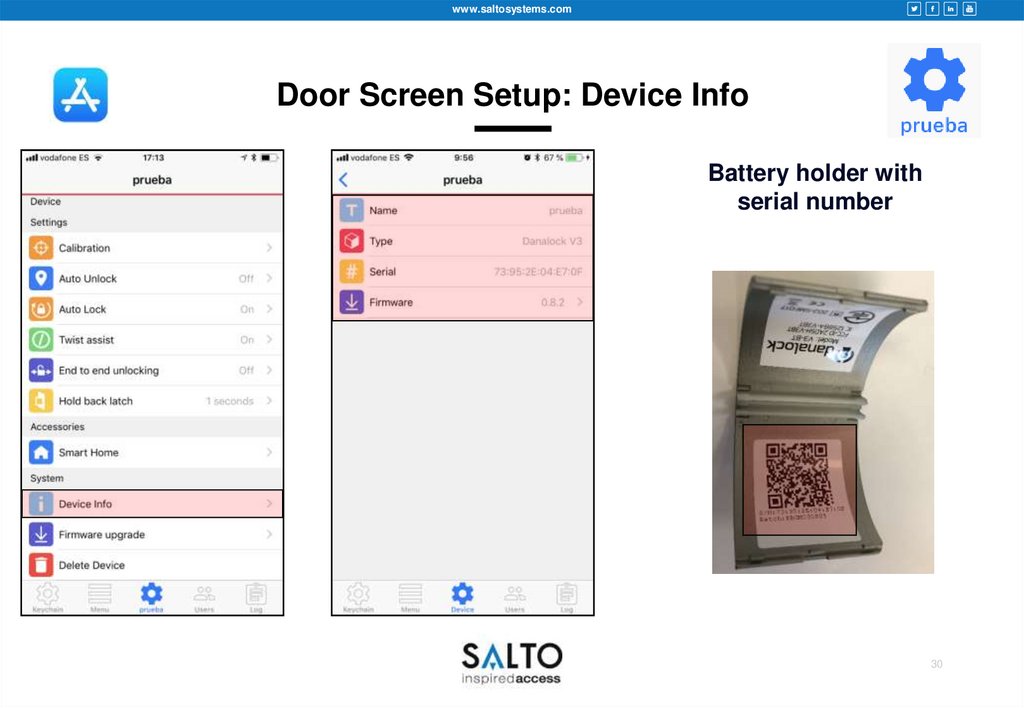
Device info: Device information
Firmware upgrade: Opción to DANALOCK
Delete Device: Free DANALOCK from your phone and system
23
24.
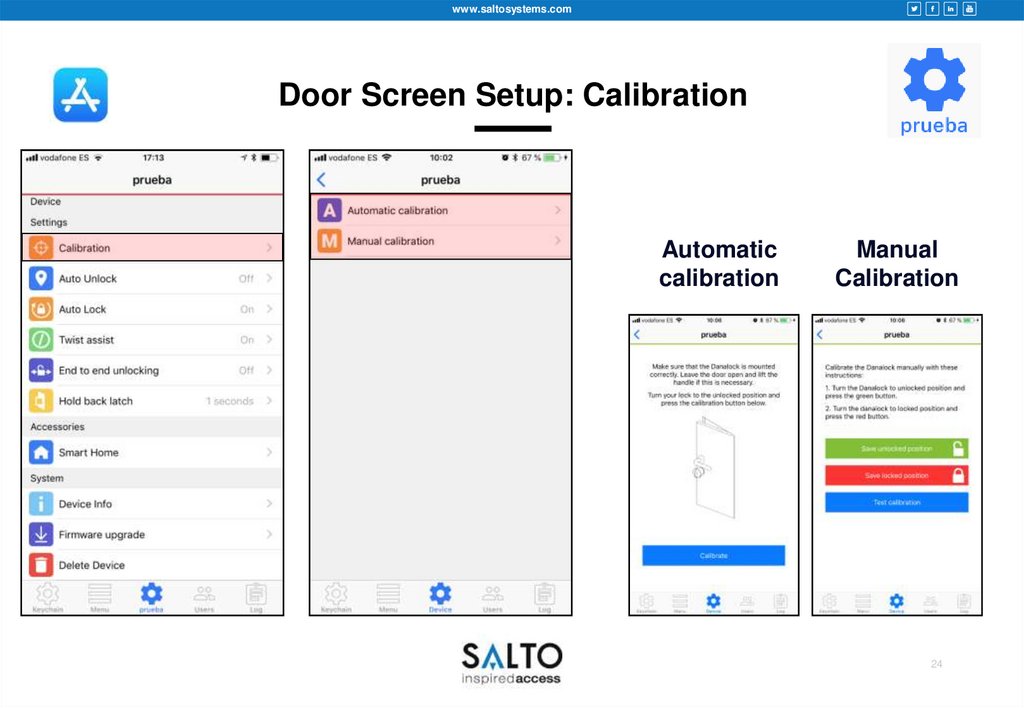
www.saltosystems.comDoor Screen Setup: Calibration
Automatic
calibration
Manual
Calibration
24
25.
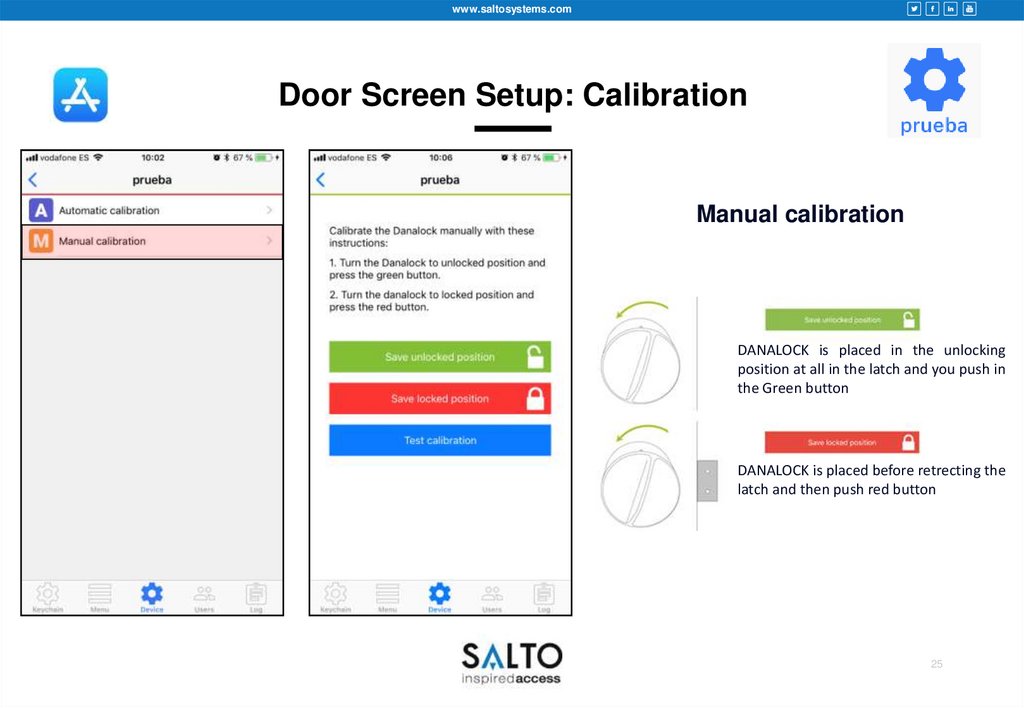
www.saltosystems.comDoor Screen Setup: Calibration
Manual calibration
DANALOCK is placed in the unlocking
position at all in the latch and you push in
the Green button
DANALOCK is placed before retrecting the
latch and then push red button
25
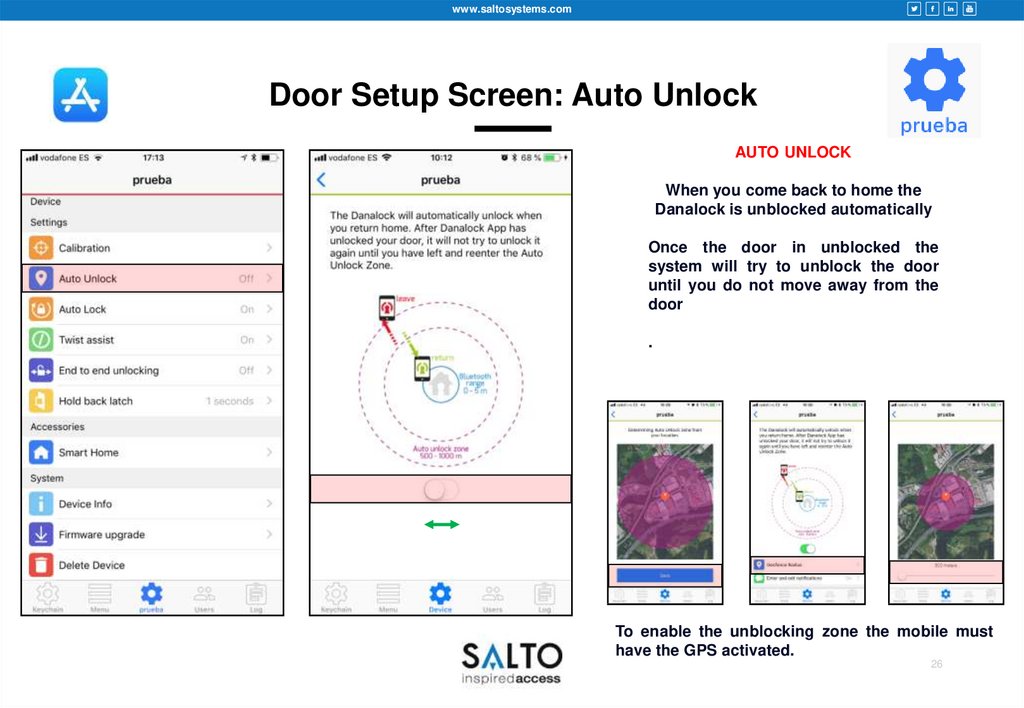
26.
www.saltosystems.comDoor Setup Screen: Auto Unlock
AUTO UNLOCK
When you come back to home the
Danalock is unblocked automatically
Once the door in unblocked the
system will try to unblock the door
until you do not move away from the
door
.
To enable the unblocking zone the mobile must
have the GPS activated.
26
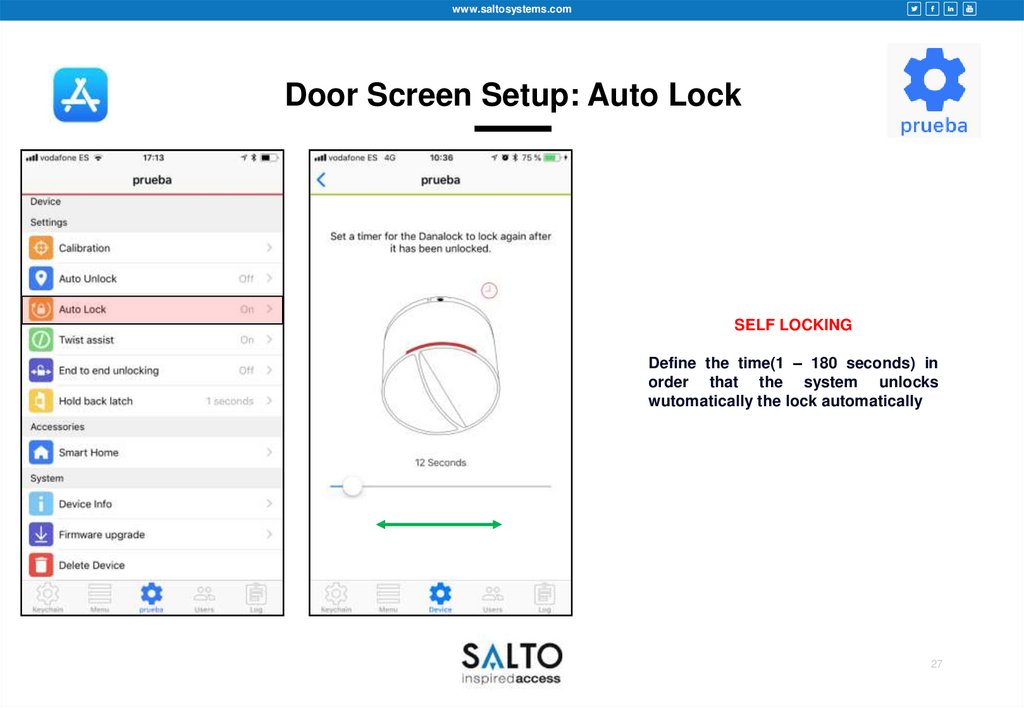
27.
www.saltosystems.comDoor Screen Setup: Auto Lock
SELF LOCKING
Define the time(1 – 180 seconds) in
order that the system unlocks
wutomatically the lock automatically
27
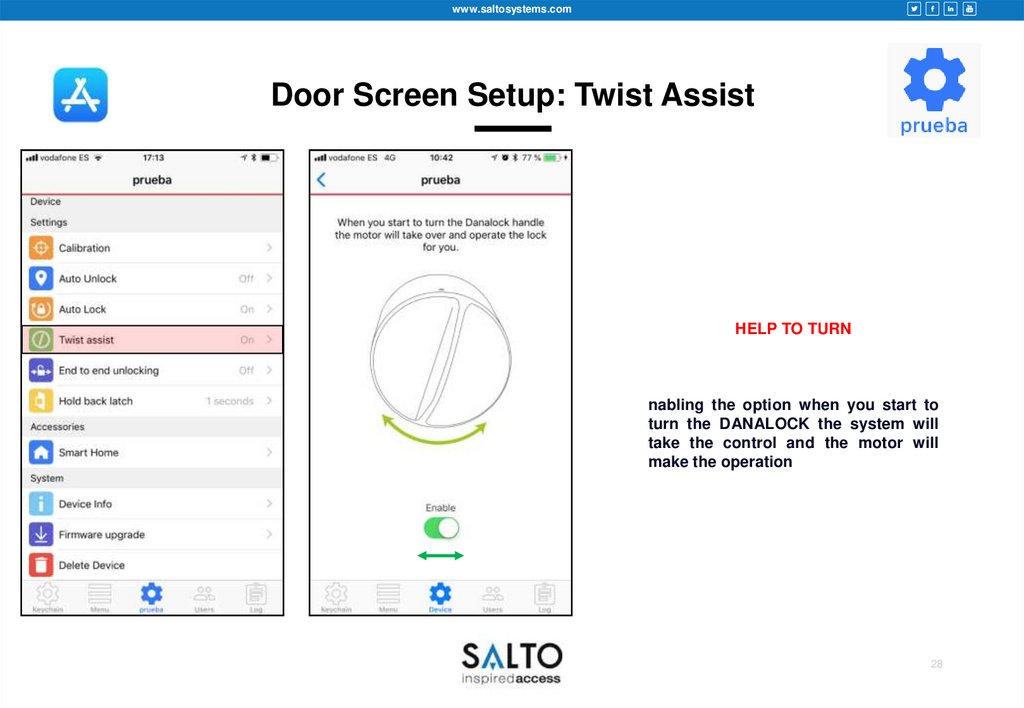
28.
www.saltosystems.comDoor Screen Setup: Twist Assist
HELP TO TURN
nabling the option when you start to
turn the DANALOCK the system will
take the control and the motor will
make the operation
28
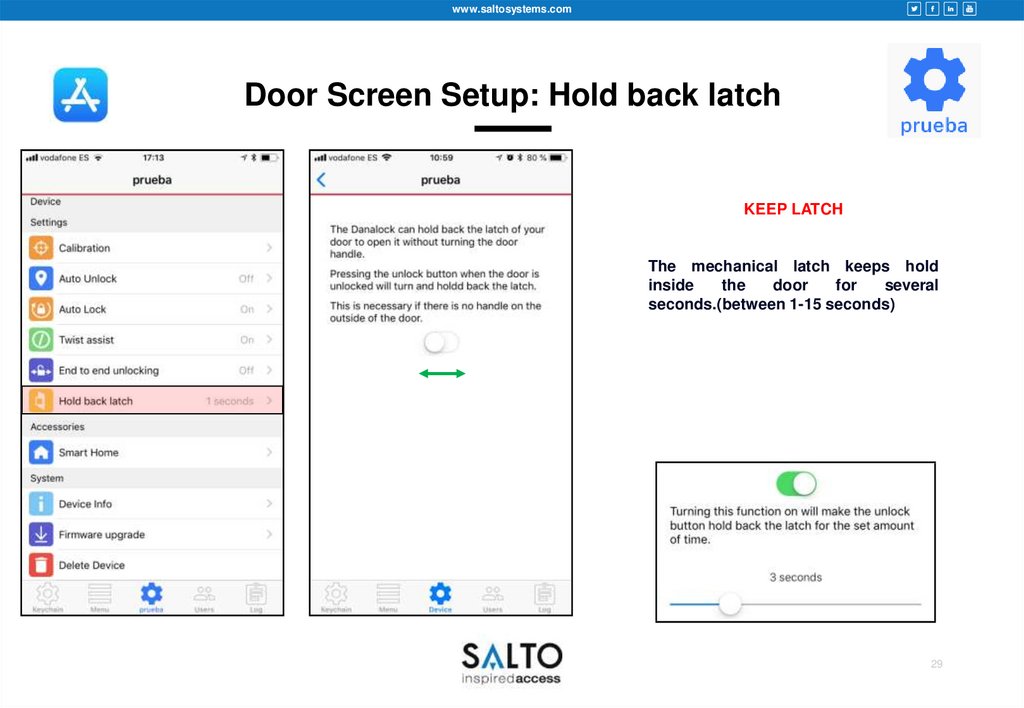
29.
www.saltosystems.comDoor Screen Setup: Hold back latch
KEEP LATCH
The mechanical latch keeps hold
inside
the
door
for
several
seconds.(between 1-15 seconds)
29
30.
www.saltosystems.comDoor Screen Setup: Device Info
Battery holder with
serial number
30
31.
www.saltosystems.comUser Screen
It will appear in the screen
the user added in the door
In the same way is possible
to invite other users to
opent he door
A guest is not able to make
a setting of the Danalock
31
32.
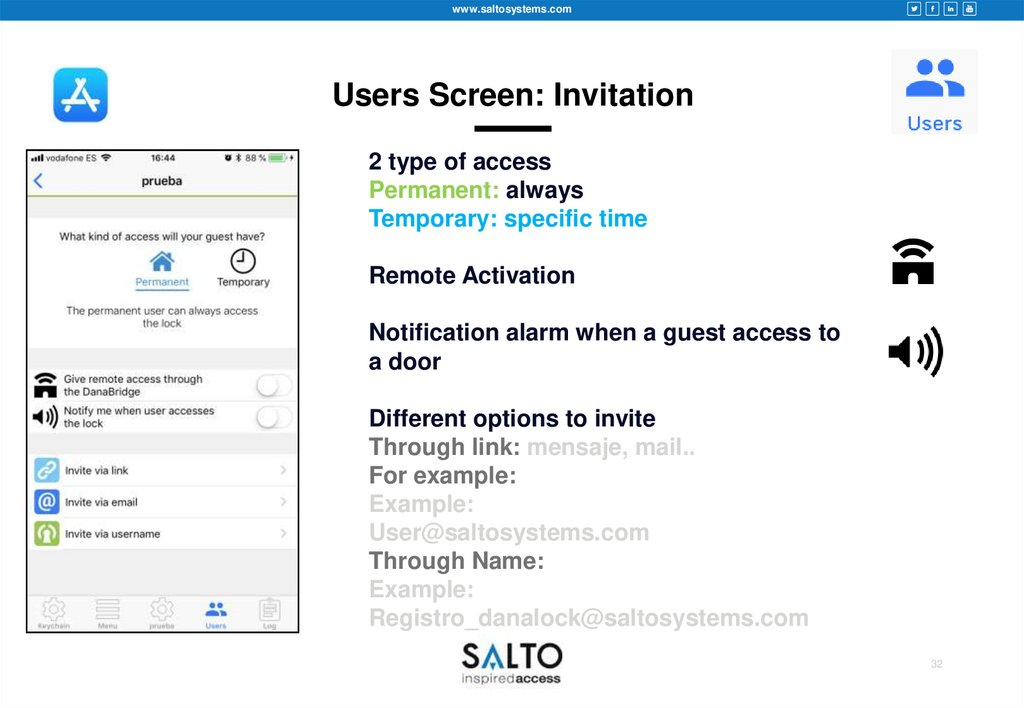
www.saltosystems.comUsers Screen: Invitation
2 type of access
Permanent: always
Temporary: specific time
Remote Activation
Notification alarm when a guest access to
a door
Different options to invite
Through link: mensaje, mail..
For example:
Example:
User@saltosystems.com
Through Name:
Example:
Registro_danalock@saltosystems.com
32
33.
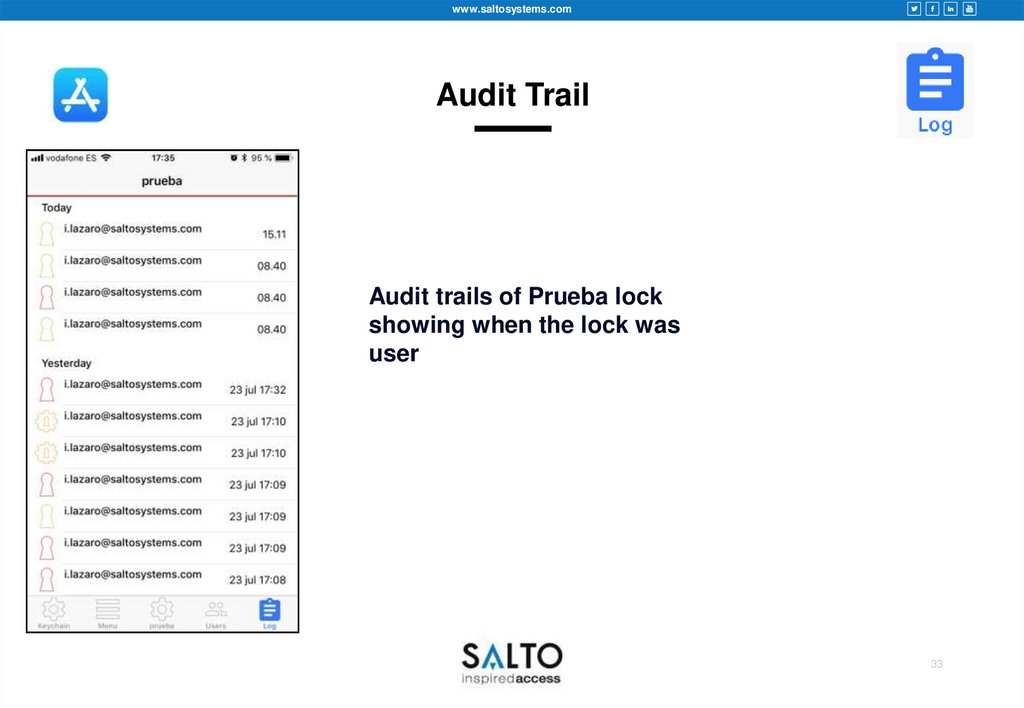
www.saltosystems.comAudit Trail
Audit trails of Prueba lock
showing when the lock was
user
33
34.
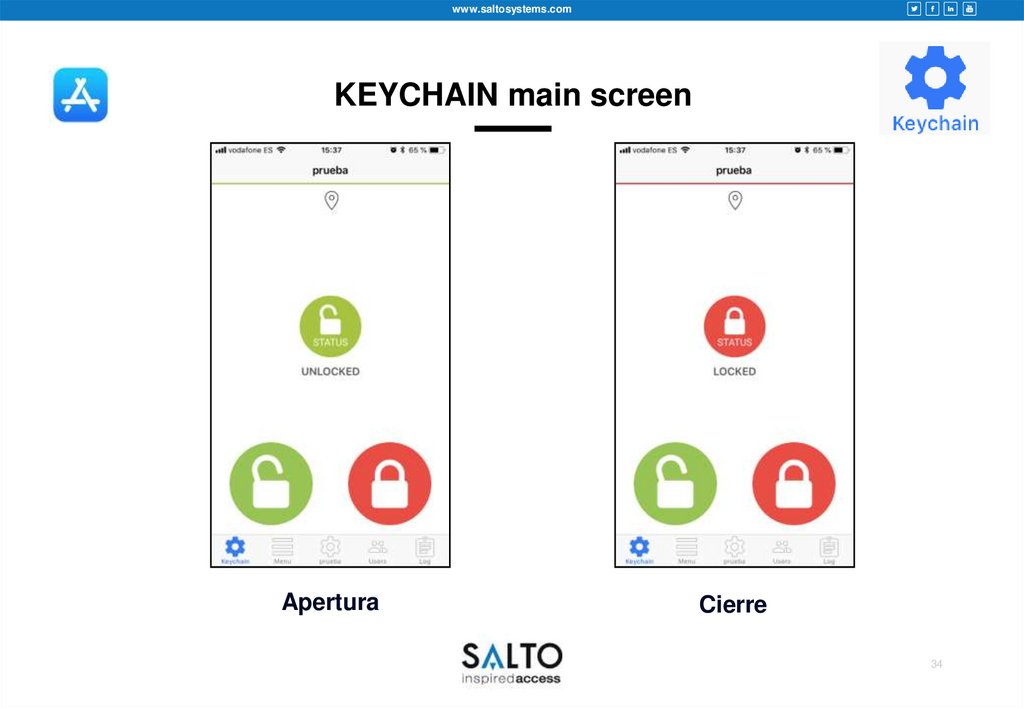
www.saltosystems.comKEYCHAIN main screen
Apertura
Cierre
34
35.
www.saltosystems.comINTRODUCTION
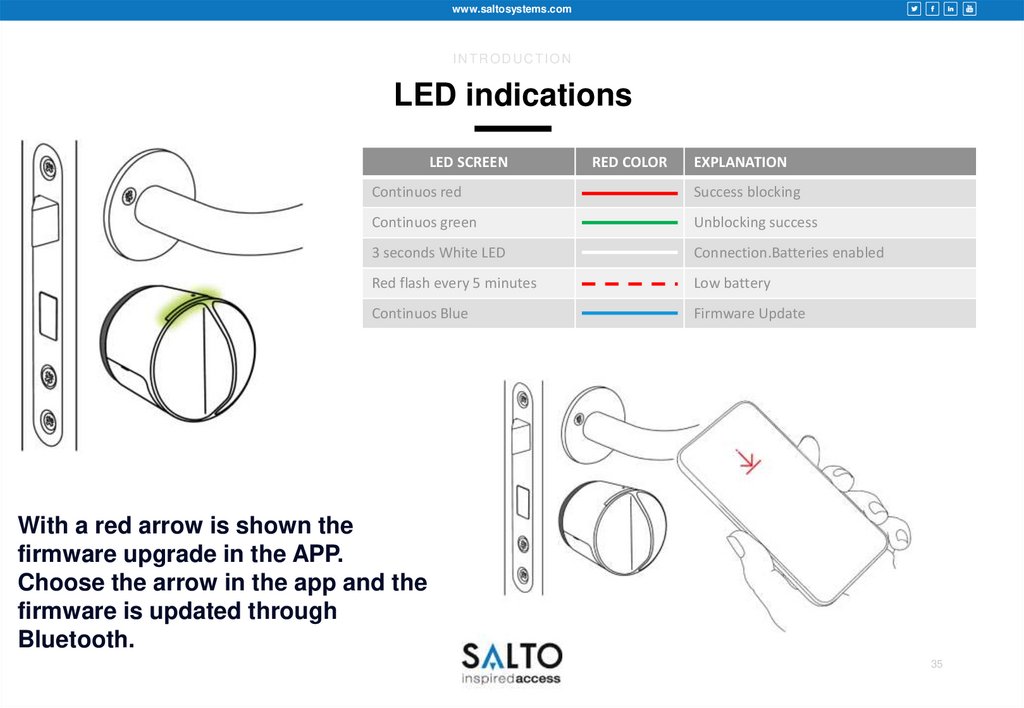
LED indications
LED SCREEN
RED COLOR
EXPLANATION
Continuos red
Success blocking
Continuos green
Unblocking success
3 seconds White LED
Connection.Batteries enabled
Red flash every 5 minutes
Low battery
Continuos Blue
Firmware Update
With a red arrow is shown the
firmware upgrade in the APP.
Choose the arrow in the app and the
firmware is updated through
Bluetooth.
35
36.
www.saltosystems.comTHANKS!
SALTO Systems HQ, Spain
Polígono Lanbarren - C/ Arkotz, 9
20180 Oiartzun, Spain
T: +34 943 344 550
www.saltosystems.com
36