


 Медицина
 Английский язык
Похожие презентации:


Сердечно-сосудистая хирургия (Cardiovascular surgery)
1.
Сердечно-сосудистая хирургияCardiovascular surgery
Агамамедова Арзув Агаджановна
М-13-2-17
2.
План:1. Разделы сердечно-сосудистой хирургии.
2. Требования к инструментам
3. Методы реваскуляризации миокарда. АКШ.
3.
Plan1. Sections of cardiovascular surgery.
2. Instruments
3. Methods of myocardial revascularization.
4.
Разделы сердечно-сосудистой хирургии.Кардиохирургия
Эндоваскулярная хирургия: стентирование, баллонная
коронарная ангиопластика
Сосудистая хирургия: шунтирование, протезирование
Хирургическая аритмология: имплантация ЭКС,
радиочастотная аблация.
5.
Sections of cardiovascular surgery.Cardiac surgery
Endovascular surgery: stenting, balloon coronary angioplasty
Vascular surgery: bypass surgery, prosthetics
Surgical arrhythmology: pacemaker implantation,
radiofrequency ablation.
6.
ИнструментыПинцеты и зажимы
Требования:
1. Атравматичность
• Широкие рабочие части для уменьшения удельного давления на
ткани
• Наличие регулирующего устройства, определяющего величину
усилия, передаваемого на стенку сосуда (кремальера)
• Неглубокие насечки на поверхности рабочих частей
• Использование эластических накладок, надеваемых на рабочие
части
2. Отсутствие выскальзывания - надежные фиксирующие
устройства
3. Не ухудшают обзор операционного поля - Место перехода бранш
инструментов в рабочую часть имеет изогнутую (к примеру, Гобразную) форму
7.
InstrumentsForceps and clamps
Requirements:
1. Atraumatic
• Wide working parts to reduce specific pressure on the tissue
• Presence of a regulating device that determines the amount of force
transmitted on the wall of the vessel (cremaillere)
• Shallow notches on the surface of the working parts
• Use of elastic pads on working parts
2. No slippage - reliable locking devices
3. Do not impair the overview of the operating field – Place curved
branched tools in the working area (for example, L-shaped)
8.
Ножницы и скальпели• Для выделения удобнее использовать ножницы с тонкими и
закруглёнными на кончиках браншами
• Для вскрытия просвета сосуда предпочтение отдают лезвиям,
начиная с 11-го
• Для продления разреза удобно применение ножниц, изогнутых по
углу
• Бранши ножниц должны быть достаточно острыми и тонкими,
чтобы не допустить сдавливание сосудистой стенки
Ножницы Метценбаума
и Поттса.
9.
Scissors and scalpels• For selection it is more convenient to use branched scissors with thin
and rounded tips
• To open the lumen of the vessel, it is preferred to use scalpel blades,
starting from the 11th
• To extend the cut, it is convenient to use curved scissors
• Scissors should be sharp and thin enough to prevent compression of the
vascular wall
Ножницы Метценбаума
и Поттса.
10.
Иглодержатели• Жёсткая рабочая поверхность, максимально
уменьшающая подвижность иглы и ее боковое смещение
при прокалывании стенки сосуда или протеза
• Тонкие рабочие поверхности при работе с иглами
небольшого диаметра, для избежания поломки иглы во
время шитья.
11.
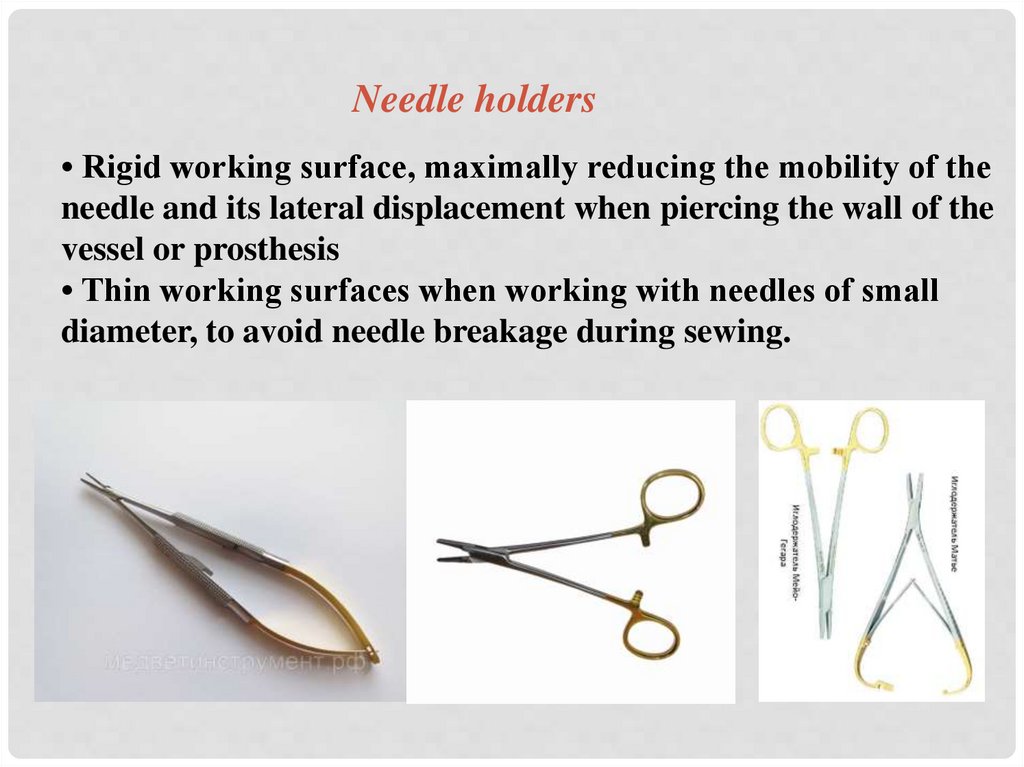
Needle holders• Rigid working surface, maximally reducing the mobility of the
needle and its lateral displacement when piercing the wall of the
vessel or prosthesis
• Thin working surfaces when working with needles of small
diameter, to avoid needle breakage during sewing.
12.
Сосудистые зажимы типа “бульдог”Предназначены для наложения на артерии малого диаметра и
на сосуды, расположенные поверхностно
Конструктивные особенности:
1. Рабочие части с рифленой поверхностью.
2. Рукоятки небольшой длины с опорными площадками для
пальцев рук.
3. Пружинное устройство для фиксации рабочих частей
13.
Vascular clamps of "bulldog" typeDesigned for application to arteries of small diameter and on
superficial vessels
Design features:
1. Working parts with corrugated surface.
2. Short length handles with support pads for fingers.
3. Spring device for fixing of working parts
14.
Шовный материалТребования к шовному материалу
1. Минимальная травматизация тканей при проведении
через стенку
2. Атравматичная игла:
колющая игла
режущий кончик (при кальцинозе стенки)
3. Минимальное кровотечение из отверстий, сделанных
иглой
4. Прочность и инертность нити
5. Отсутствие тромбообразования на шовном материале
6. Выбор размера шовного материала в зависимости от
диаметра сосуда.
Анастомоз с аортой - используются нити 3/0
- Анастомоз с бедренной артерией – 5/0
- Дистальные анастомозы при АКШ - 7/0, 8/0
7. Нити нерассасывающиеся
Основной выбор - полипропилен!
15.
Suture materialRequirements for suture material
1. Minimal traumatization of tissues when inserted in the wall
2. Atraumatic needle:
piercing needle
cutting tip (with calcification of the wall)
3. Minimal bleeding from holes made with a needle
4. Strength and inertness of the thread
5. Absence of thrombosis on the suture material
6. Selection of the size of the suture material depending on the
diameter of the vessel.
- Anastomosis with aorta - 3/0 used
- Anastomosis with femoral artery – 5/0
- Distal anastomoses - 7/0, 8/0
7 . Non-absorbable thread.
The best choice is polypropylene!
16.
Инструменты17.
InstrumentsDebakey’s clamps
For partial
clamping of large
vessels
18.
Методы реваскуляризации миокарда1. Коронарное шунтирование
2. Баллонная коронарная ангиопластика
3. Стентирование
4. Ротаблация
5. Лазерная коронарная ангиопластика
19.
Methods of myocardial revascularization1. Coronary artery bypass grafting
2. Balloon coronary angioplasty
3. Stenting
4. Rotablation
5. Laser coronary angioplasty
20.
21.
StentingBalloon angioplasty
22.
Аорто-коронарное шунтирование – это операция, прикоторой устанавливается шунт – обходной сосуд, в качестве
которого берется, обычно, большая подкожная вена бедра,
внутренняя грудная артерия или лучевая артерия – между аортой
и коронарной артерией, просвет которой сужен с
атеросклеротической бляшкой.
23.
Aorto-coronary bypass surgery is an operation in which a shunt isinstalled - a bypass vessel, which is usually taken as a large
subcutaneous vein of the thigh (great saphenous vein), an internal
thoracic artery or radial artery - between the aorta and the coronary
artery, the lumen of which is narrowed with atherosclerotic plaque.
24.
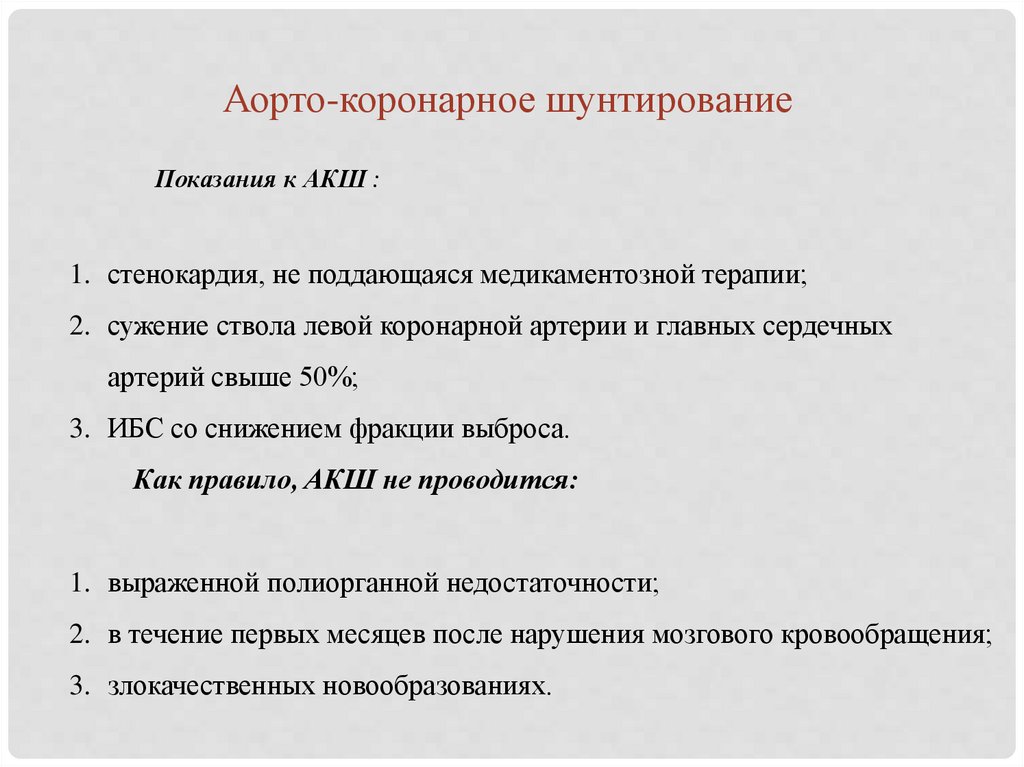
Аорто-коронарное шунтированиеПоказания к АКШ :
1. стенокардия, не поддающаяся медикаментозной терапии;
2. сужение ствола левой коронарной артерии и главных сердечных
артерий свыше 50%;
3. ИБС со снижением фракции выброса.
Как правило, АКШ не проводится:
1. выраженной полиорганной недостаточности;
2. в течение первых месяцев после нарушения мозгового кровообращения;
3. злокачественных новообразованиях.
25.
Aorto-coronary bypass graftingIndications for CABG :
1. angina pectoris, not amenable to drug therapy;
2. narrowing of the trunk of the left coronary artery and the main heart arteries
over 50%;
3. CHD with a decrease in the ejection fraction.
Contraindications for CABG:
1. severe multiple organ failure;
2. during the first months after cerebral circulation disorders;
3. malignant neoplasms.
26.
В качестве шунта могут применяются :1. Внутригрудная артерия
2. Лучевая артерия
3. Большая подкожная вена ноги
4. Желудочно-сальниковая артерия
5. Синтетические кондуиту
27.
As a shunt we can use:1. Intrathoracic artery
2. Radial artery
3. Large subcutaneous vein of the leg
4. Gastroointestinal artery
5. Synthetic materials
28.
Подготовка аутовенозного трансплантатаБольшая подкожная вена ноги является практически единственным
трансплантатом для ауто-венозного аортокоронарного шунтирования.
1.Выделение вены начинают с голени у переднего края медиальной лодыжки.
2. После выделения выполняют мобилизацию вены на всем протяжении.
29.
Preparation of an autovenous graftThe large subcutaneous vein of the leg is practically the only graft for autovenous
coronary artery bypass grafting.
1.Vein excretion begins with the lower leg at the anterior edge of the medial ankle.
2. After isolation, the vein is mobilized throughout the entire length.
30.
3.Обрабатывают, перевязывают коллатеральные ветви основного ствола.31.
3. Tie collateral branches of the main trunk.32.
В лодыжечный конец вены вставляют канюлю, фиксируя еекруговой лигатурой. С помощью шприца трансплантат промывают
изотоническим раствором хлорида натрия с гепарином.
После завершения обработки трансплантата его помещают в раствор
с гепарином.
33.
A cannula is inserted into the ankle end of the vein, and fixed with acircular ligature. With the help of a syringe, the graft is washed with an
isotonic solution of sodium chloride with heparin.
After the processing of the graft is completed, it is placed in a solution with
heparin.
34.
Доступ к сердцуУниверсальным доступом к сердцу является - срединная стернотомия.
35.
Access to the heartUniversal access to the heart is - median sternotomy.
36.
1. Начиная от яремной вырезки до мечевидного отростка строго посрединной линии рассекают мягкие ткани с помощью скальпеля,
параллельно коагулятором коагулируют кровоточащие сосуды.
2. Надкостницу рассекают коагулятором по центру грудины на всем ее
протяжении.
3. Между ножницами и грудиной вводят палец, ножницы извлекают и
при выдохе больного пальцем мобилизуют заднюю часть грудины.
4. Далее грудину рассекают электропилой.
37.
1. Starting from the jugular notch to the xyphoid process strictly along themedian line, soft tissues are dissected with a scalpel, in parallel with the
coagulator, bleeding vessels coagulate.
2. The periosteum is dissected with a coagulator in the center of the sternum
throughout its length.
3. A finger is inserted between the scissors and the sternum, the scissors are
removed and when the patient exhales, the back of the sternum is mobilized.
4. Next, the sternum is dissected with an electric saw.
38.
6. Ранорасширителем умеренно разводят края раны.(6-8см.)7. Приподнимают пинцетом перикард и вскрывают его продольно вниз до
диаф-рагмы.
8.Расширитель разводят полностью( на 15-17см) и рассекают перикард по
диафрагме в стороны на 3 см.
9. Края перикарда коагулируют и фиксируют к расширителю.
39.
6. The retractor moderately widens the edges of the wound. (6-8cm.)7. Lift the pericardium with tweezers and open it longitudinally down to the
diaphragm.
8.The retractor is widened completely (by 15-17 cm) and the pericardium is
dissected along the diaphragm to the sides by 3 cm.
9. The edges of the pericardium are coagulated and fixed to the retractor.
40.
Подключение аппарата искусственного кровообращения.1-аорта
2-артериальная линия
3-микрофильтр
4-артериальный насос
5-оксигенатор
6-венозная линия
7-нижняя полая вена
8-верхняя полая вена
АИК подключают до ревизии сердца, соблюдая строгую
последовательность действий. АИК в течении операции:
• обеспечивает хорошую гемодинамику, поддерживая АД в пределах 60100 мм рт.ст.
• создает сухое неподвижное операционное поле
• обеспечивает качественное наложение анастомоза с коронарной
артерией с применением микрохирургической техники.
41.
Connection of the Cardio-pulmonary bypass machine.1-aorta
2-arterial tube
3-microfilter
4-arterial pump
5-oxygenator
6-venous tube
7-inferior vena cava
8-superior vena cava
CPB is connected before the revision of the heart, observing a strict sequence of
actions. CPB during the operation:
- provides good hemodynamic, maintains blood pressure of 60-100 mm Hg.
- creates a dry fixed operating field
- provides high-quality imposition of anastomosis within the coronary artery
using microsurgical techniques.
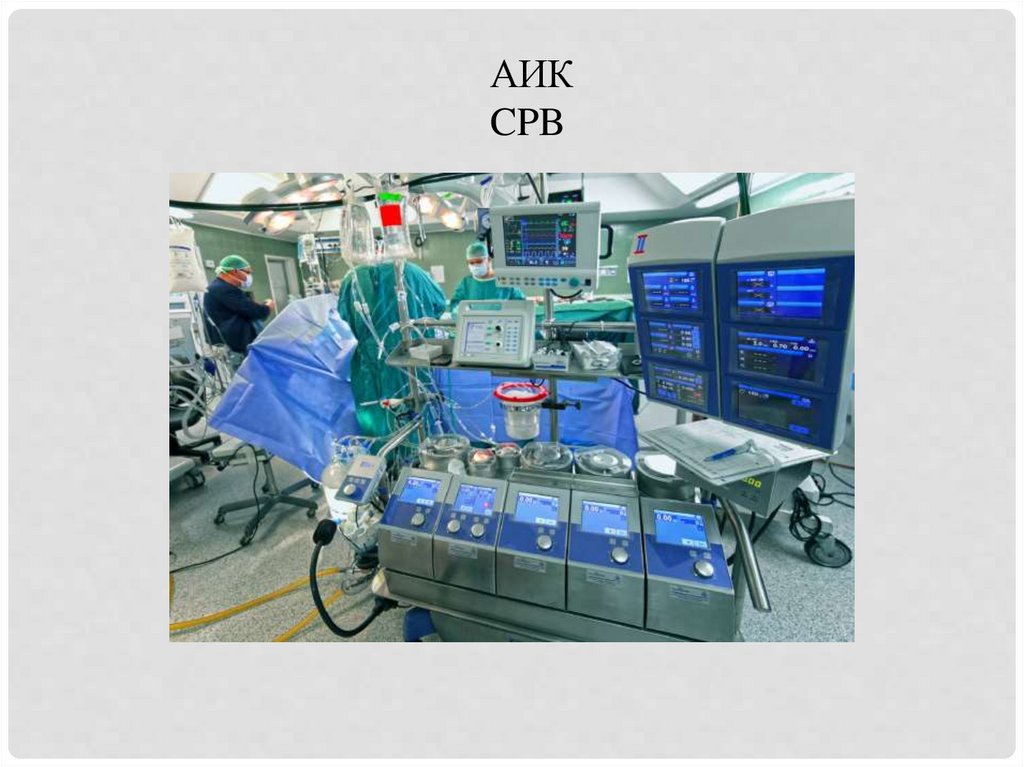
42.
АИКCPB
43.
Стандартные компоненты контура ИК (рассматриваются по токукрови во время проведения ИК).
1. Венозные канюли
2. Венозная магистраль
3. Венозный резервуар
4. Магистраль от выхода венозного резервуара до основного насоса
5. Магистраль роликового насоса
6. Магистраль от выхода насоса до входа в оксигенатор
7. Оксигенатор
8. Магистраль от выхода оксигенатора до входа в артериальный фильтр
9. Артериальный фильтр
10. артериальная магистраль
11. Артериальная канюля
44.
Standard components of the CPB circuit (considered by blood flowduring the CPB).
1. Venous cannulas
2. Venous tube
3. Venous reservoir
4. Tube from the outlet of the venous reservoir to the main pump
5. Roller pump line
6. Tube from pump outlet to oxygenator entrance
7. Oxygenator
8. Tube from the oxygenator outlet to the entrance to the arterial filter
9. Arterial filter
10. arterial Tube
11. Arterial cannula
Venous blood through
cannulas in vena cava
Bloodstream
Venous tube
Venous reservoir
Oxygenator
Arterial tube
Arterial filter
45.
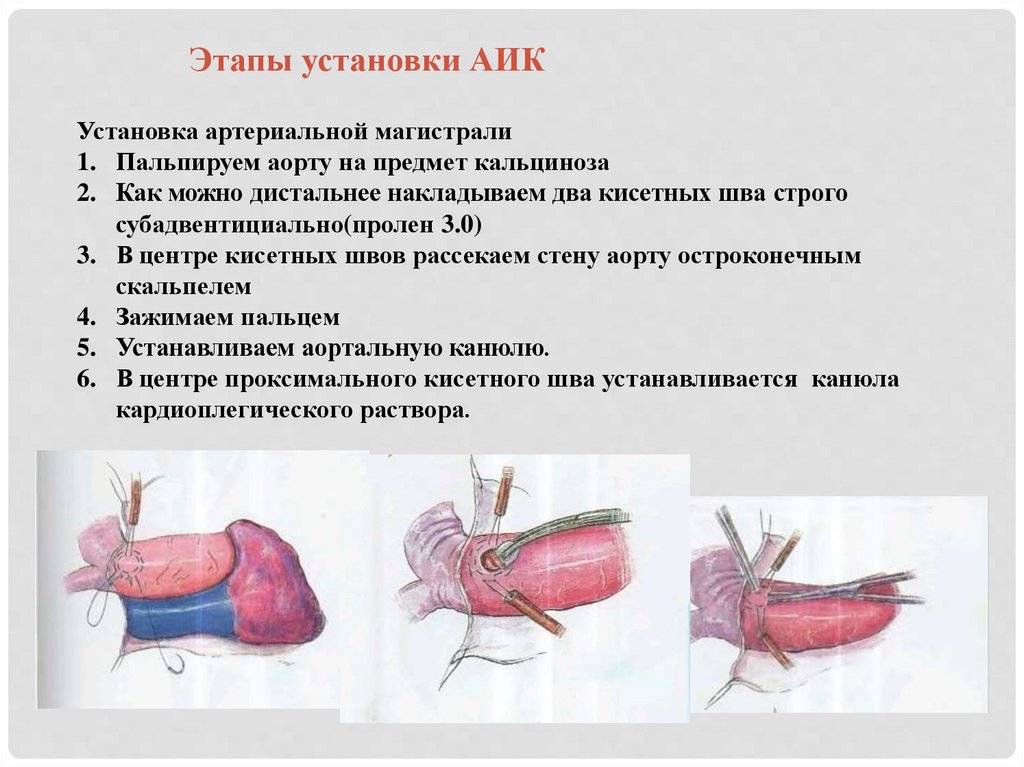
Этапы установки АИКУстановка артериальной магистрали
1. Пальпируем аорту на предмет кальциноза
2. Как можно дистальнее накладываем два кисетных шва строго
субадвентициально(пролен 3.0)
3. В центре кисетных швов рассекаем стену аорту остроконечным
скальпелем
4. Зажимаем пальцем
5. Устанавливаем аортальную канюлю.
6. В центре проксимального кисетного шва устанавливается канюла
кардиоплегического раствора.
46.
Stages of CPB installationInstallation of arterial highway
1. Palpate the aorta for calcification
2. As distal as possible, we apply two purse sutures strictly subadventitially (prolen
3.0)
3. In the center of the purse sutures, cut the wall of the aorta with a pointed scalpel.
4. Clamp with your finger
5. Install an aortic cannula.
6. In the center of the proximal purse suture, a cannula of cardioplegic solution is
installed.
47.
48.
Канюляция полых вен1.
2.
3.
4.
5.
6.
7.
Производим выделение полых вен
Накладываем зажим Сатинского на предсердие
Накладываем кисетный шов на предсердие
Вскрытие полости ПП.
Вводим канюлю через ПП в нижнюю полую вену
Также поступаем с канюляцией верхней полой вены
Через тройник оба венозных катетера соединяем с венозной магистралью АИКа
49.
Cannulating hollow veins1.
2.
3.
4.
5.
6.
7.
We allocate the hollow veins
Apply Satinsky Debakey’s clamp to the atrium
Apply a purse suture to the atrium
Dilate the openings
Inject the cannula through it into the inferior vena cava
Also do with the cannula of the superior vena cava
Both venous catheters are connected to the venous tube of the CPB
50.
Защита миокарда(кардиоплегия)
51.
Myocardial protection(cardioplegia)
1) Administration of solution containing high amounts
of potassium ions
2) Cold blood cardioplegia is preferred
3) Use St. Thomas solution
St. Thomas solution composition:
Potassium 16 mmol/l
Sodium 110 mmol/l
Chlorine 28 mmol/l
Calcium 2.4-1.2 mmol/l
Magnesium 32-16 mmol/l
Sodium bicarbonate 10 mmol/l
pH 7.8
Antegrade cardioplegia
Retrograde cardioplegia
Cardioplegic solution
delivered via infusion to the
root of aorta or directly into
the coronary arteries
Retrograde cardioplegic
cannula is installed into
coronary sinus
52.
НАЛОЖЕНИЕ АНАСТОМОЗА С КОРОНАРНЫМЫАРТЕРИЯМЫ
1. Сердце отжимают рукой от
внутриполостной жидкости
2. Экпозиция коронарной артерии
3. Из окружающей тканей
выделяют только переднюю
часть (1/3- ½) артерии
4. Определение консистенции
стенки артерии, величины
просвета сосуда и наличие в
просвете бляшки.
5. Просвет артерии вскрывает
легким движением кончика
скальпеля №11 “от себя”
53.
IMPOSITION OF ANASTOMOSIS IN CORONARYARTERIES
1. The heart is squeezed by hand from
the intracavitary fluid
2. Locate coronary artery
3. Only isolate the beginning (1/3-1/2)
of the artery from the surrounding
tissues
4. Determine the consistency of the
arterial wall, the size of the lumen
of the vessel and the presence of
plaque in the lumen.
5. Open the lumen of the artery with a
slight upward movement of the tip
of scalpel No. 11
54.
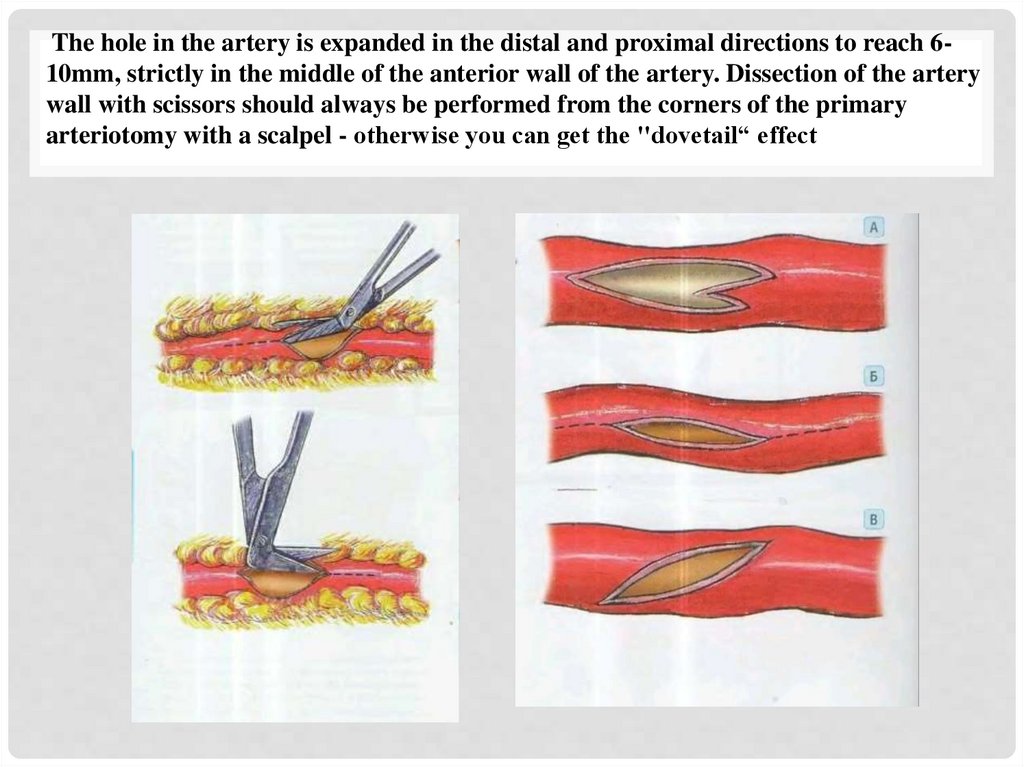
Отверстие в артерии расширяют в дистальном и проксимальномнаправлениях до 6-10мм и строго по середине передней стенки артерии.
Рассечение стенки артерии ножницами следует всегда выполнять от углов
первичной артериотомии скальпелем – в противном случае можно получить
эффект “ ласточкиного хвоста”
55.
The hole in the artery is expanded in the distal and proximal directions to reach 610mm, strictly in the middle of the anterior wall of the artery. Dissection of the arterywall with scissors should always be performed from the corners of the primary
arteriotomy with a scalpel - otherwise you can get the "dovetail“ effect
56.
Угол конца венозного трансплантата срезают ножницами таким образом,что стенку вены иссекают продольно на длину , равной половине
поперечника вены. Расправленный конец вены после этого становится похож
на головку кобры .
57.
The angle of the end of the venous graft is cut off with scissors so that the wall ofthe vein is excised longitudinally to a length equal to half the diameter of the vein.
The straightened end of the vein then becomes similar to the head of a cobra.
58.
Шов анастомоза выполняют полипропиленовой нитью 6/0 или 7/0 с двумяиглами 13 или 9 мм, используя технику наложения анастомоза “ конец в бок “ с
сосудами малого диаметра.
Прокалываем артерию изнутри кнаружи у проксимального угла ее разреза.
Эту иглу выводят налево и на нее вешают зажим типа “ бульдог”.
Другой иглой прокалывают вену изнутри кнаружи в конечной части бокового
среза вены. Эту иглу выводят вправо и ею же продолжают шить анастомоз.
59.
The anastomosis suture is performed with polypropylene thread 6/0 or 7/0 with twoneedles of 13 or 9 mm, using the technique of applying anastomosis "end to side" with
vessels of small diameter. Pierce the artery from the inside to the outside at the
proximal corner of its incision. This needle is taken to the left and a bulldog clip is
hung on it. Another needle pierces a vein from the inside to the outside at the end of
the lateral section of the vein. This needle is brought to the right and we continue to
sew anastomosis.
60.
Второй и последующие стежки анастомоза делают по схеме “с артерии навену”. Так шьют правую от хирурга стенку анастомоза, причем иглу ведут “на
себя”. В 1-1.5 мм от первого стежка накладывают второй стежок, прокалывая
последовательно эпикард, артерию и вену. Как правило, это удается сделать
без промежуточного перехвата иглы.
61.
The second and subsequent stitches of anastomosis are done according to thescheme "from artery to vein". So sew the right wall of anastomosis from the
surgeon’s side, with the needle facing away. At 1-1.5 mm from the first stitch impose
a second stitch, piercing successively the epicardium, artery and vein. As a rule, this
can be done without intermediate interception of the needle.
62.
4. Дальнейшее шитье анастомоза осуществляют без перехвата иглы,прошивая сразу эпикард ( с целью герметизации анастомоза), артерию
и вену. Эпикард берут в шов только по его боковым краям, сделав
отступ 1 мм от его разреза.
63.
4. Further sewing of anastomosis is carried out without interception of theneedle, stitching immediately the epicardium (in order to seal the
anastomosis), artery and vein. The epicardium is taken into the suture only
along its lateral edges, making an indentation of 1 mm from its incision.
64.
5. В дистальном углеанастомоза артерию
прокалывают снаружи внутрь
на расстоянии 1-1,5 мм от ее
края , без захвата эпикарда.
6. После выведения иглы из
просвета артерии на кончик
иглы насаживают вену отходя
1,5 мм от края.
65.
5. At the distal angle ofanastomosis, the artery is pierced
from the outside in, at a distance
of 1-1.5 mm from its edge,
without capturing the
epicardium.6. After removing the
needle from the lumen of the
artery on the tip of the needle, a
vein is sutured 1.5 mm from the
edge.
66.
NB! При наложении этих швов необходимо помнить о такомосложнении, как подхватывание противоположной стенки
артерии.
67.
NB! When applying these sutures, it is necessary to remember abouta complication like picking up the opposite wall of the artery.
68.
6. Сформировав дистальный угол анастомоза, с этой же иглой вколамис артерии на вену накладывают ещё 2 стежка по боковой стенке.
7.Далее нить с иглой отводят вправо и на нее помещают зажим типа
«бульдог».
8. Бужом проверяют проходимость дистальной части артерии.
69.
6. Having formed the distal angle of anastomosis, with the same needleinserted from the artery to the vein, impose 2 more stitches along the side
wall.
7.Next, the thread with the needle is taken to the right and a bulldog clamp is
placed on it.
8. Check the patency of the distal part of the artery.
70.
9. Левую (от хирурга) стенку анастомоза начинают шить с иглой,выходящей из проксимального угла артерии. Вену прокалывают
снаружи внутрь, а артерию изнутри кнаружи.
10. Последующие стежки накладывают без промежуточного
перехвата иглы.
71.
9. The left (surgeon’s side) wall of anastomosis begins to be sewn with aneedle coming out of the proximal corner of the artery. The vein is pierced
from the outside in, and the artery from the inside out.
10. Subsequent stitches are applied without intermediate interception of
the needle.
72.
11. Параллельно в противоположныйконец вены шприцом нагнетают
изотонический раствор хлорида
натрия.
12. Закончив формировать анастомоз
завязывают нити, узел затягивают
только до исчезновения поступления
раствора через швы.
73.
11. In parallel, at the opposite end of thevein, an isotonic solution of sodium
chloride is pumped with a syringe.
12. Having finished forming anastomosis,
threads are tied, the knot is tightened only
until the disappearance of the solution
through the seams.
74.
14. Качественно анастомозированная вена должна «входить» вартерию под углом менее 45°. При большем угле возникает
деформация вены у анастомоза при прижатии ее перикардом в
конце операции .
75.
14. Qualitatively anastomosed vein should "enter" the artery at an angleof less than 45 °. With a larger angle, deformation of the vein occurs in
anastomosis when it is pressed by the pericardium at the end of the
operation.
76.
Контроль качества наложения коронарного анастомоза1. Визуальный контроль проведения иглы через артерию и вену во
время шитья анастомоза. Необходимо исключить шитье «вслепую»
без четкого разграничения стенок вены и артерии.
2. Ревизия бужом выхода из анастомоза в дистальные отделы
артерии.
3. Гидравличесая проба: инфузия изотонического раствора хлорида
натрия в артерию через шунт. Раствор должен поступать свободно,
что свидетельствует о достаточной ёмкости дистального русла и об
отсутствии стенозов в артерии и анастомозе.
77.
Quality control of coronary anastomosis imposition1. Visual control of the needle through the artery and vein is necessary
during the suturing the anastomosis. It is necessary to exclude sewing
"blindly" without a clear distinction between the walls of the vein and
the artery.
2. Revision of the exit from anastomosis to the distal parts of the artery.
3. Hydraulic test: infusion of isotonic sodium chloride solution into the
artery through a shunt. The solution should flow freely, which indicates
a sufficient capacity of the distal bed and the absence of stenosis in the
artery and anastomosis.
78.
Наложение анастомозов с аортой1. Пальпаторная ревизия восходящей части аорты
2. С зажимом Сатинского отжимают восходящую часть аорты на
половину диаметра.
3. С отжатого участка аорты ножницами снимают адвентицию.
4. Остроконечным скальпелем №11 выполняют разрез аорты по 5мм на
всю толщину ее стенки.
5. Далее с помощью выкусывателя стенки аорты с диаметром 4-5мм
формируют округлые отверстия с ровными стенками.
6. Перед формированием анастомоза нужно убедиться в необходимой
длине шунта, отсутствии его перекрута и перегиба.
79.
Imposition of anastomoses with aorta1. Palpation of the ascending part of the aorta
2. With the Satinsky Debakey clamp, the ascending part of the aorta is
squeezed out by half the diameter.
3. From the squeezed area of the aorta with scissors remove adventitia.
4. With a pointed scalpel No. 11, an incision of the aorta is made 5mm
crossing the entire thickness of its wall.
5. Further, with the help of an aortic punch, rounded holes with smooth walls
are made in the walls of the aorta with a diameter of 4-5mm.
6. Before the formation of anastomosis, you need to make sure of the required
length of the shunt, the absence of its torsion and inflection
80.
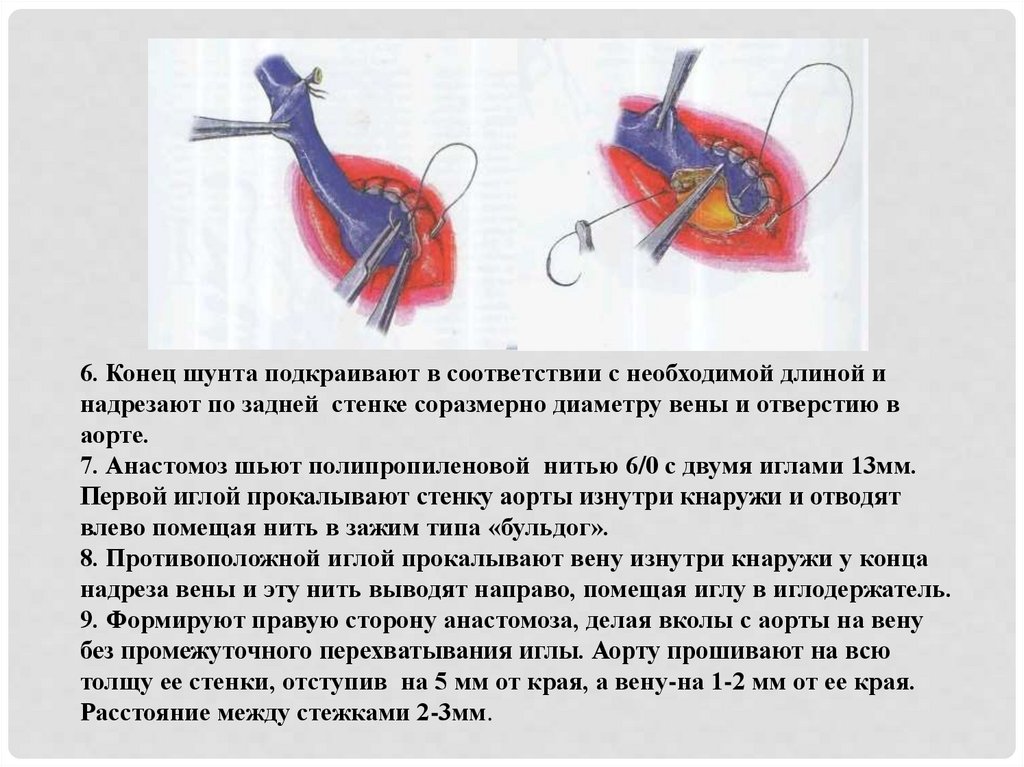
6. Конец шунта подкраивают в соответствии с необходимой длиной инадрезают по задней стенке соразмерно диаметру вены и отверстию в
аорте.
7. Анастомоз шьют полипропиленовой нитью 6/0 с двумя иглами 13мм.
Первой иглой прокалывают стенку аорты изнутри кнаружи и отводят
влево помещая нить в зажим типа «бульдог».
8. Противоположной иглой прокалывают вену изнутри кнаружи у конца
надреза вены и эту нить выводят направо, помещая иглу в иглодержатель.
9. Формируют правую сторону анастомоза, делая вколы с аорты на вену
без промежуточного перехватывания иглы. Аорту прошивают на всю
толщу ее стенки, отступив на 5 мм от края, а вену-на 1-2 мм от ее края.
Расстояние между стежками 2-3мм.
81.
6. The end of the shunt is trimmed in accordance to the required length and cutalong the back wall proportionate to the diameter of the vein and the hole in the
aorta.
7. Anastomosis is sewn with polypropylene thread 6/0 with two needles 13mm.
The first needle pierces the wall of the aorta from the inside out, then taken to
the left and placed in a clamp of the "bulldog" type.
8. The opposite needle pierces the vein from the inside out at the end of the
incision of the vein and this thread is brought to the right, placing the needle in
the needle holder.
9. Form the right side of the anastomosis, making injections from the aorta to
the vein without intermediate interception of the needle. The aorta is stitched
through entire thickness of its wall, retreating 5 mm from the edge, and the
vein1-2 mm from its edge. Distance between stitches 2-3mm.
82.
10. Пройдя половину анастомоза, на эту нить перекладывают зажимтипа «бульдог» и продолжают шить анастомоз противоположной иглой с
вены на аорту.
11. Закончив анастомоз, конец нитей связывают между собой и обрезают.
83.
10. After passing half of the anastomosis, a bulldog clamp is shifted to thisthread and anastomosis is continued to be sewn with the opposite needle from
the vein to the aorta.
11. Having finished anastomosis, the end of the threads are tied together and
cut.