


 Программирование
Похожие презентации:


Software Installation guide for the Windows environment. Java from scratch. Get ready before the classes
1.
Software Installation guide for theWindows environment
Java from scratch
Get ready before the classes☺
2.
Computer specification – Java for beginners✔ min. 8 GB RAM,
✔ recommended processor Intel i5 lub Amd10,
✔ min. 8GB free disc space
✔ System min. Windows 7.
3.
List of programs for the Java from Scratch course - to download at home BEFORETHE CLASSES
Before the course start, please remember to install Java JDK8 and 2 versions of IntelliJ IDEA: Community
and Ultimate. At first, only Community will be used.
However, with IntelliJ IDEA Ultimate, please until the JSP and Servlet technology classes will start. From
that moment you will use intelliJ and also get the free access for 6 month.
Other programs should be downloaded and installed before classes to be able to start the activity.
4.
List of programs and tools used during the Java from ScratchPlease download and install the following programs at home before the classes!
✔ Slack communicator - https://slack.com/get
✔ Java JDK8 - installation guide(slide 6)
✔ IntelliJ IDEA - installation guide(slide 21)
✔ Git - installation guide(slide 33)
✔ maven
Download: : https://maven.apache.org/download.cgi
Installation: https://maven.apache.org/install.html
✔ MySQL- installation guide(slide 51)
✔ Total Commander
Download and install: https://www.ghisler.com/download.htm
5.
JDK – Java Development Kit6.
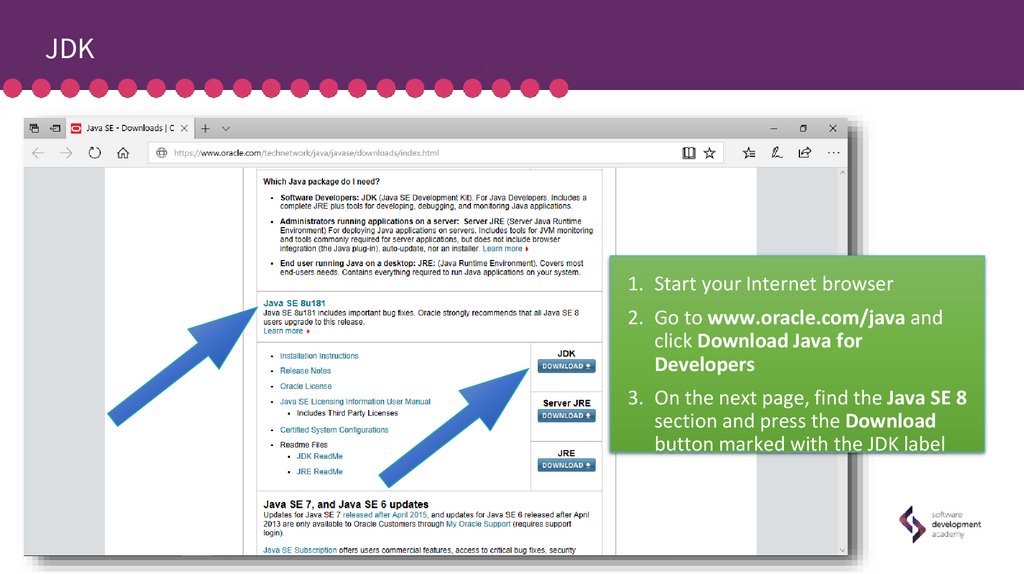
JDK1. Start your Internet browser
2. Go to www.oracle.com/java and
click Download Java for
Developers
3. On the next page, find the Java SE 8
section and press the Download
button marked with the JDK label
7.
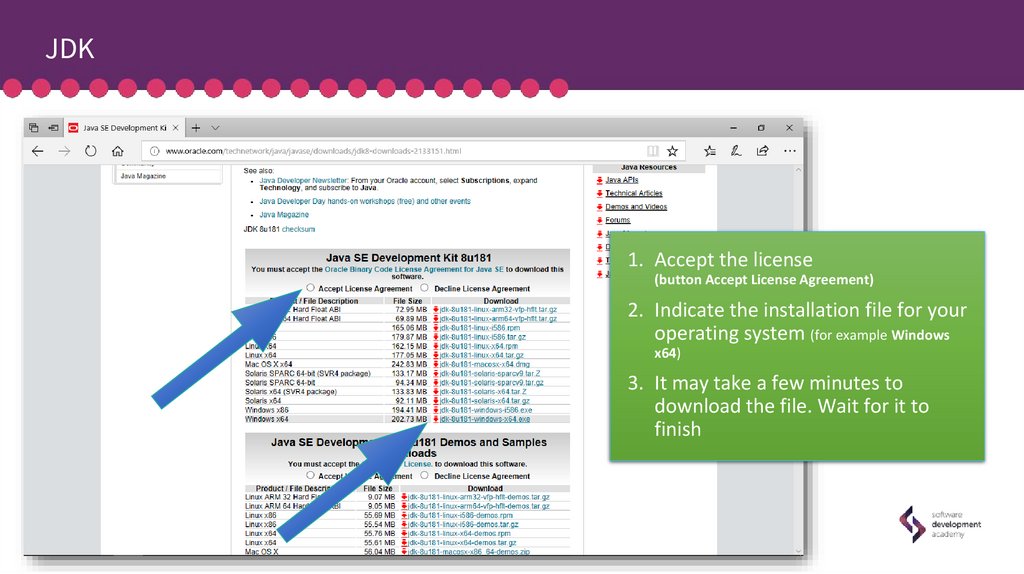
JDK1. Accept the license
(button Accept License Agreement)
2. Indicate the installation file for your
operating system (for example Windows
x64)
3. It may take a few minutes to
download the file. Wait for it to
finish
8.
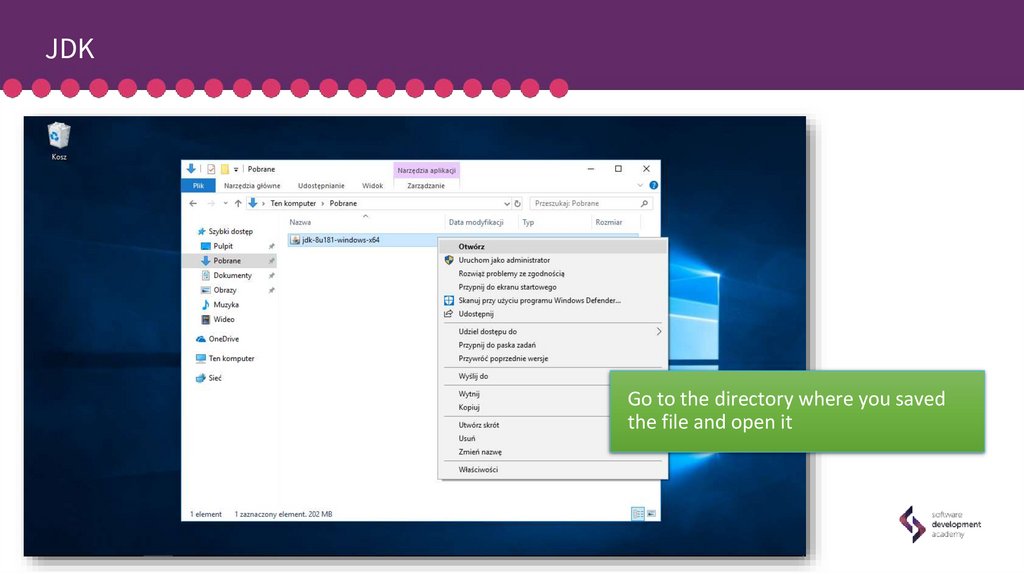
JDKGo to the directory where you saved
the file and open it
9.
JDKThe installation program will start
Go to the next step by pressing the
Next button
10.
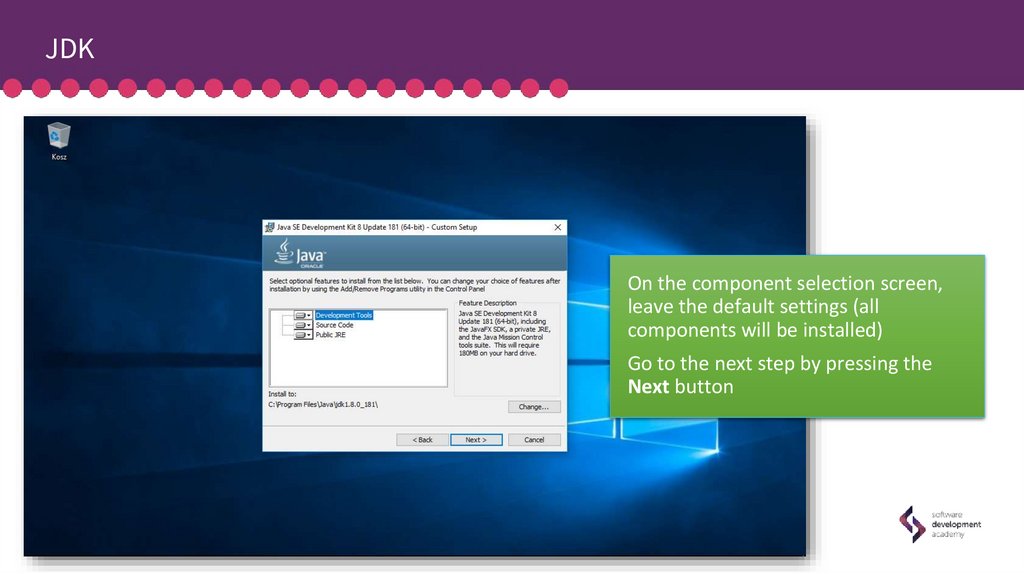
JDKOn the component selection screen,
leave the default settings (all
components will be installed)
Go to the next step by pressing the
Next button
11.
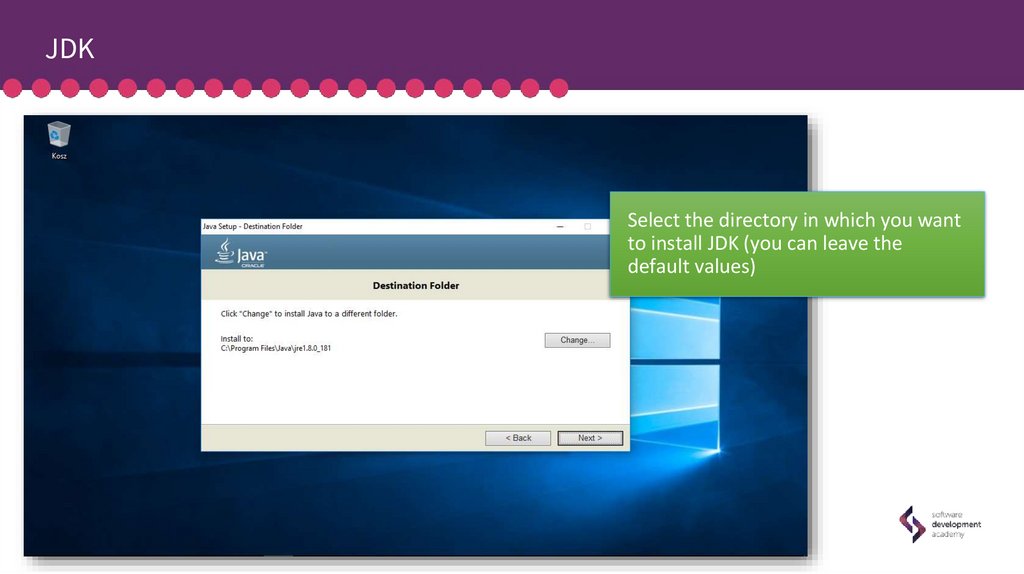
JDKSelect the directory in which you want
to install JDK (you can leave the
default values)
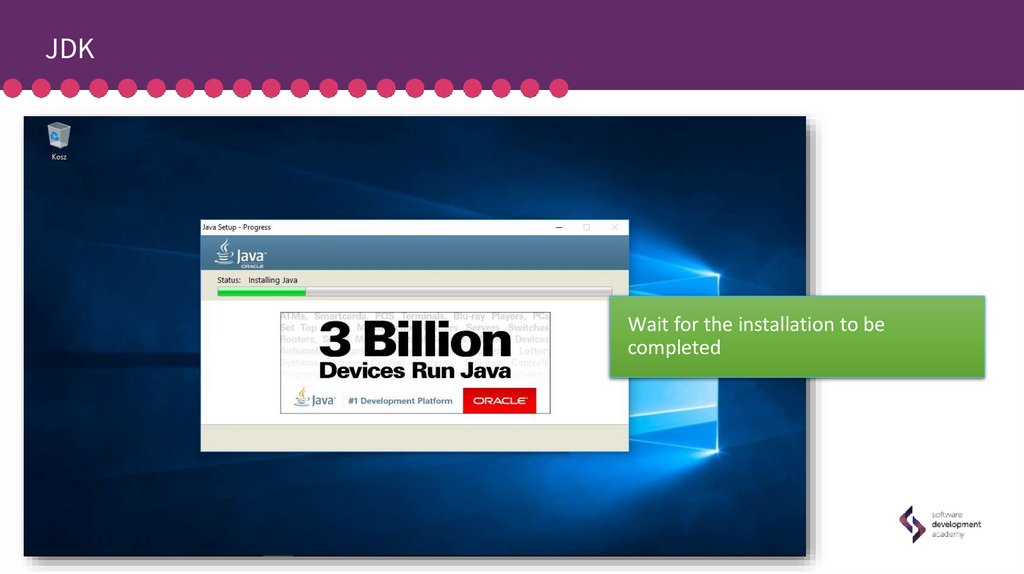
12.
JDKWait for the installation to be
completed
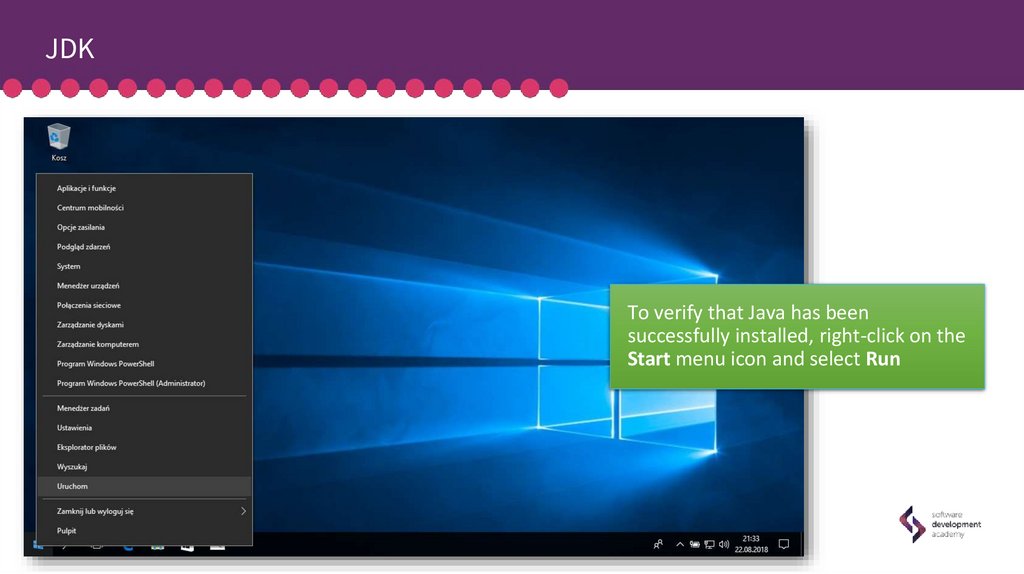
13.
JDKTo verify that Java has been
successfully installed, right-click on the
Start menu icon and select Run
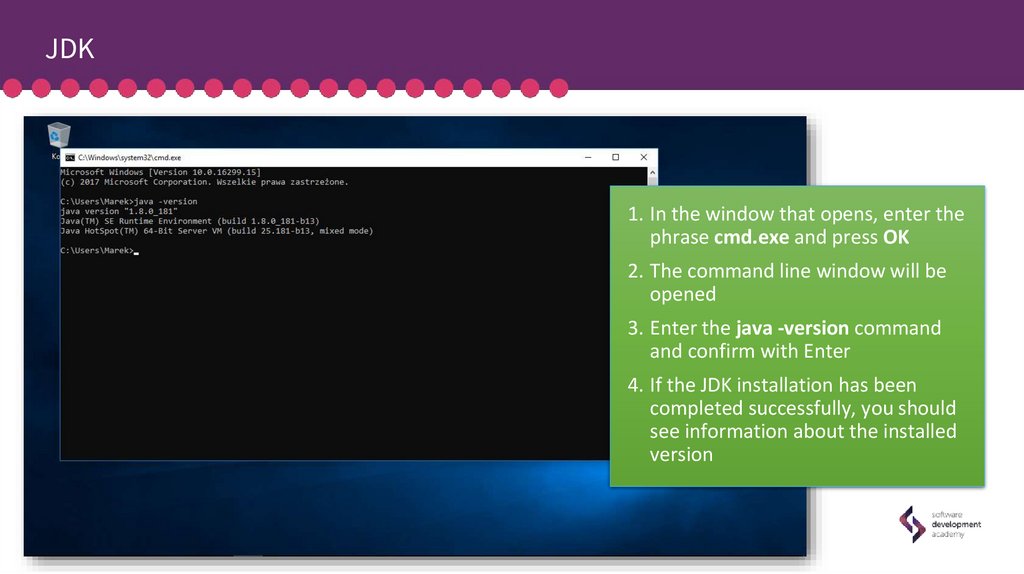
14.
JDK1. In the window that opens, enter the
phrase cmd.exe and press OK
2. The command line window will be
opened
3. Enter the java -version command
and confirm with Enter
4. If the JDK installation has been
completed successfully, you should
see information about the installed
version
15.
JDKTo set the JAVA_HOME environment
variable click on the magnifier icon
and start writing the phrase Edit
system environment variables. Rightclick on the found position
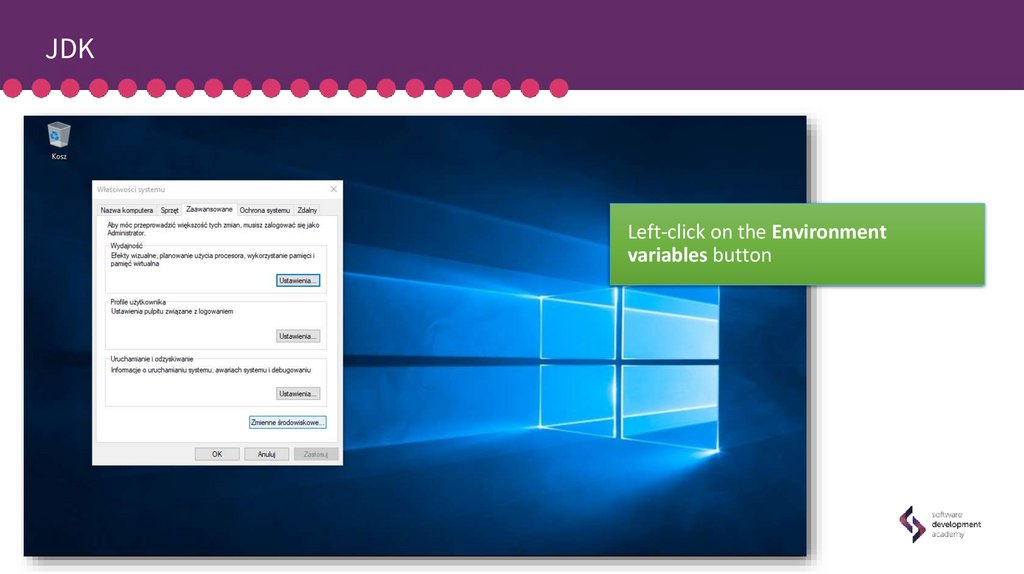
16.
JDKLeft-click on the Environment
variables button
17.
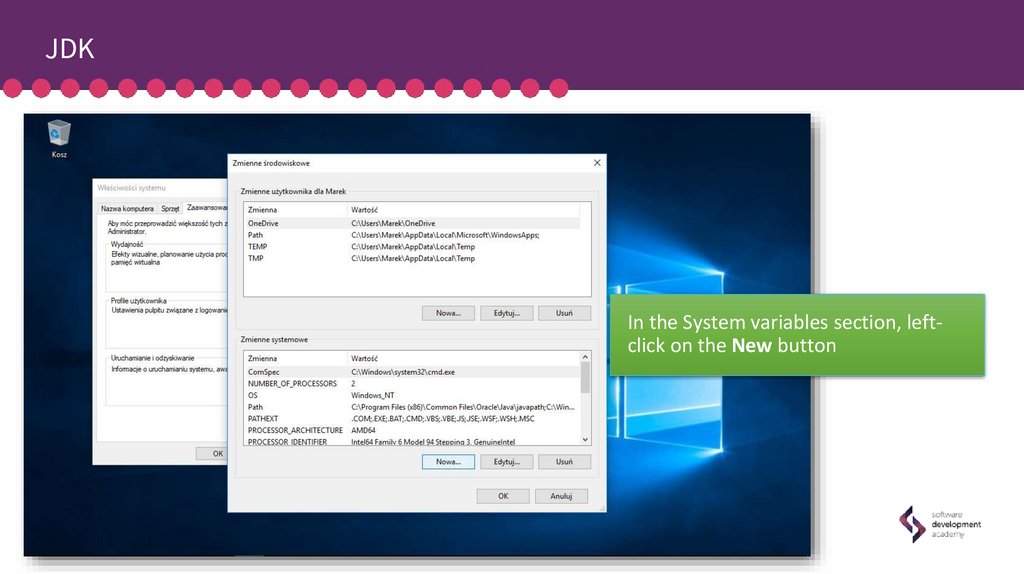
JDKIn the System variables section, leftclick on the New button
18.
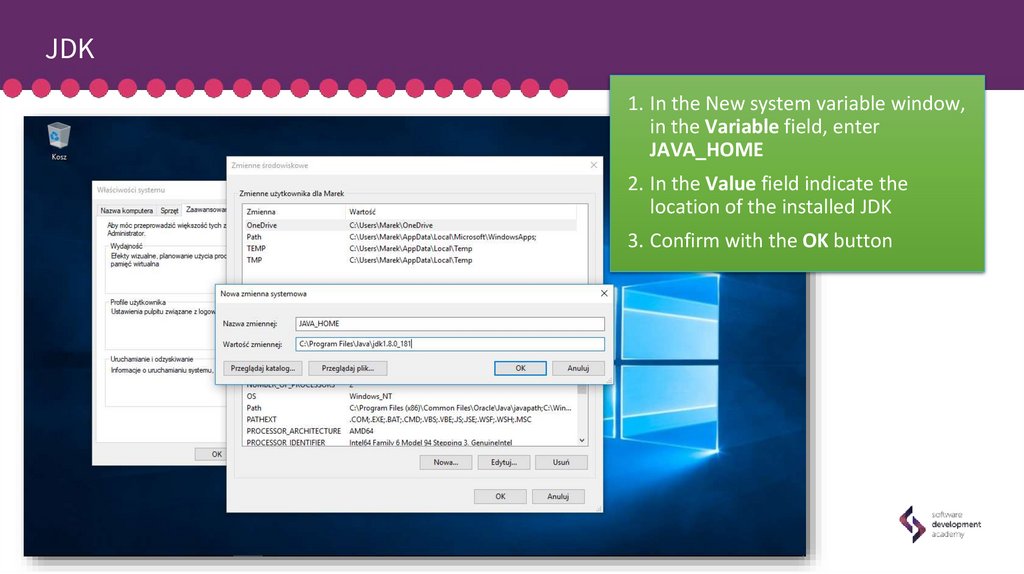
JDK1. In the New system variable window,
in the Variable field, enter
JAVA_HOME
2. In the Value field indicate the
location of the installed JDK
3. Confirm with the OK button
19.
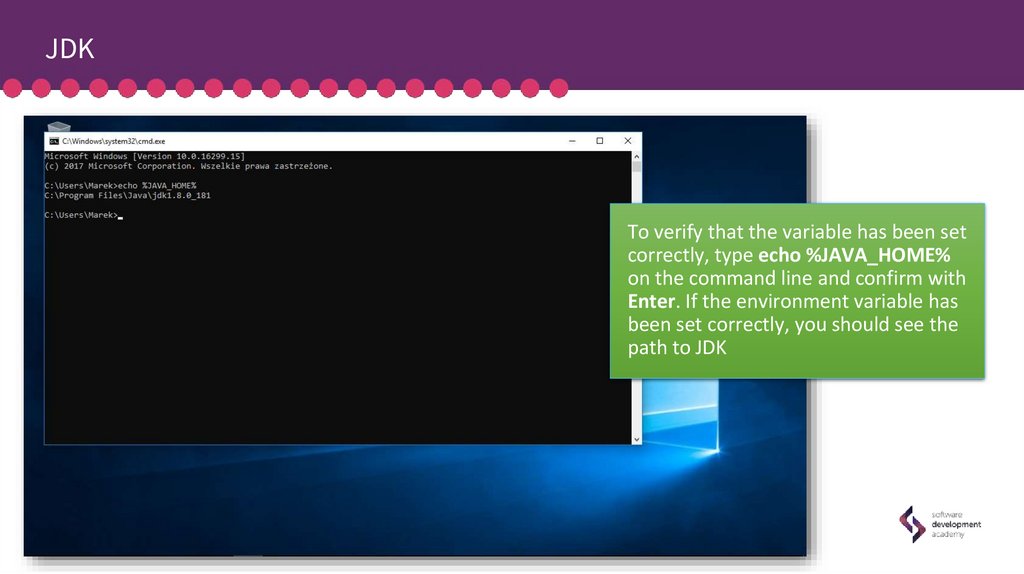
JDKTo verify that the variable has been set
correctly, type echo %JAVA_HOME%
on the command line and confirm with
Enter. If the environment variable has
been set correctly, you should see the
path to JDK
20.
IntelliJ IDEA21.
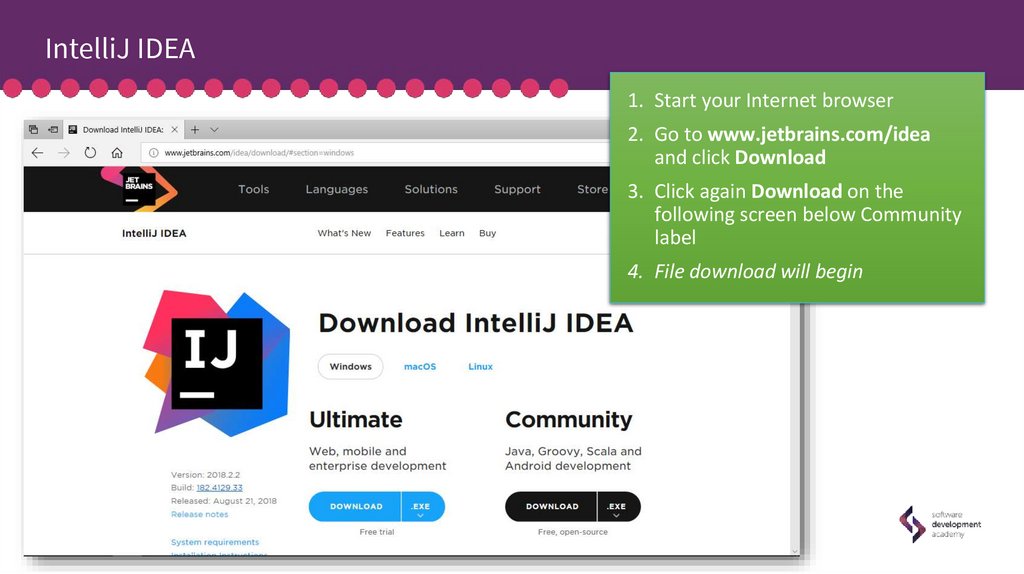
IntelliJ IDEA1. Start your Internet browser
2. Go to www.jetbrains.com/idea
and click Download
3. Click again Download on the
following screen below Community
label
4. File download will begin
22.
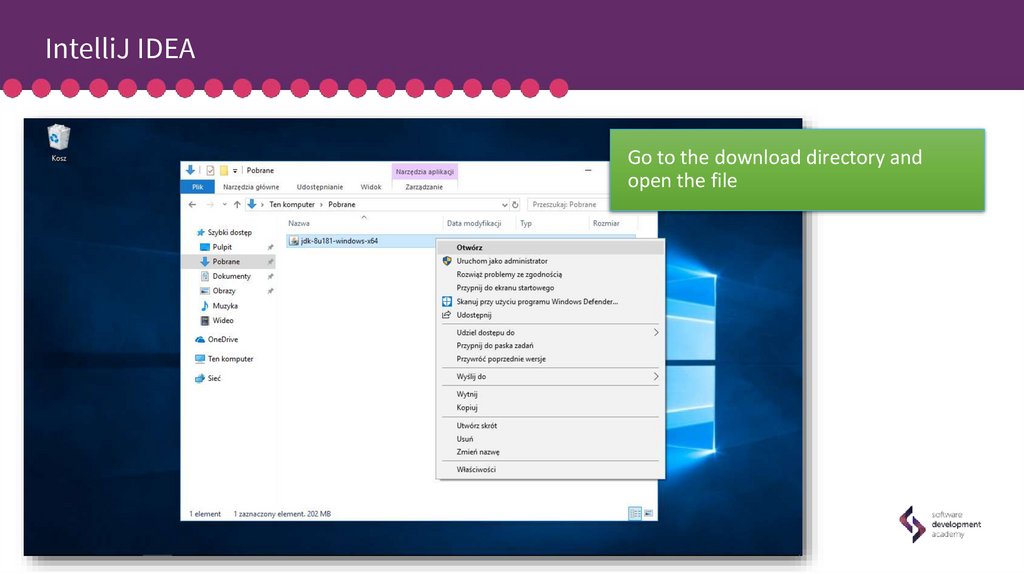
IntelliJ IDEAGo to the download directory and
open the file
23.
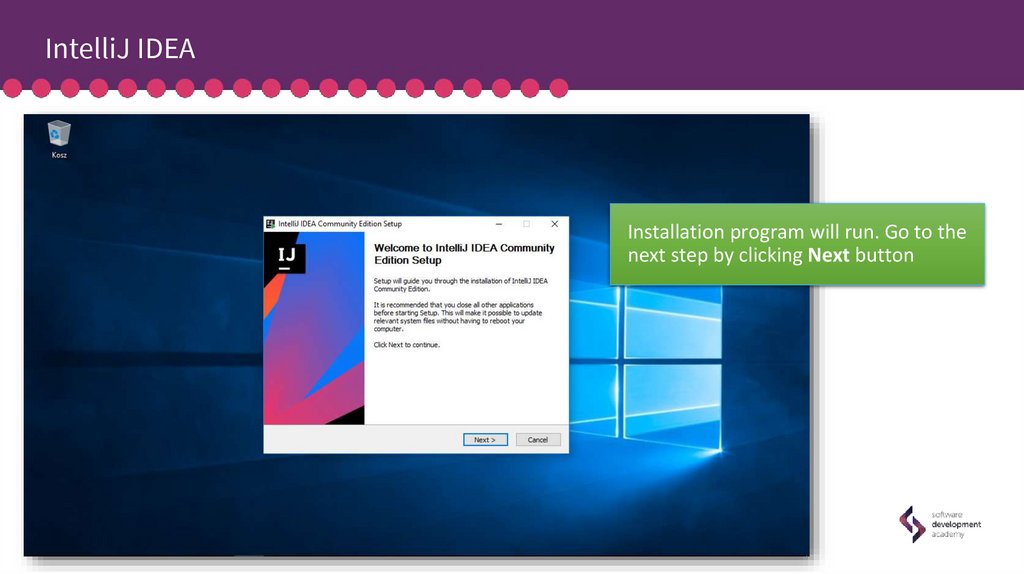
IntelliJ IDEAInstallation program will run. Go to the
next step by clicking Next button
24.
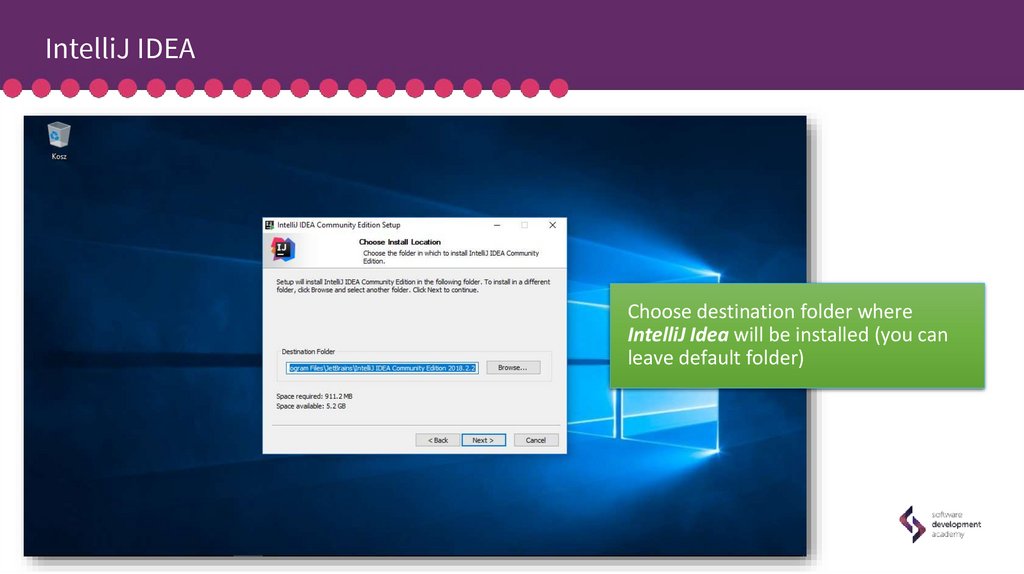
IntelliJ IDEAChoose destination folder where
IntelliJ Idea will be installed (you can
leave default folder)
25.
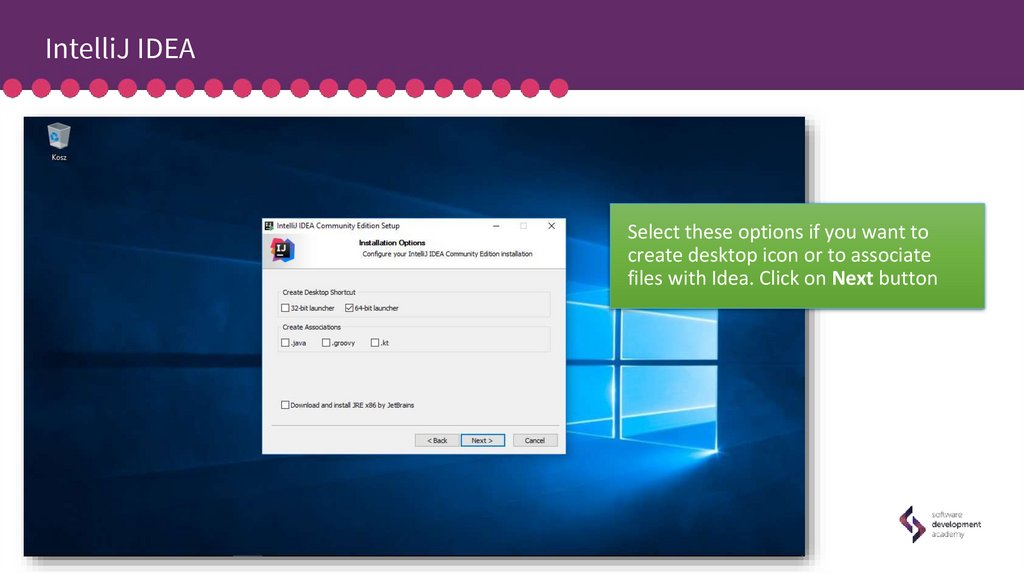
IntelliJ IDEASelect these options if you want to
create desktop icon or to associate
files with Idea. Click on Next button
26.
IntelliJ IDEAWait a moment for installation to be
completed
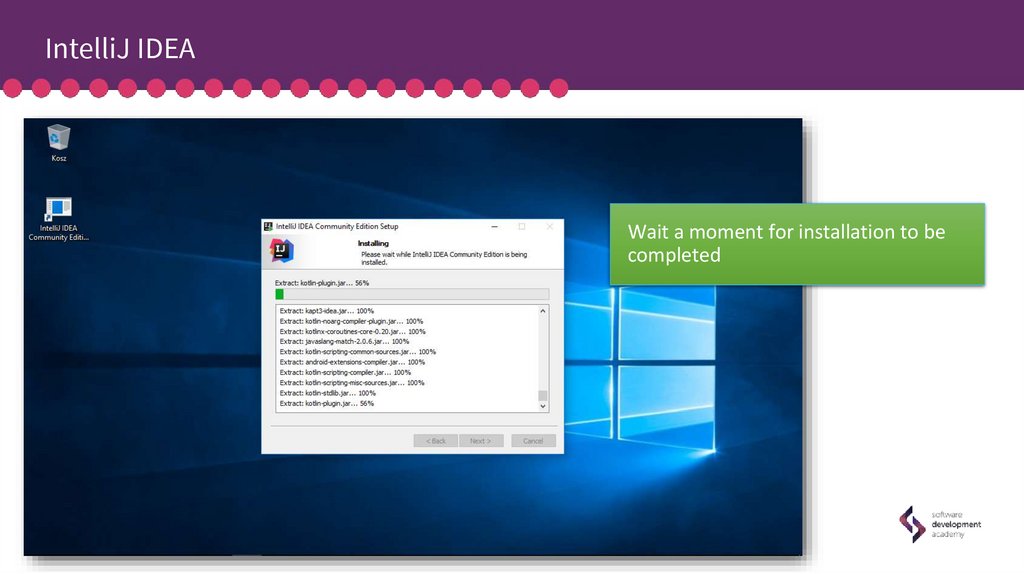
27.
IntelliJ IDEAComplete the installation process by
clicking Finish button
28.
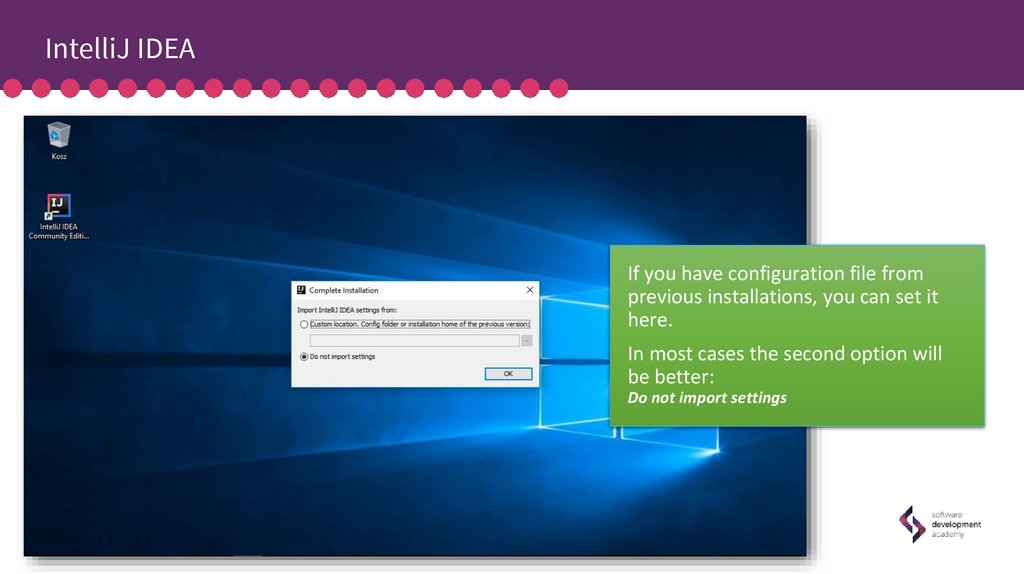
IntelliJ IDEAIf you have configuration file from
previous installations, you can set it
here.
In most cases the second option will
be better:
Do not import settings
29.
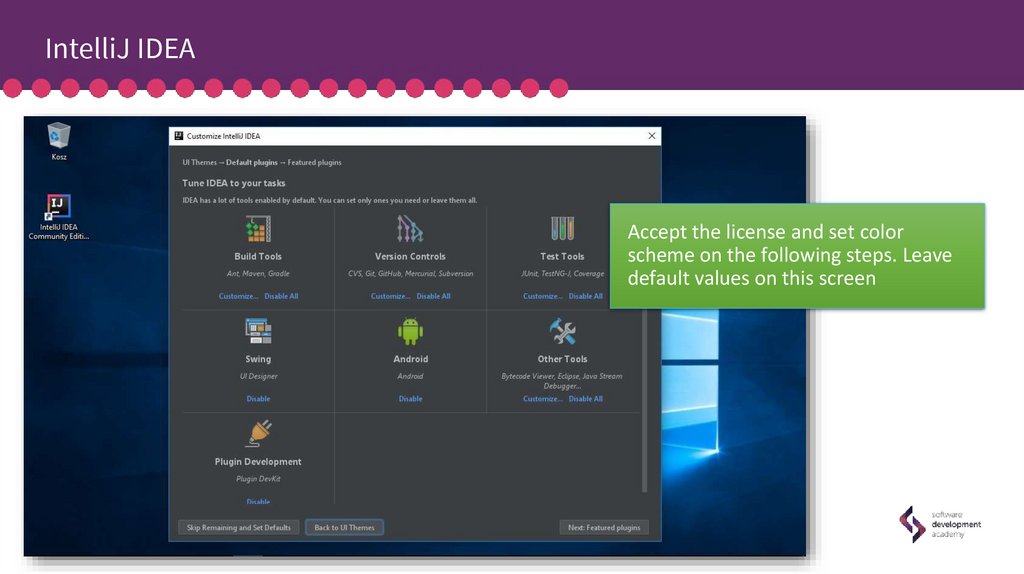
IntelliJ IDEAAccept the license and set color
scheme on the following steps. Leave
default values on this screen
30.
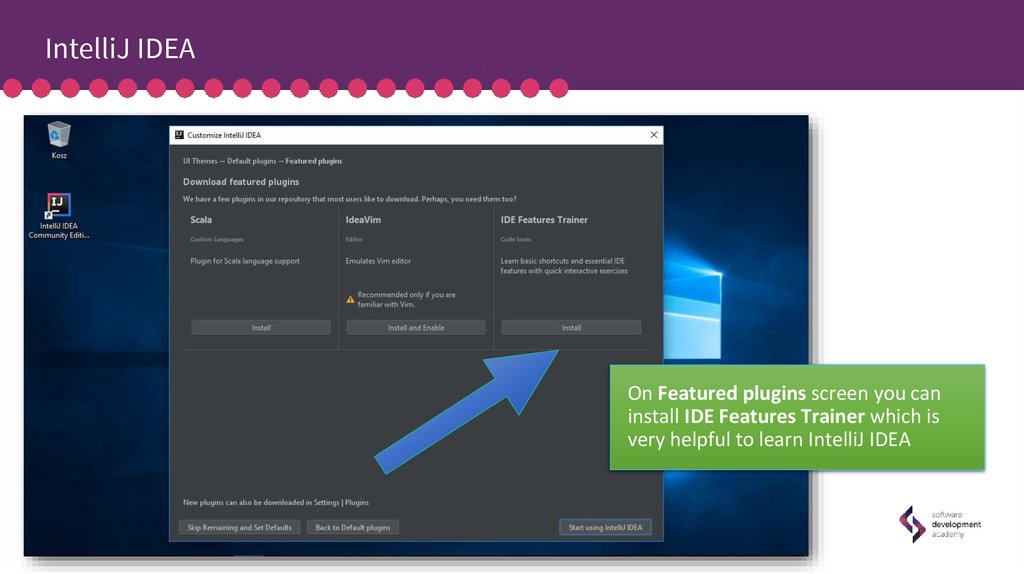
IntelliJ IDEAOn Featured plugins screen you can
install IDE Features Trainer which is
very helpful to learn IntelliJ IDEA
31.
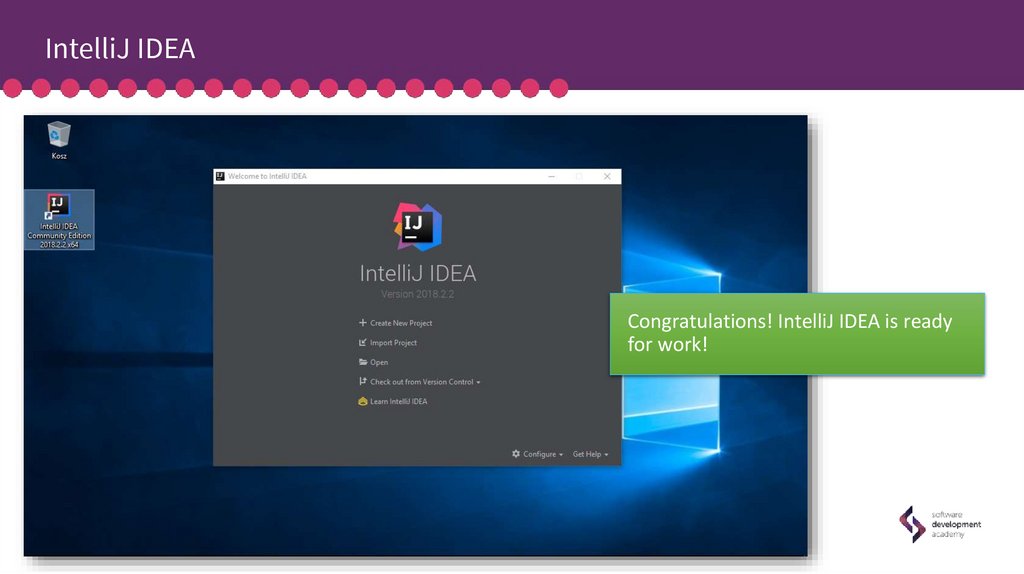
IntelliJ IDEACongratulations! IntelliJ IDEA is ready
for work!
32.
GIT33.
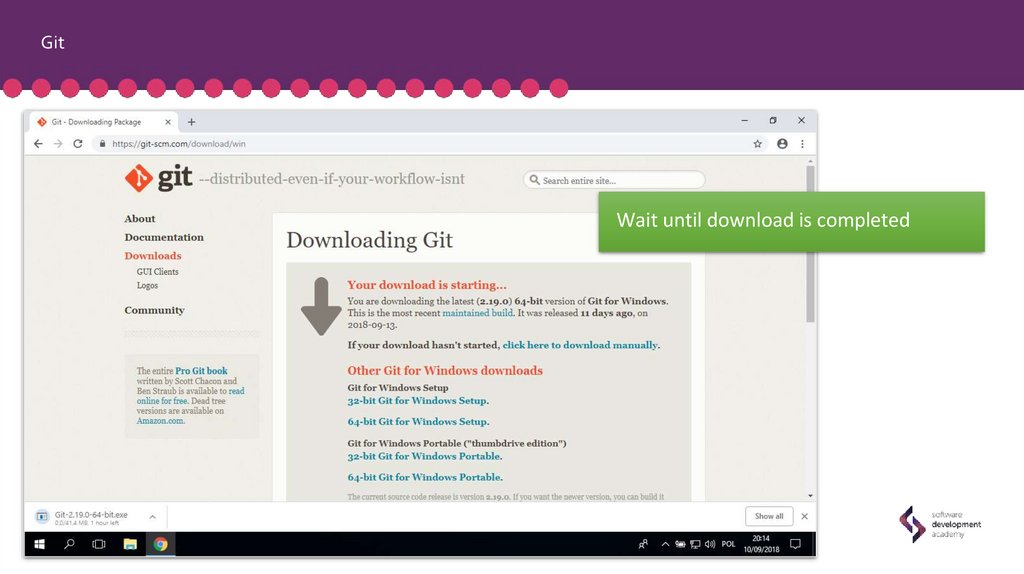
Git1. Start your Internet browser
2. Go to
https://git-scm.com
3. Press Download for Windows
34.
GitWait until download is completed
35.
GitGo to the download directory open the
file
36.
GitPress Next button after you read the
license
37.
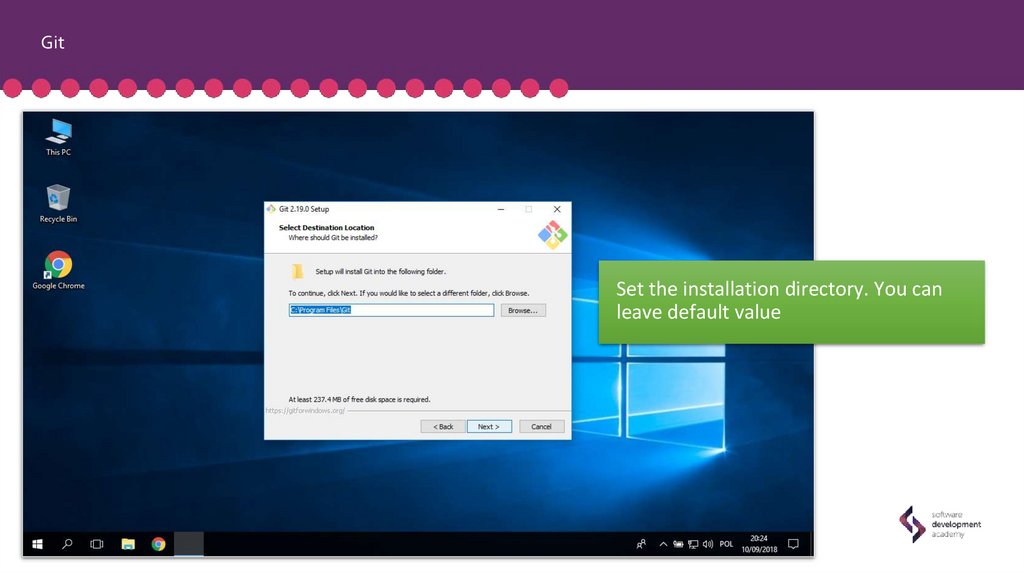
GitSet the installation directory. You can
leave default value
38.
GitChoose components that should be
installed. You can leave default values
39.
GitEnter Start Menu shortcut name. You
can leave default value. Click Next
button
40.
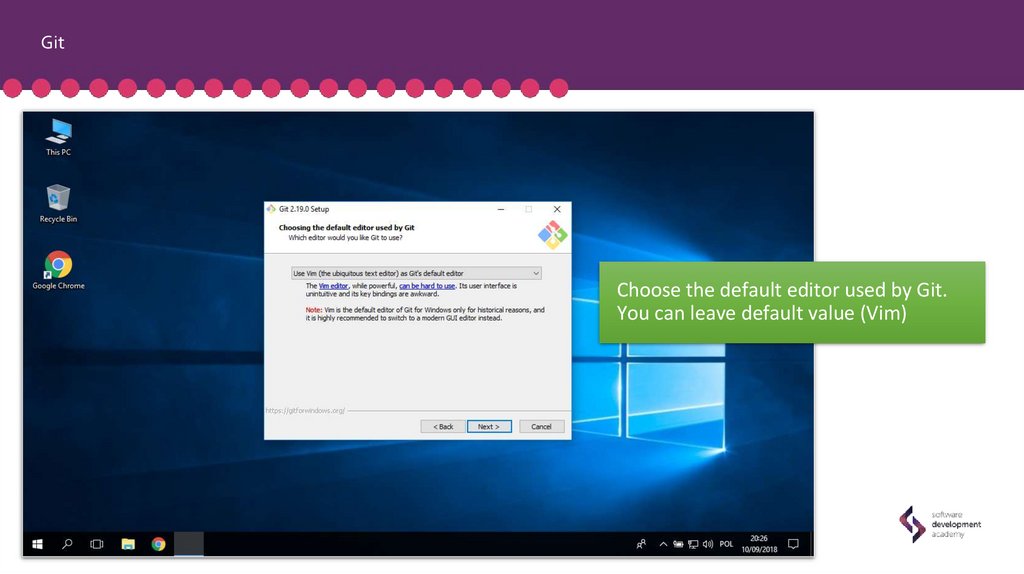
GitChoose the default editor used by Git.
You can leave default value (Vim)
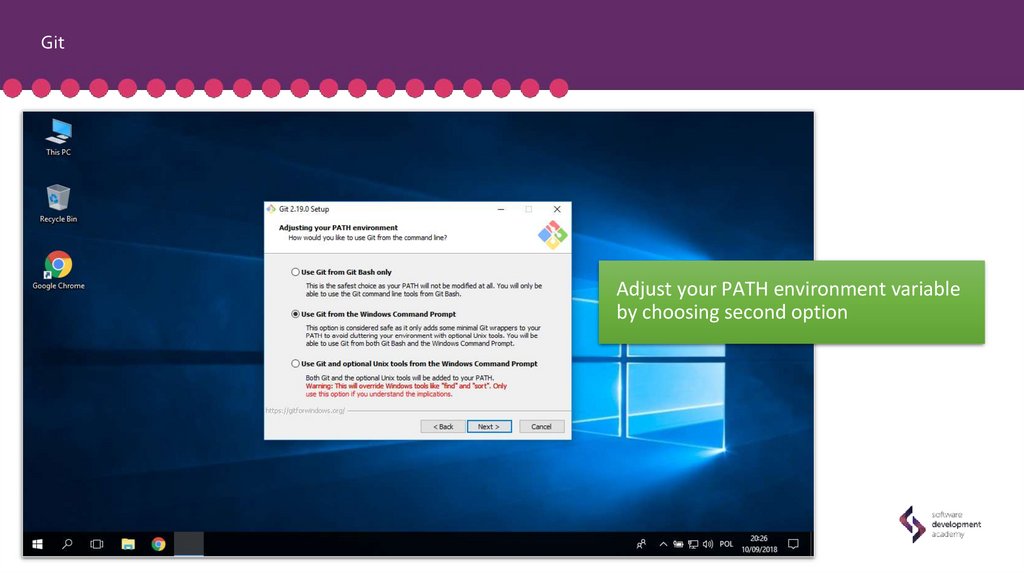
41.
GitAdjust your PATH environment variable
by choosing second option
42.
GitChoose OpenSSL on this screen
43.
GitConfigure the line ending conversions
by choosing Checkout Windows-style,
commit Unix-style line endings
44.
GitChoose MinTTY as default terminal
45.
GitYou can leave default values on this
screen
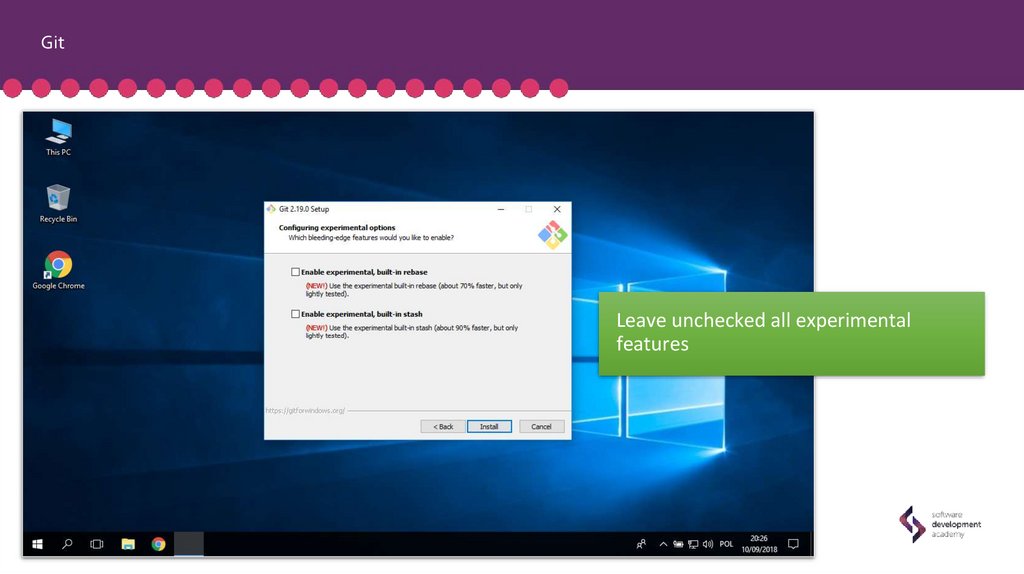
46.
GitLeave unchecked all experimental
features
47.
GitWait a moment until installation is
complete
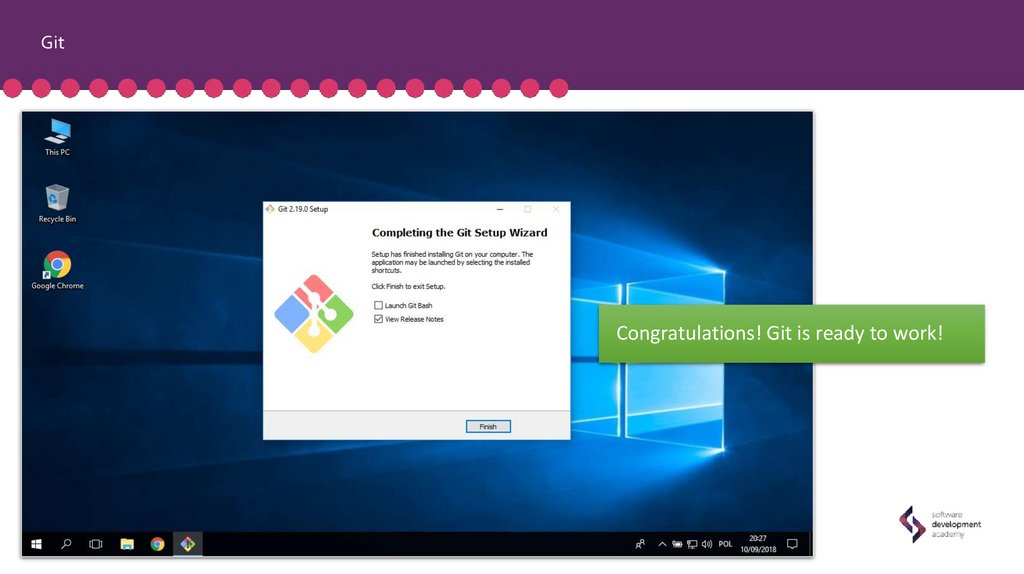
48.
GitCongratulations! Git is ready to work!
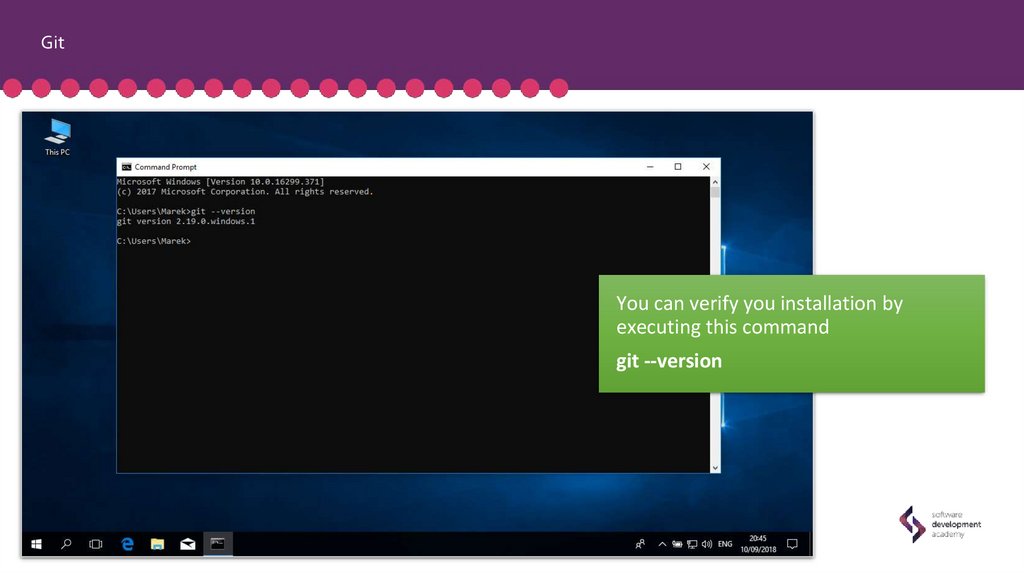
49.
GitYou can verify you installation by
executing this command
git --version
50.
MySQL51.
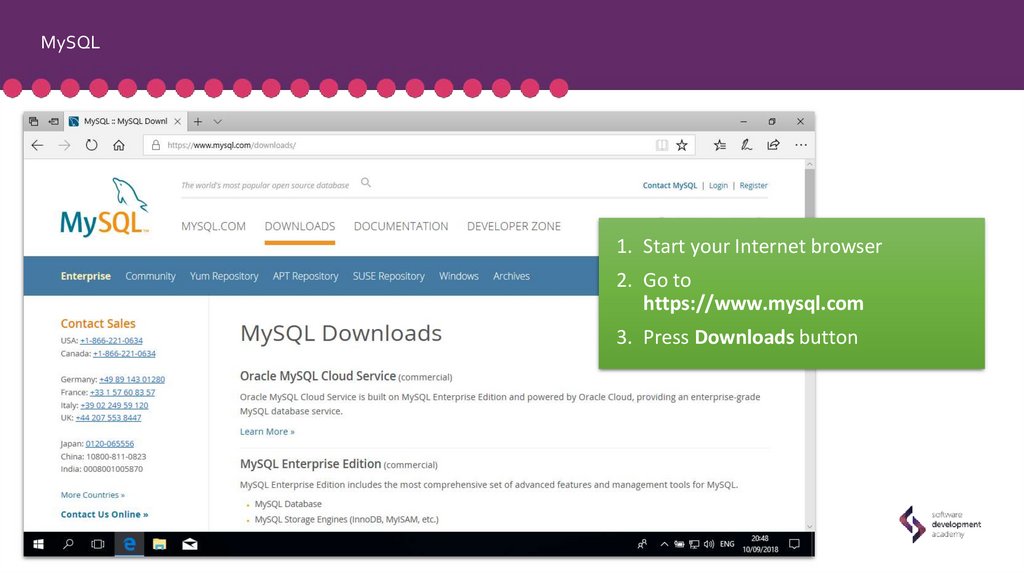
MySQL1. Start your Internet browser
2. Go to
https://www.mysql.com
3. Press Downloads button
52.
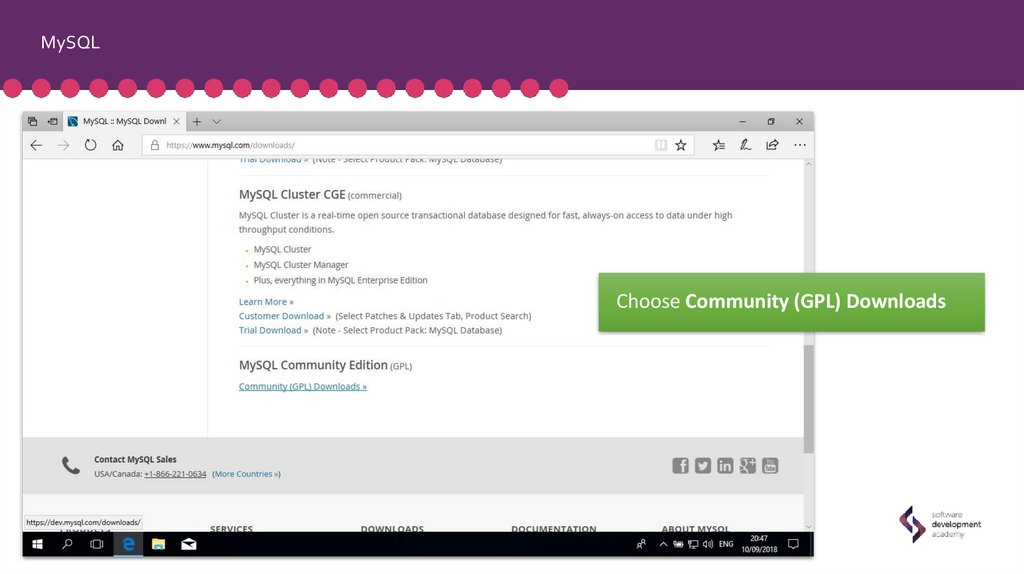
MySQLChoose Community (GPL) Downloads
53.
MySQLPress Download button on full MSI
Installer (second position)
54.
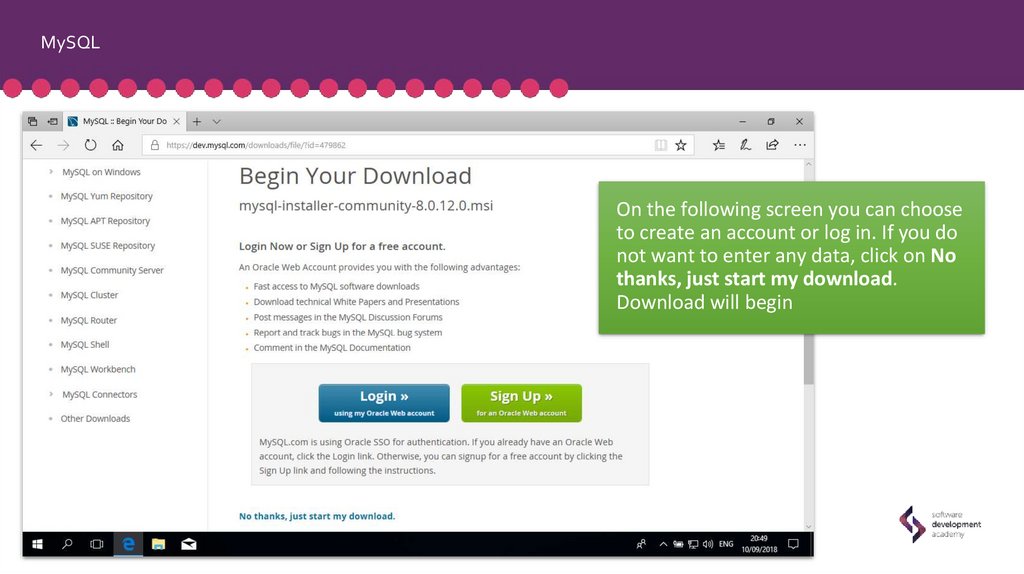
MySQLOn the following screen you can choose
to create an account or log in. If you do
not want to enter any data, click on No
thanks, just start my download.
Download will begin
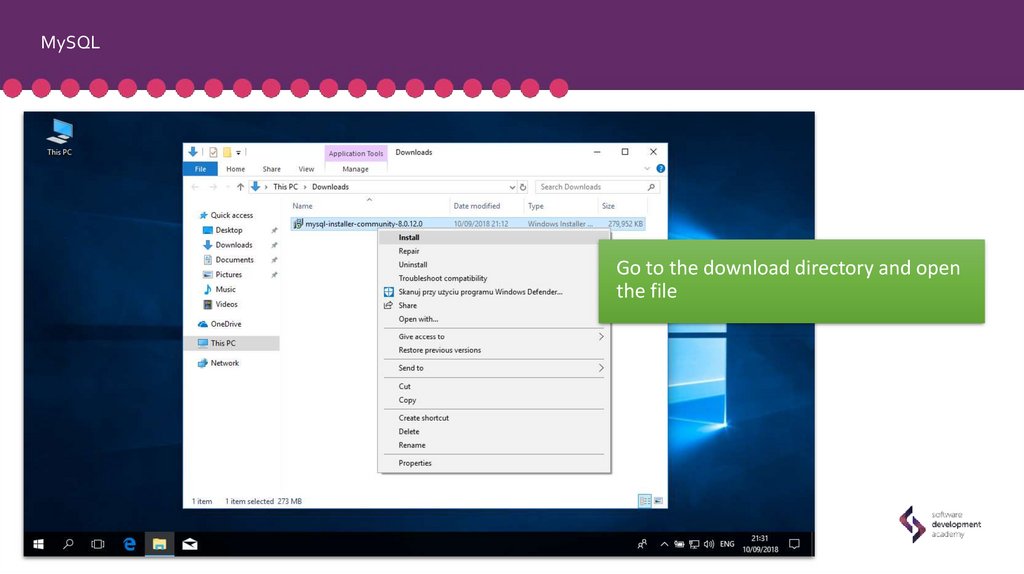
55.
MySQLGo to the download directory and open
the file
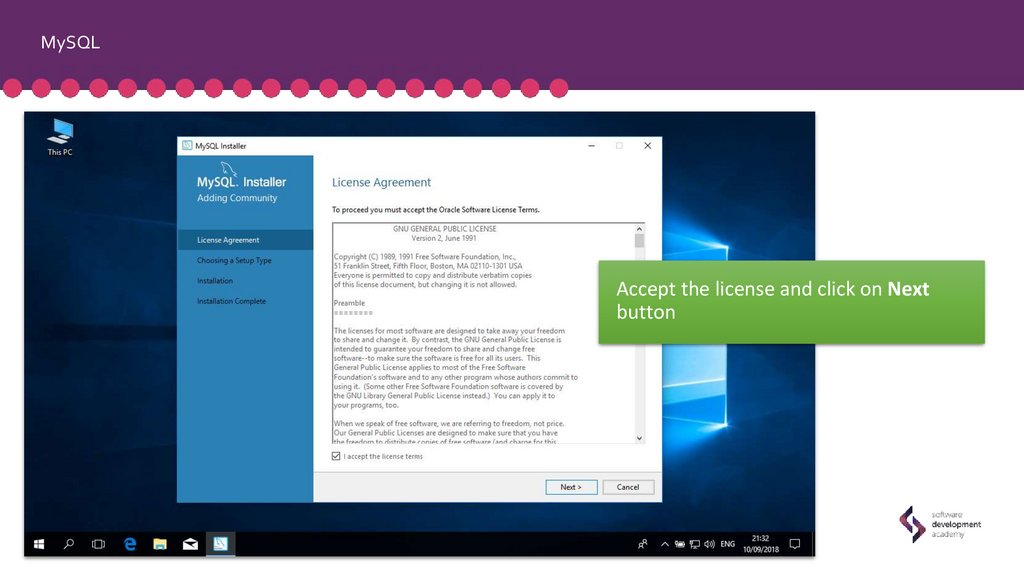
56.
MySQLAccept the license and click on Next
button
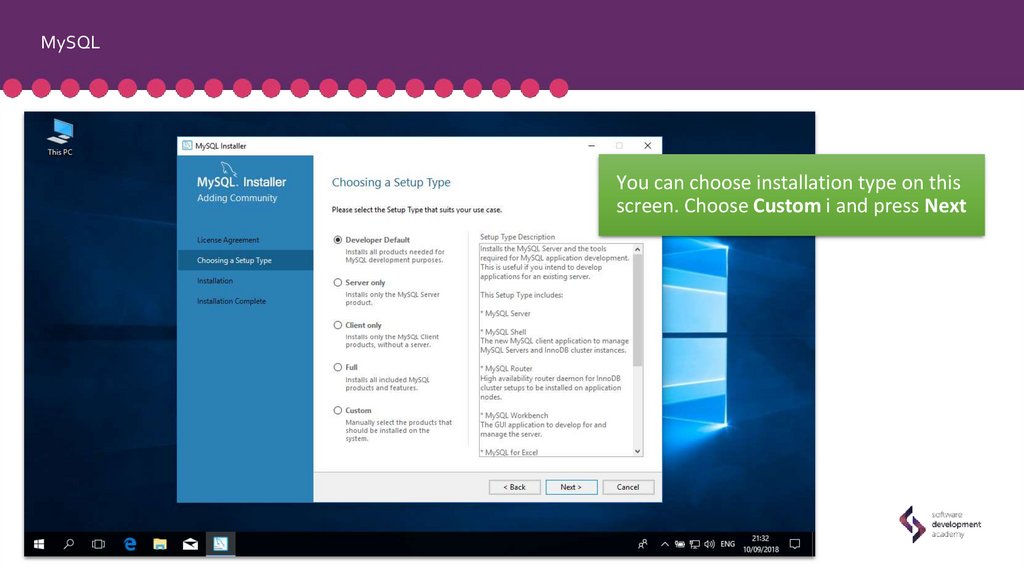
57.
MySQLYou can choose installation type on this
screen. Choose Custom i and press Next
58.
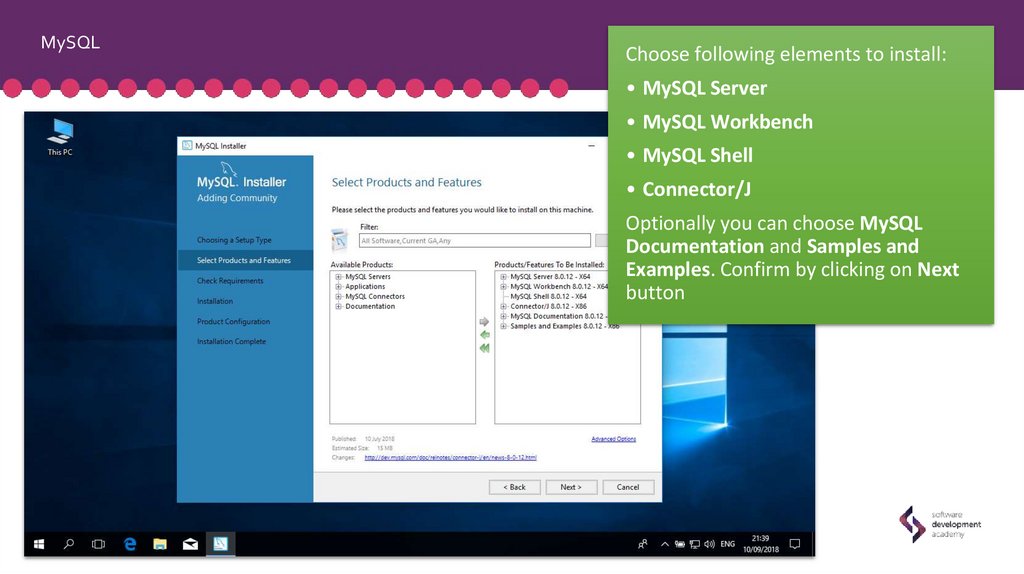
MySQLChoose following elements to install:
• MySQL Server
• MySQL Workbench
• MySQL Shell
• Connector/J
Optionally you can choose MySQL
Documentation and Samples and
Examples. Confirm by clicking on Next
button
59.
MySQLOn Check Requirements screen you’ll
see additional components that have to
be installed. Click Execute to install
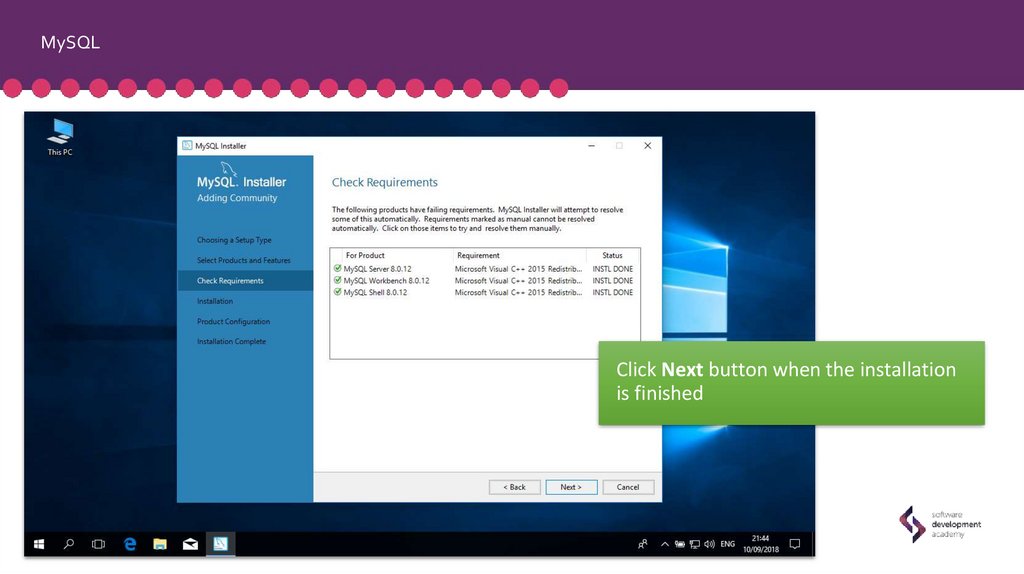
60.
MySQLClick Next button when the installation
is finished
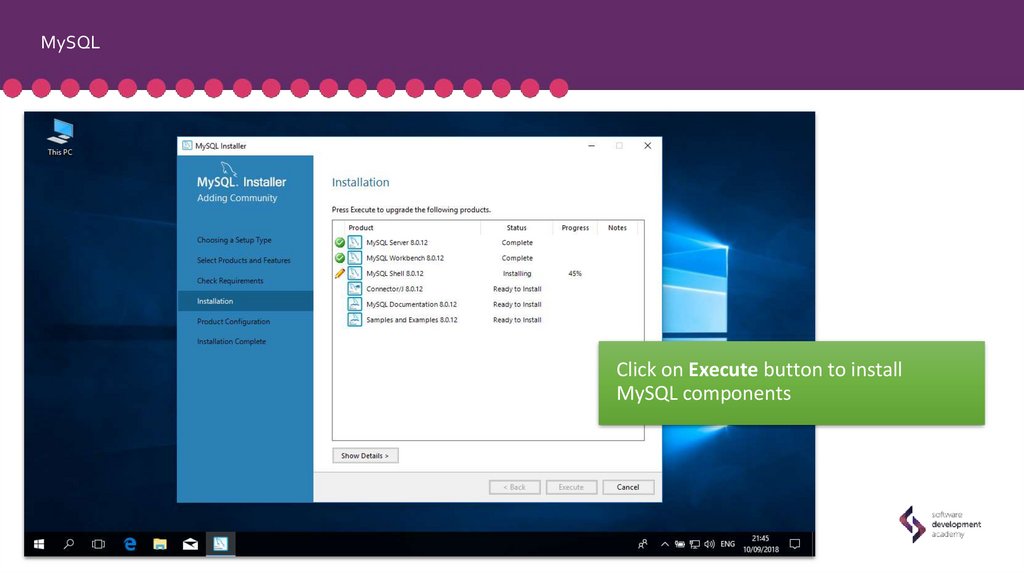
61.
MySQLClick on Execute button to install
MySQL components
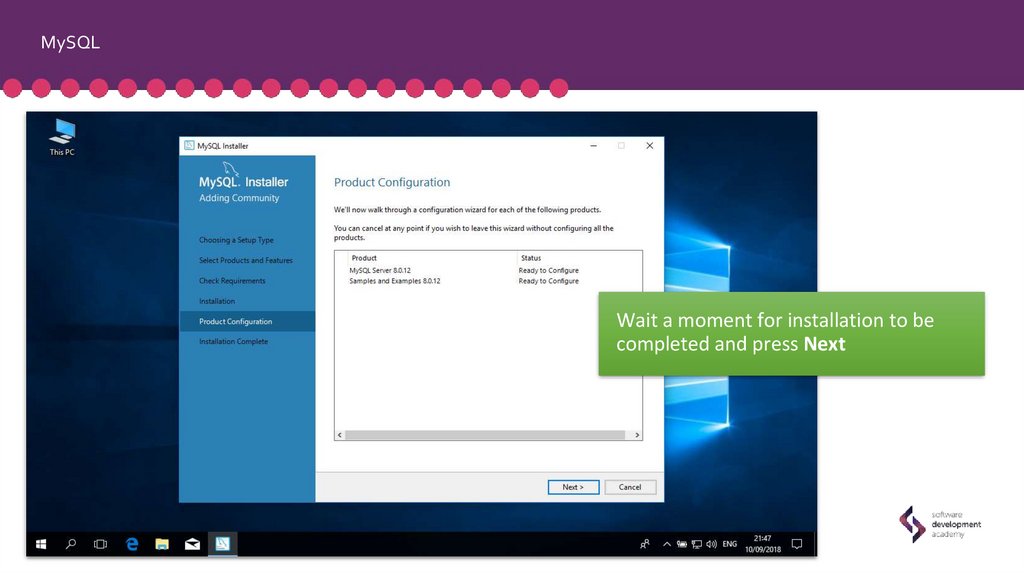
62.
MySQLWait a moment for installation to be
completed and press Next
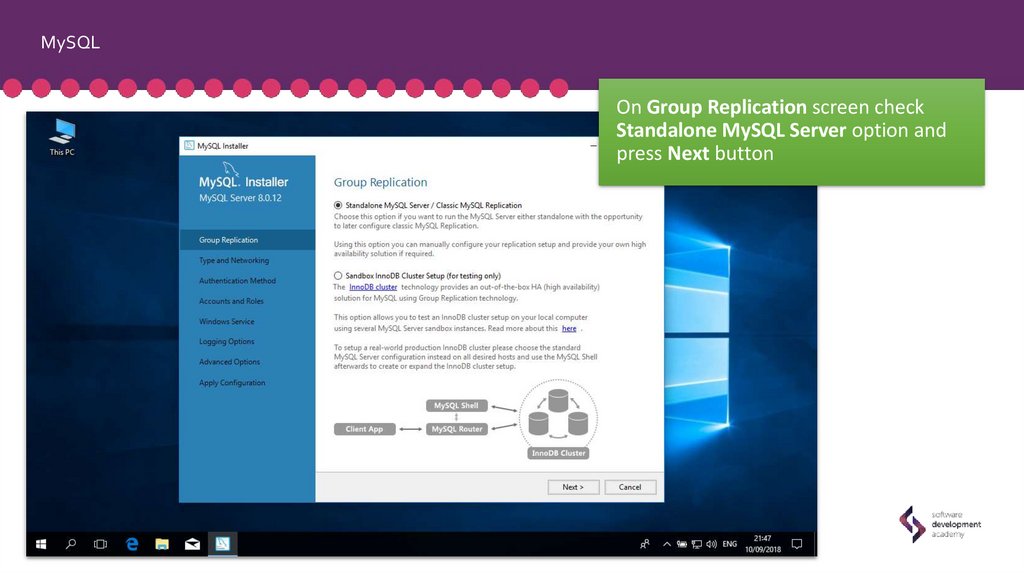
63.
MySQLOn Group Replication screen check
Standalone MySQL Server option and
press Next button
64.
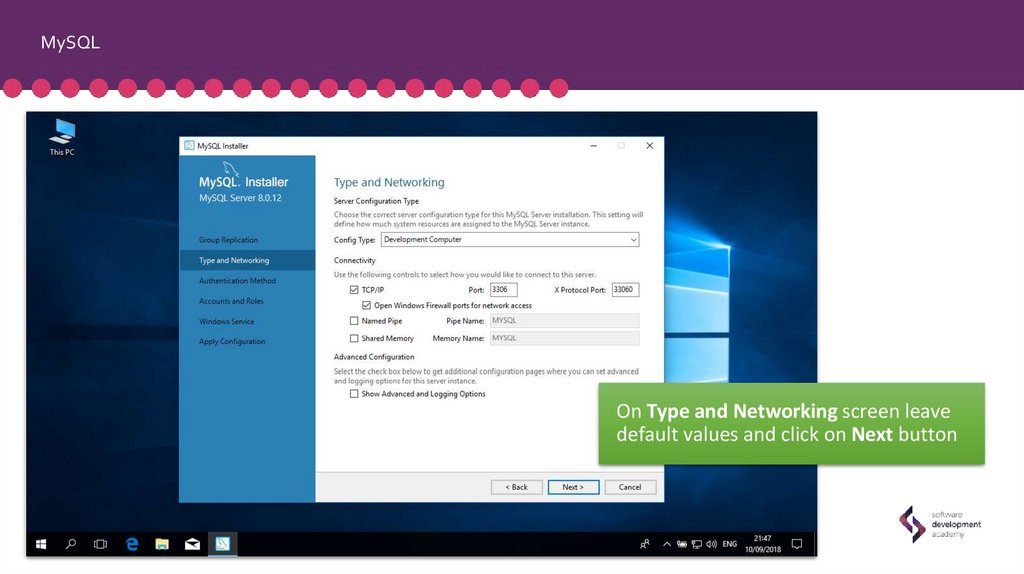
MySQLOn Type and Networking screen leave
default values and click on Next button
65.
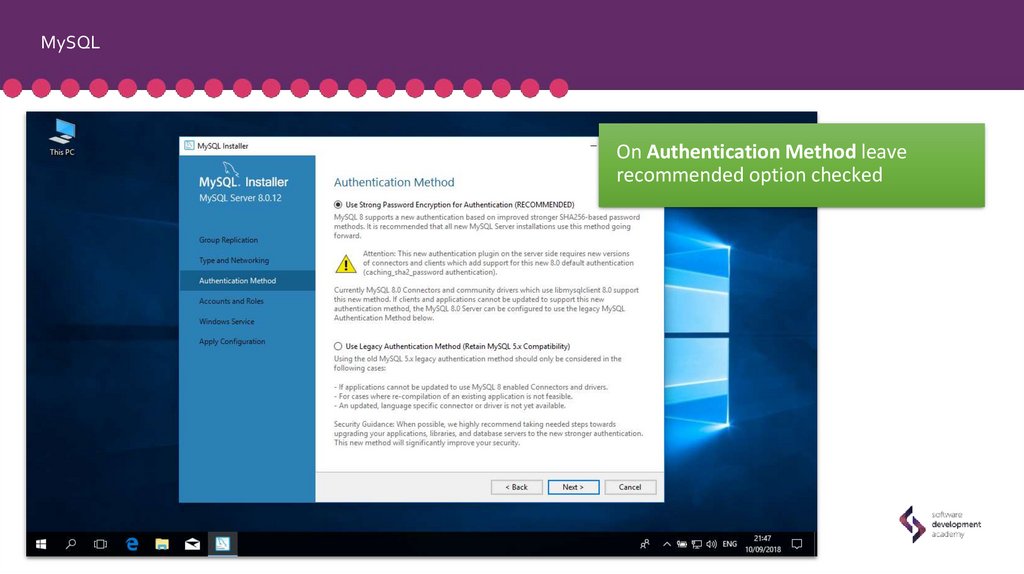
MySQLOn Authentication Method leave
recommended option checked
66.
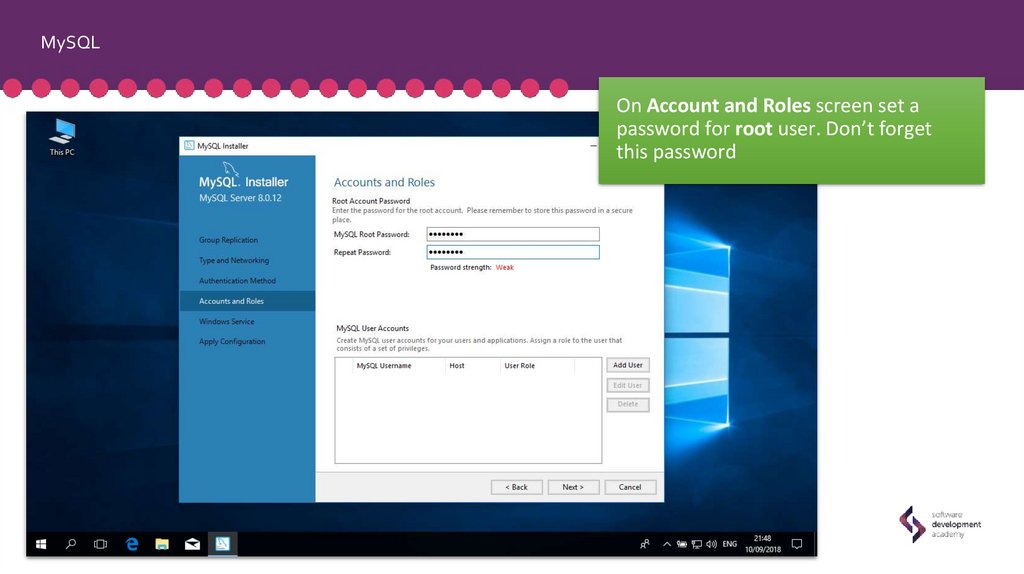
MySQLOn Account and Roles screen set a
password for root user. Don’t forget
this password
67.
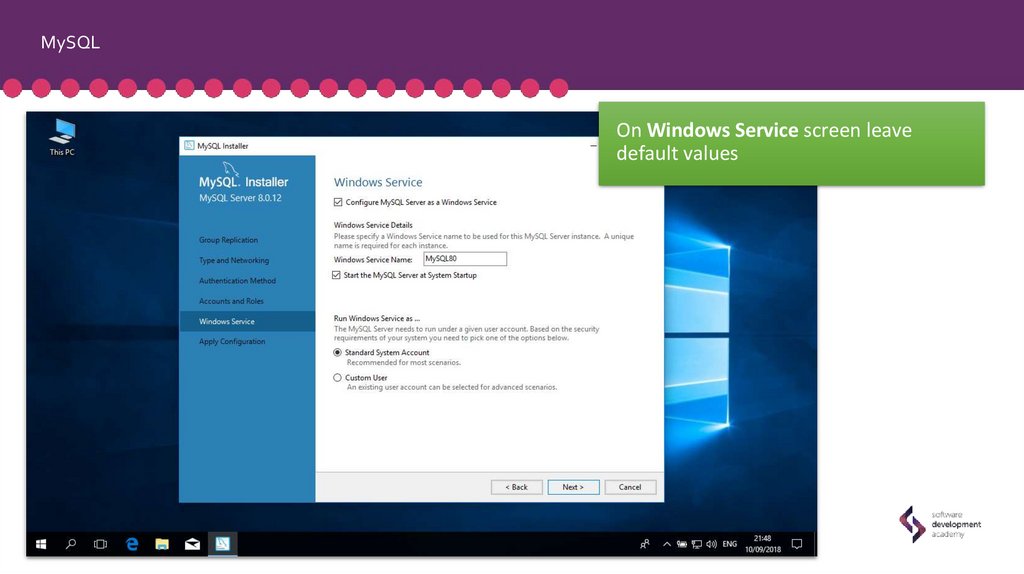
MySQLOn Windows Service screen leave
default values
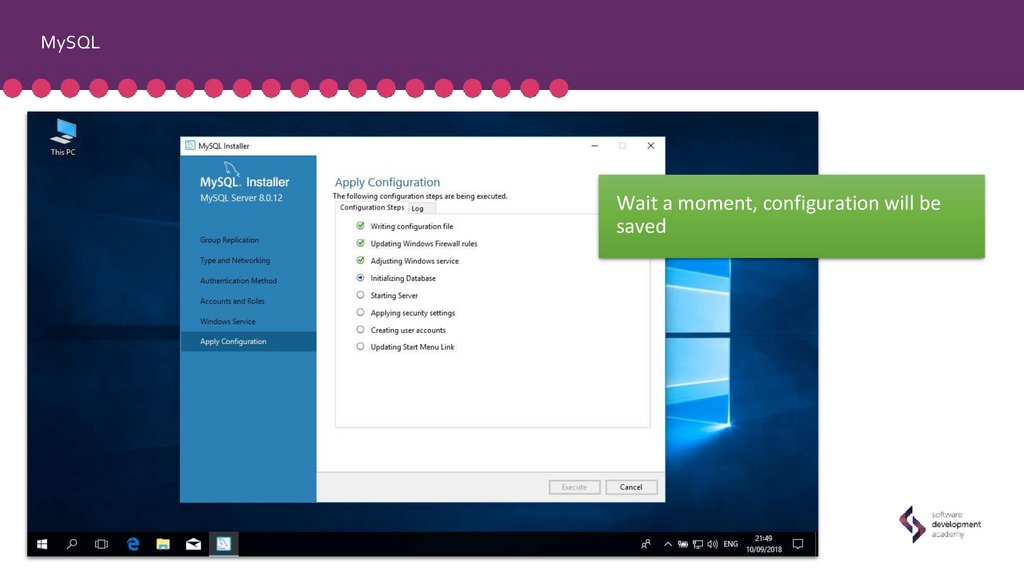
68.
MySQLWait a moment, configuration will be
saved
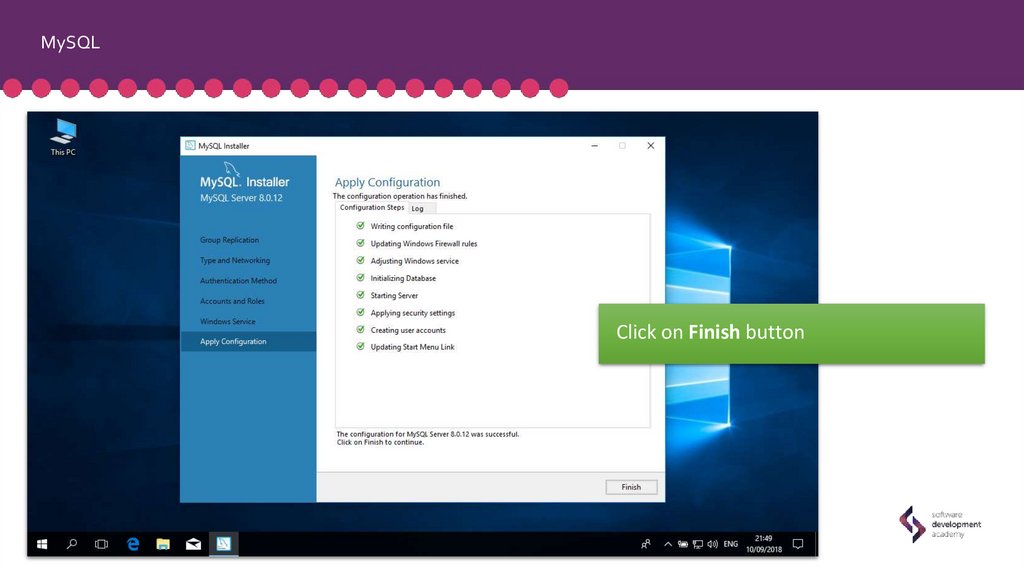
69.
MySQLClick on Finish button
70.
MySQLClick on Next button
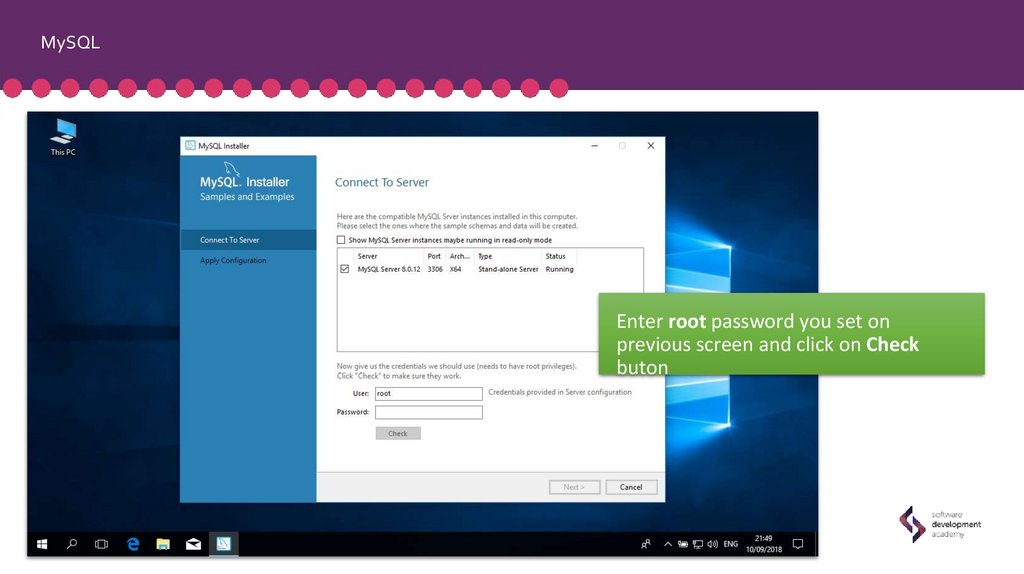
71.
MySQLEnter root password you set on
previous screen and click on Check
buton
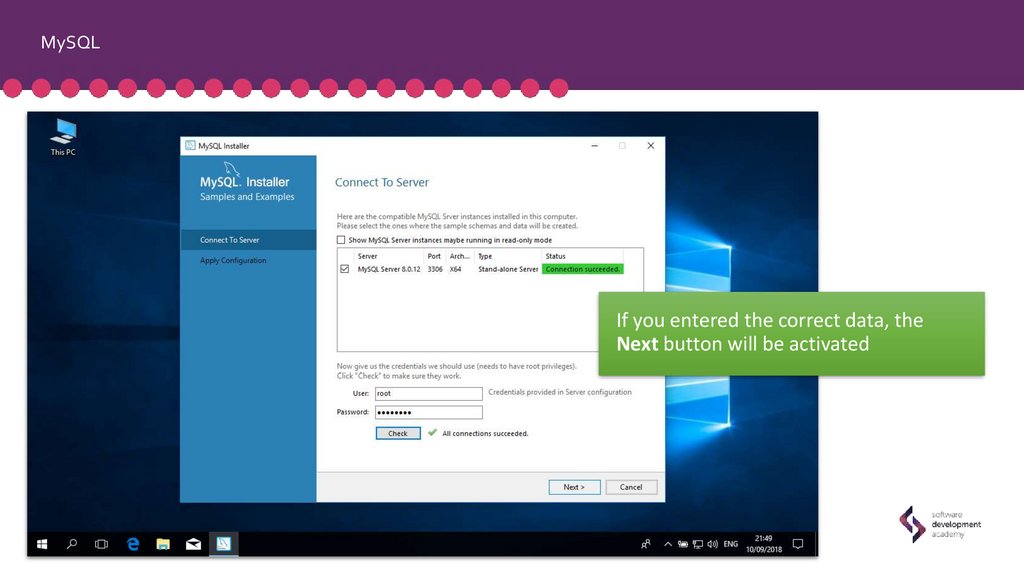
72.
MySQLIf you entered the correct data, the
Next button will be activated
73.
MySQLPress Execute to finish configuration
process
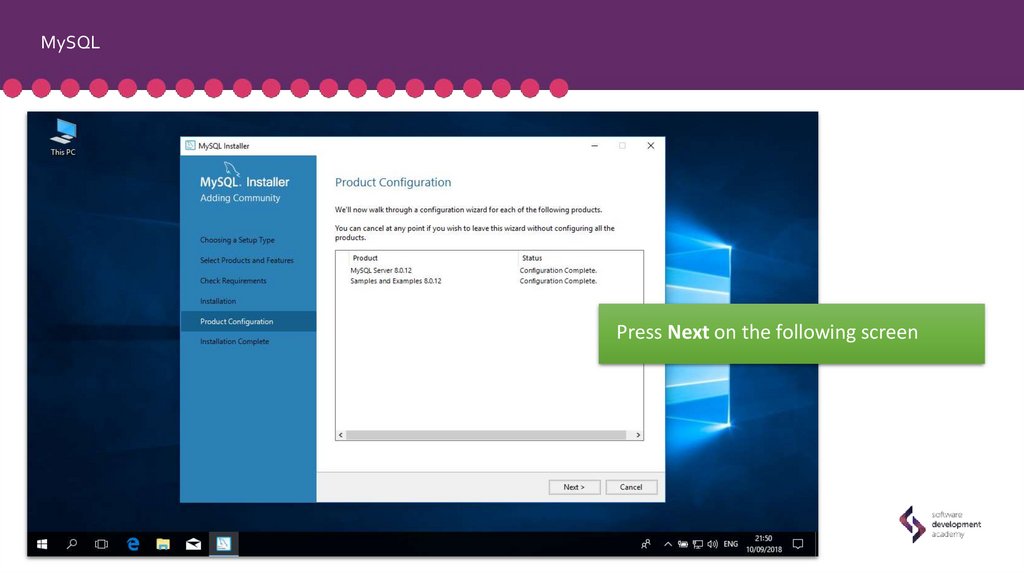
74.
MySQLPress Next on the following screen
75.
MySQLCongratulations! You can now start
work with MySQL database!
76.
MySQLYou should see this screen if you left
checked Start MySQL Workbench after
Setup on previous screen