Похожие презентации:
How to draw tolerance zones using data of tables of tolerances and fundamental deviations. Seminar 4
1. Seminar 4: How to draw tolerance zones using data of tables of tolerances and fundamental deviations
Standardization and measurementassurance of engineering production
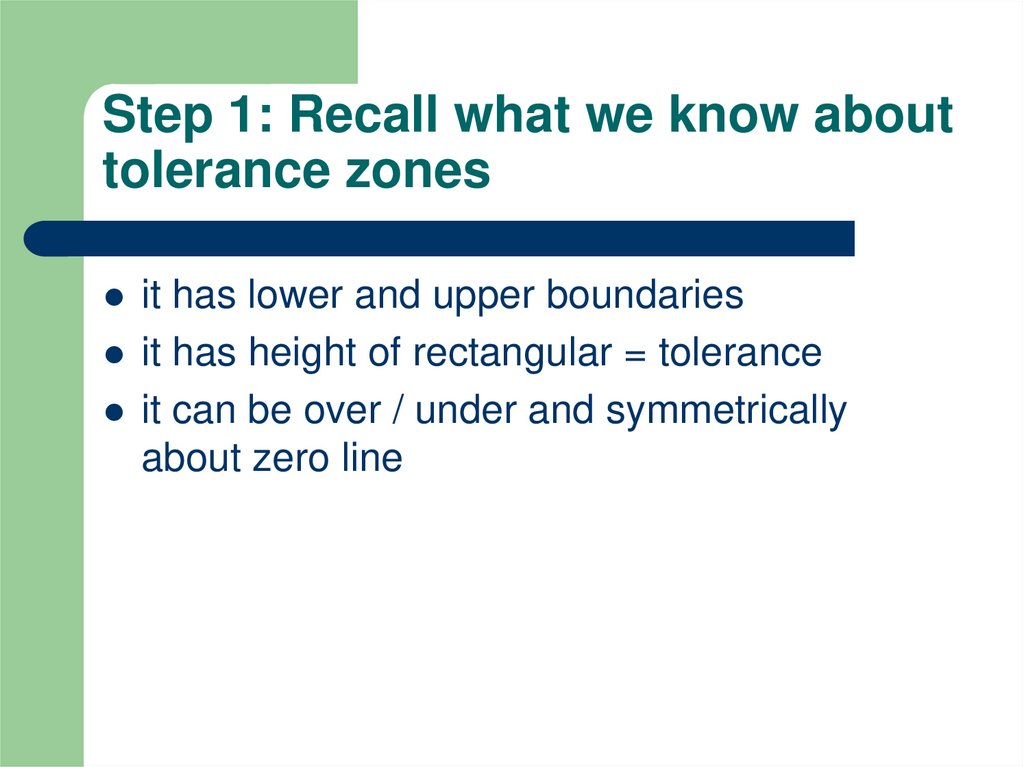
2. Step 1: Recall what we know about tolerance zones
it has lower and upper boundariesit has height of rectangular = tolerance
it can be over / under and symmetrically
about zero line
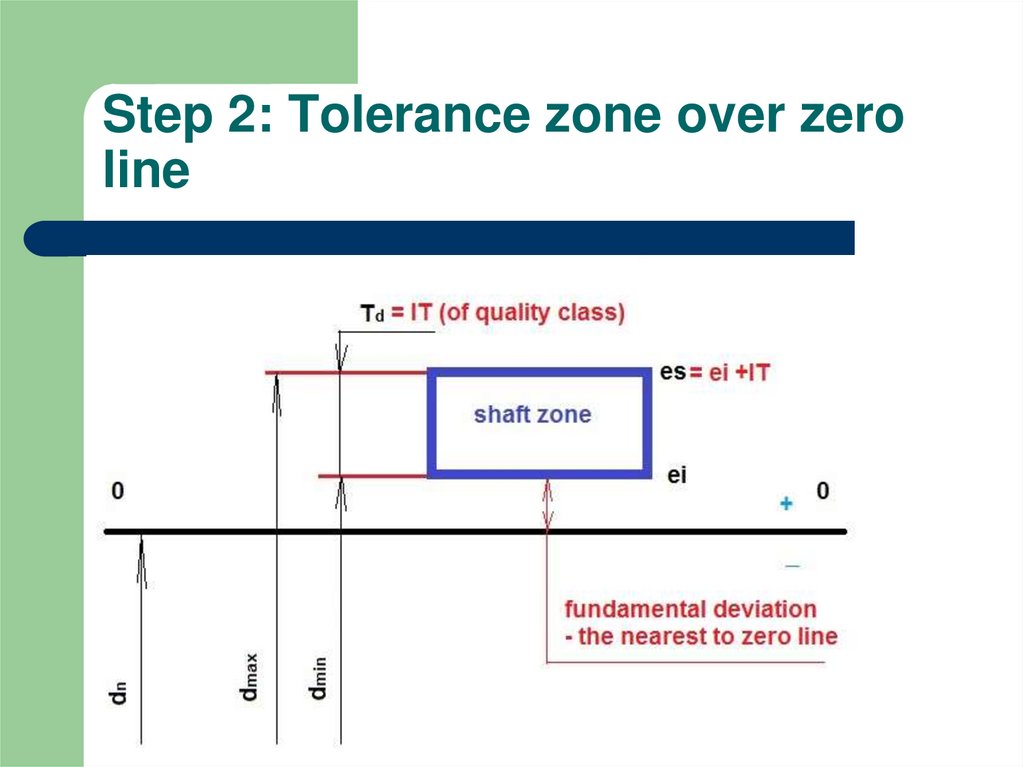
3. Step 2: Tolerance zone over zero line
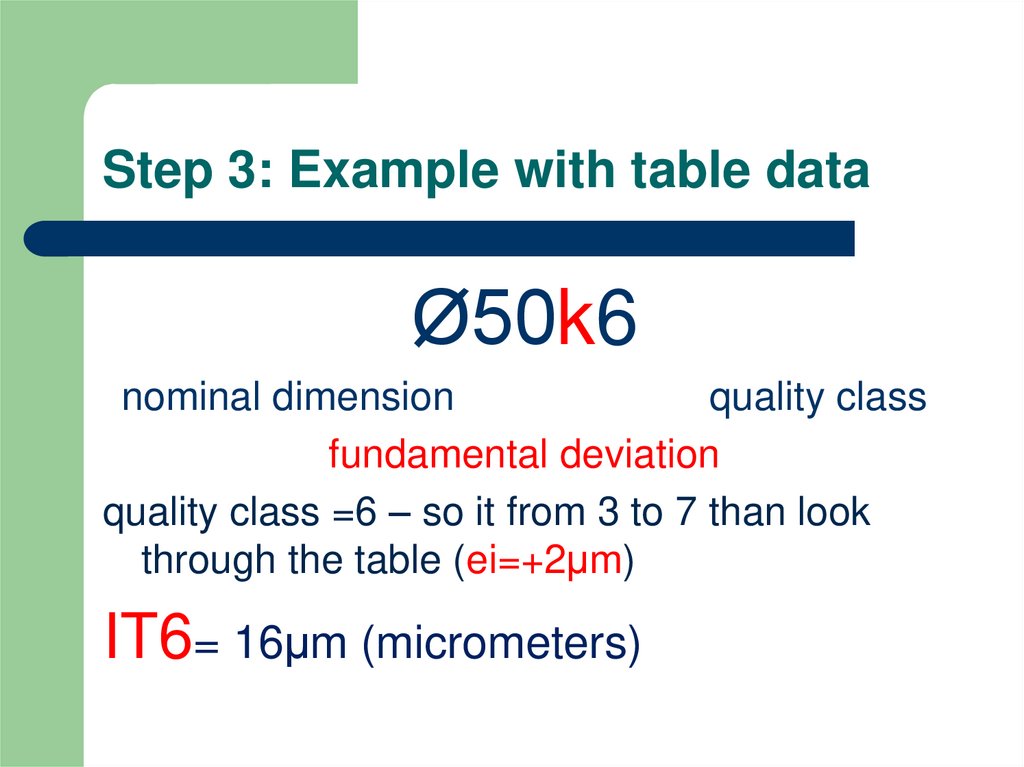
4. Step 3: Example with table data
Ø50k6nominal dimension
quality class
fundamental deviation
quality class =6 – so it from 3 to 7 than look
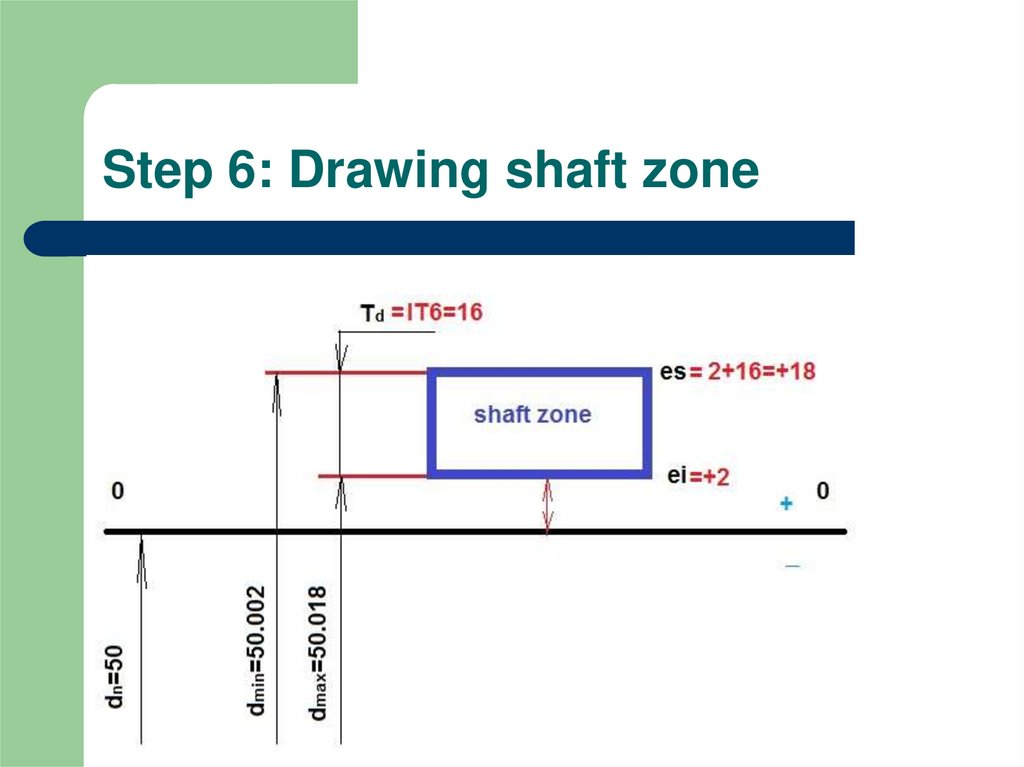
through the table (ei=+2μm)
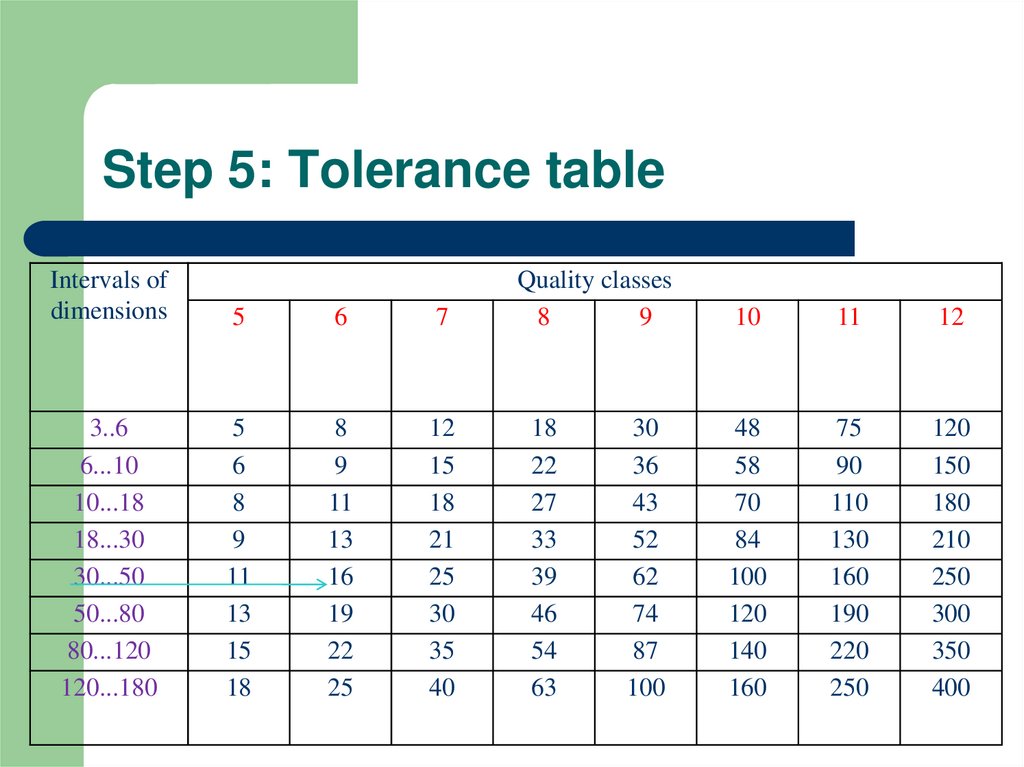
IT6= 16μm (micrometers)
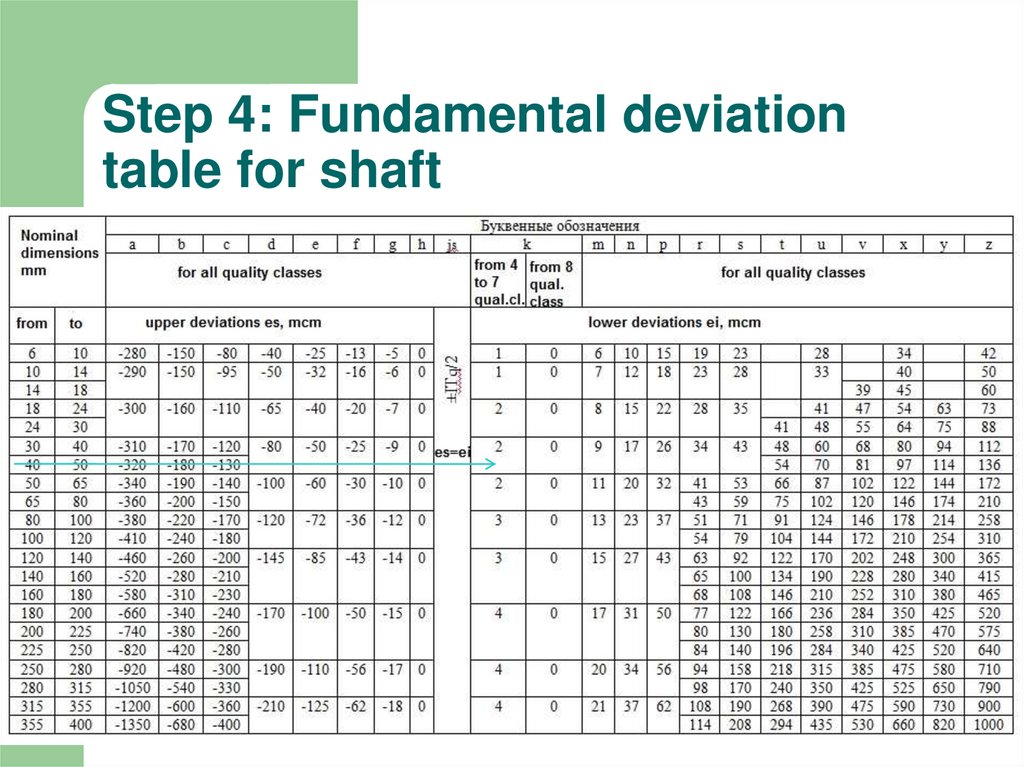
5. Step 4: Fundamental deviation table for shaft
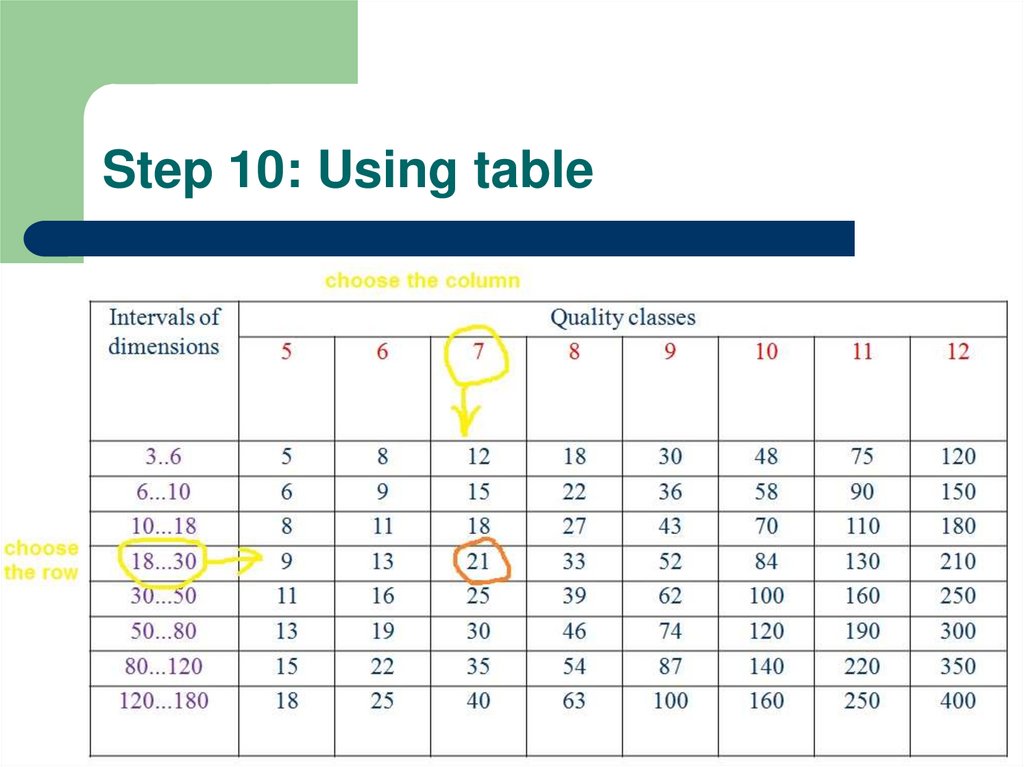
6. Step 5: Tolerance table
Intervals ofdimensions
5
6
7
3..6
6...10
10...18
18...30
30...50
50...80
80...120
120...180
5
6
8
9
11
13
15
18
8
9
11
13
16
19
22
25
12
15
18
21
25
30
35
40
Quality classes
8
9
18
22
27
33
39
46
54
63
30
36
43
52
62
74
87
100
10
11
12
48
58
70
84
100
120
140
160
75
90
110
130
160
190
220
250
120
150
180
210
250
300
350
400
7. Step 6: Drawing shaft zone
8. Step 7: Find table data for the hole
It is needed to define value of tolerance forØ25H7
nominal dimension
quality class
IT-? fundamental deviation - ?
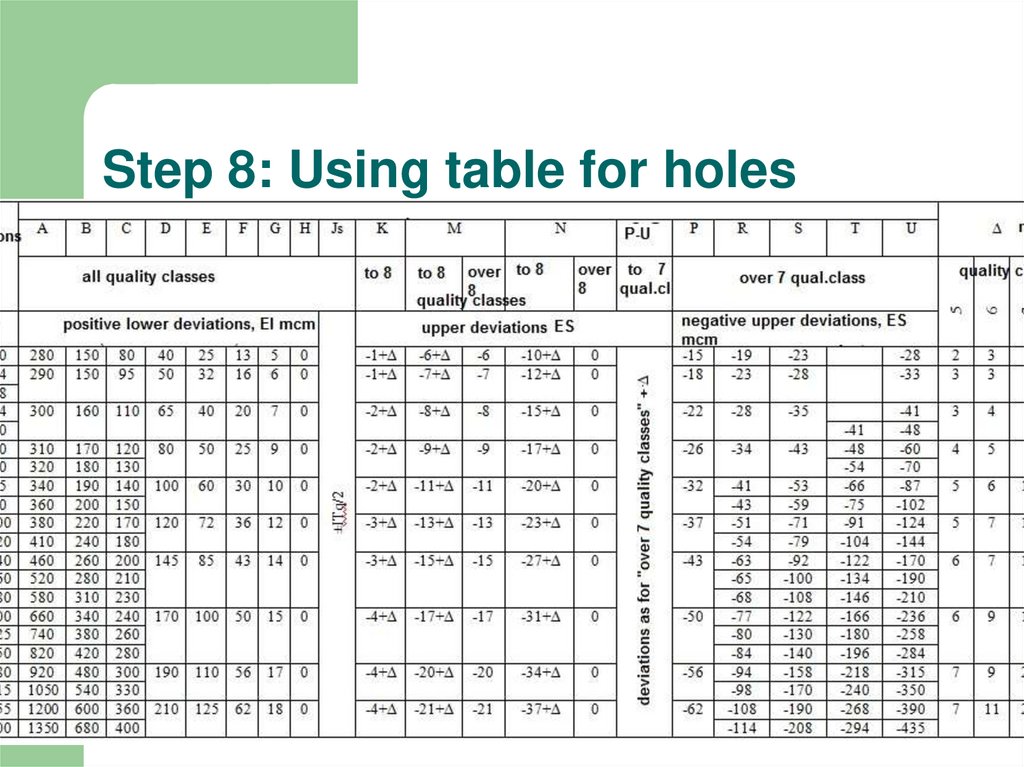
9. Step 8: Using table for holes
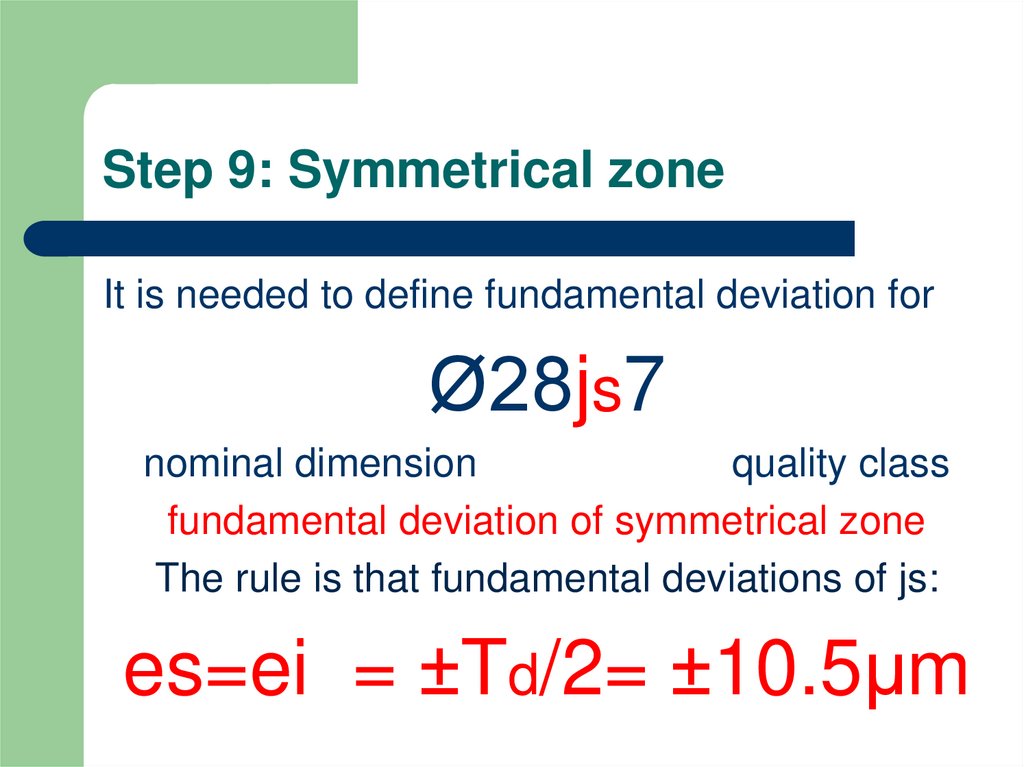
10. Step 9: Symmetrical zone
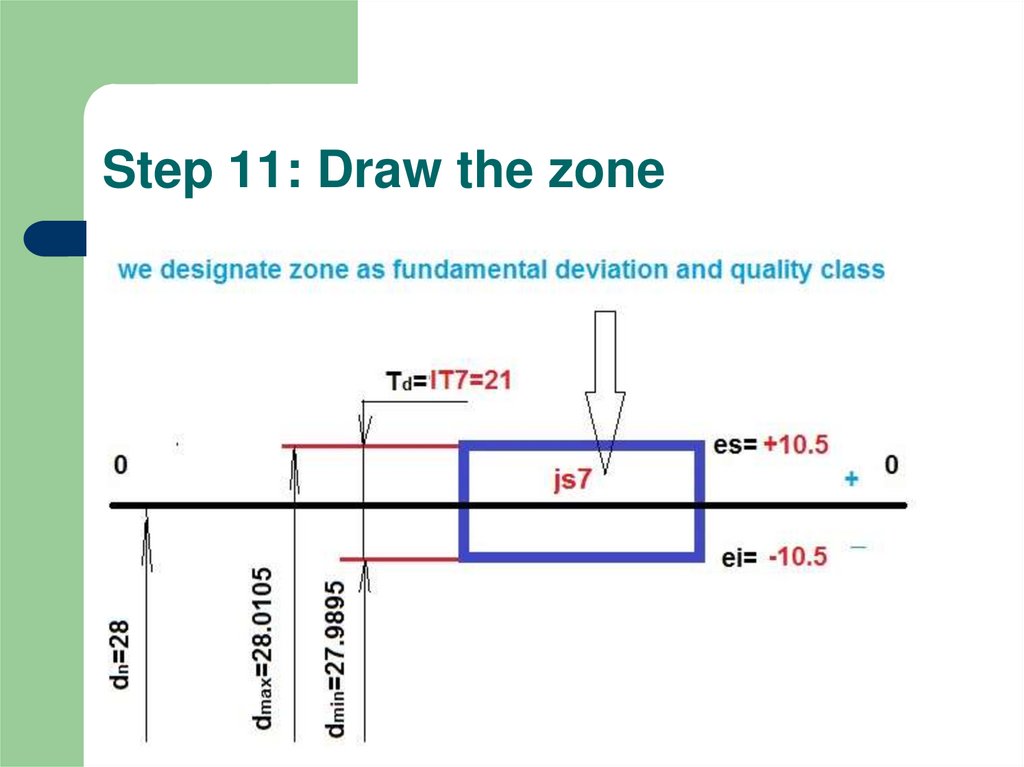
It is needed to define fundamental deviation forØ28js7
nominal dimension
quality class
fundamental deviation of symmetrical zone
The rule is that fundamental deviations of js:
es=ei = ±Td/2= ±10.5μm
11. Step 10: Using table
12. Step 11: Draw the zone
13.
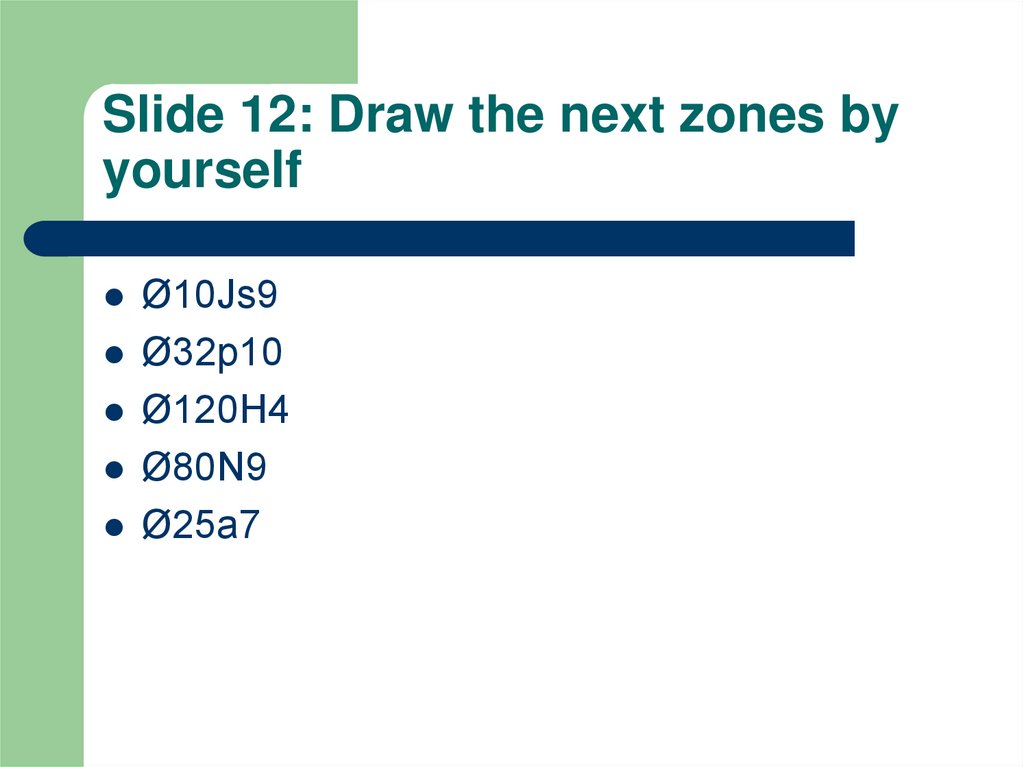
Slide 12: Draw the next zones byyourself
Ø10Js9
Ø32p10
Ø120H4
Ø80N9
Ø25a7

