 Механика
Похожие презентации:


Replacement of Dryer
1.
Replacement of Dryer①Conduct the automatic pump down.
②Quickly replace the dryer with new one
③Conduct vacuum-dehydrating from the quick joint located
at the inlet side of dryer.
④Conduct refrigerant leakage test
⑤Check on the green color of liquid / moisture indictor after system
operation started.
⑥Adhere an anti-corrosion tape on the flare nut section.
2.
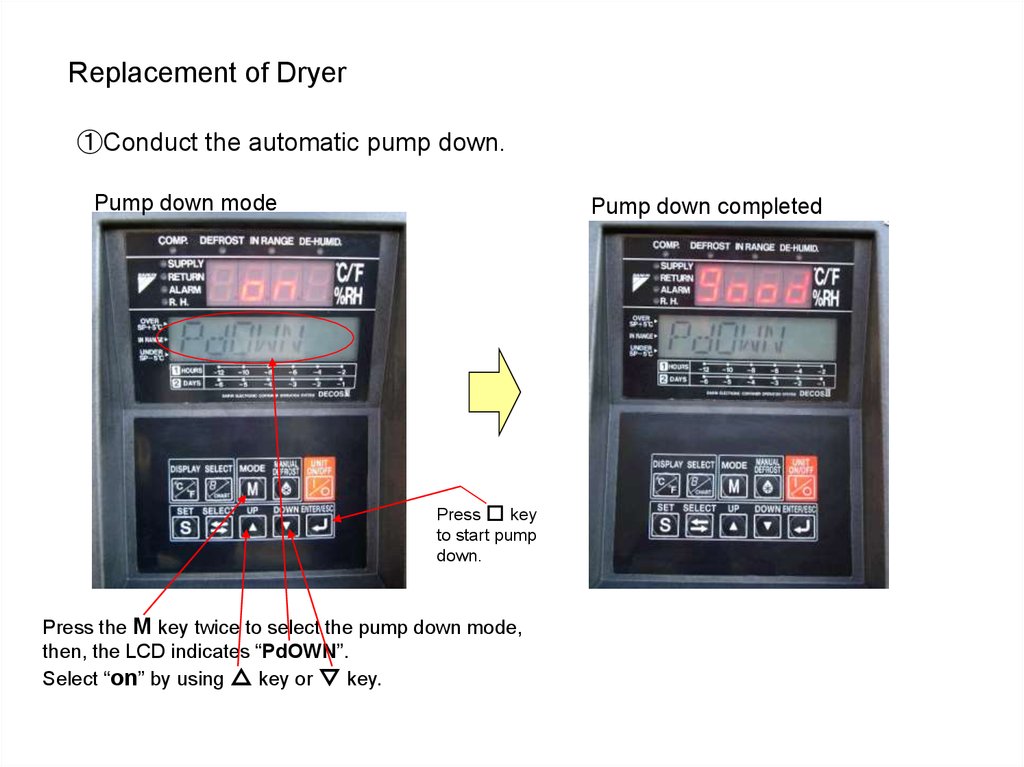
Replacement of Dryer①Conduct the automatic pump down.
Pump down mode
Pump down completed
Press □ key
to start pump
down.
Press the M key twice to select the pump down mode,
then, the LCD indicates “PdOWN”.
Select “on” by using △ key or ▽ key.
3.
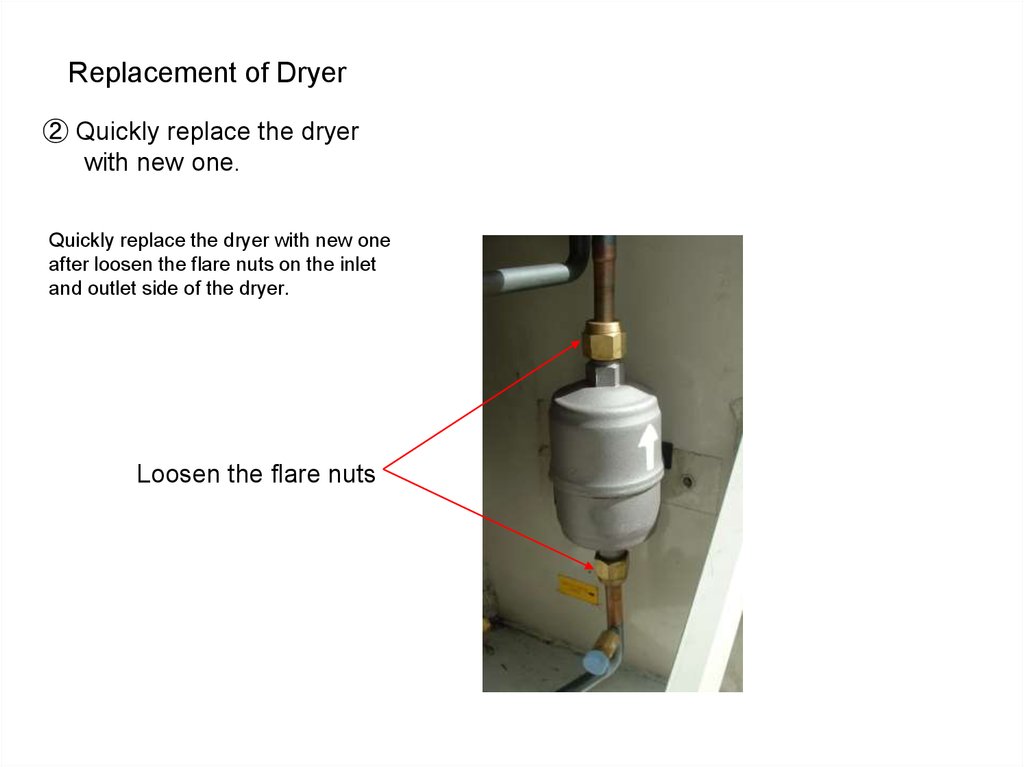
Replacement of Dryer② Quickly replace the dryer
with new one.
Quickly replace the dryer with new one
after loosen the flare nuts on the inlet
and outlet side of the dryer.
Loosen the flare nuts
4.
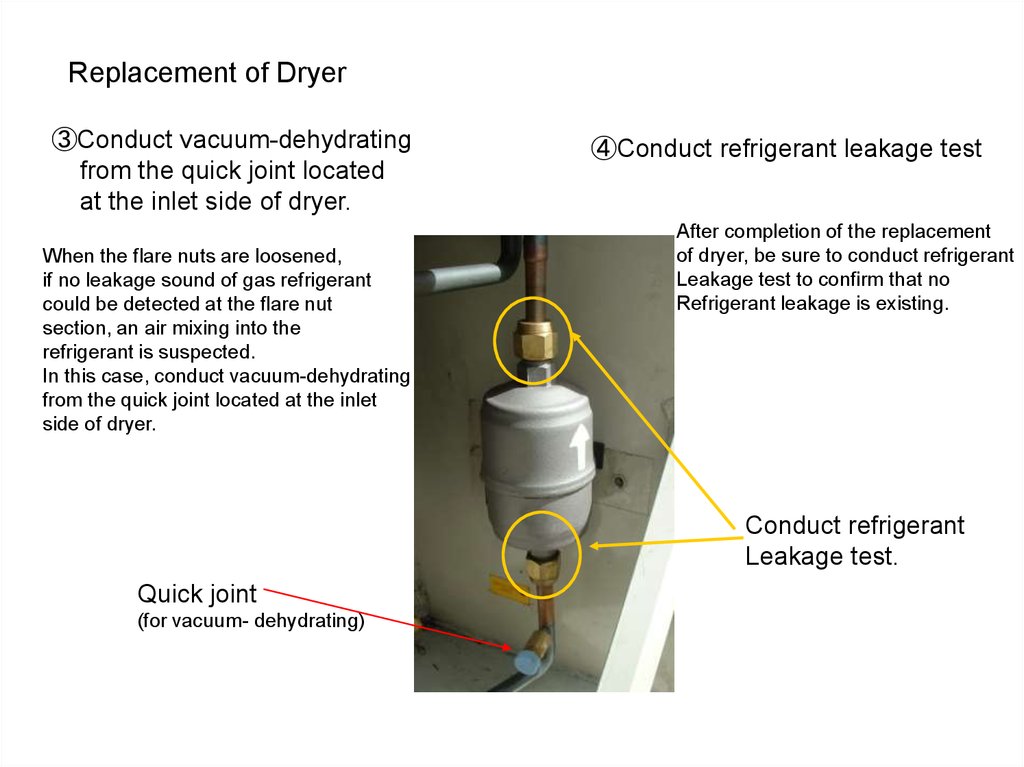
Replacement of Dryer③Conduct vacuum-dehydrating
from the quick joint located
at the inlet side of dryer.
When the flare nuts are loosened,
if no leakage sound of gas refrigerant
could be detected at the flare nut
section, an air mixing into the
refrigerant is suspected.
In this case, conduct vacuum-dehydrating
from the quick joint located at the inlet
side of dryer.
④Conduct refrigerant leakage test
After completion of the replacement
of dryer, be sure to conduct refrigerant
Leakage test to confirm that no
Refrigerant leakage is existing.
Conduct refrigerant
Leakage test.
Quick joint
(for vacuum- dehydrating)
5.
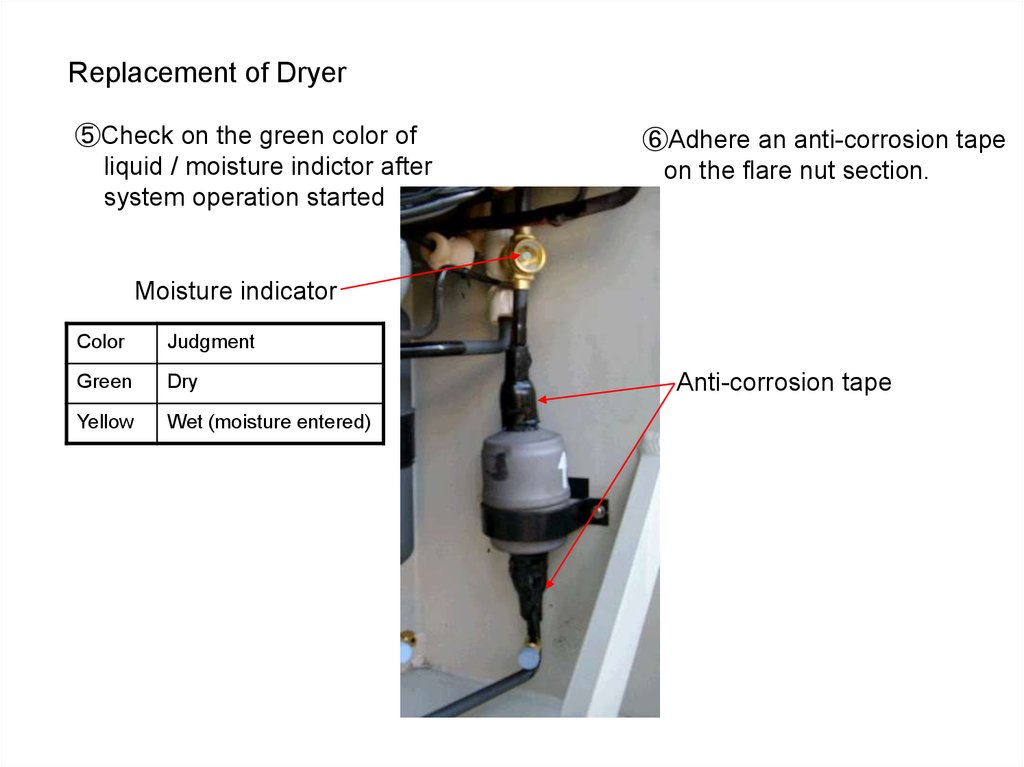
Replacement of Dryer⑤Check on the green color of
liquid / moisture indictor after
system operation started
⑥Adhere an anti-corrosion tape
on the flare nut section.
Moisture indicator
Color
Judgment
Green
Dry
Yellow
Wet (moisture entered)
Anti-corrosion tape