


 Программное обеспечение
Похожие презентации:


")
")


Running GitLab in the Cloud with Azure
1.
Running GitLab in the Cloud with AzureХуа Вэй
53504/11
2.
IntroductionOne of the first things that you should do before starting a software
project is set up a version control system (VCS) for your code. A
version control system allows you to track changes for your code,
concurrently maintain different versions (i.e. production and
development) and simplifies the task of merging and integrating
contributions from multiple developers. One of the most popular VCS is
Git, a distributed version control and source code management system.
Though Git itself is mainly a collection of command line tools, many
people manage Git repositories using third party tools and services,
such as GitHub, Gitorious or GitLab.
GitLab is a Ruby on Rails web application that helps you manage who
has permissions to contribute to which repository. It also includes a
wiki, enables code reviews and many other features.GitLab CI is a
complementary web application that provides Continuous Integration
closely integrated with Git to run tasks after a new change or run tests
in different branches in the repository.
This guide describes how to create your own Git repository and
integrate it with a Continuous Integration server in the cloud with
Windows Azure and a BitNami GitLab virtual machine.
3.
GitLab & GitLab CIGitLab is a self-hosted Git management
software application written in Ruby on
Rails and distributed under an open source
license. GitLab simplifies the task of
managing Git projects: you can enable or
disable access per user and per project,
keep track of project activities, code
reviews, merge requests or track issues.
GitLab CI allows you to run tasks with the
project code. It is useful for automating the
tests or the release process.
4.
BitNami provides a free, pre-configured GitLab virtual machine that you can deploy inWindows Azure. The image is based on Ubuntu and ships all of the required
dependencies for running GitLab and GitLab CI, including a web server, database and
Ruby on Rails runtime. This means you can get started with GitLab right away, without
having to install or configure it.
5.
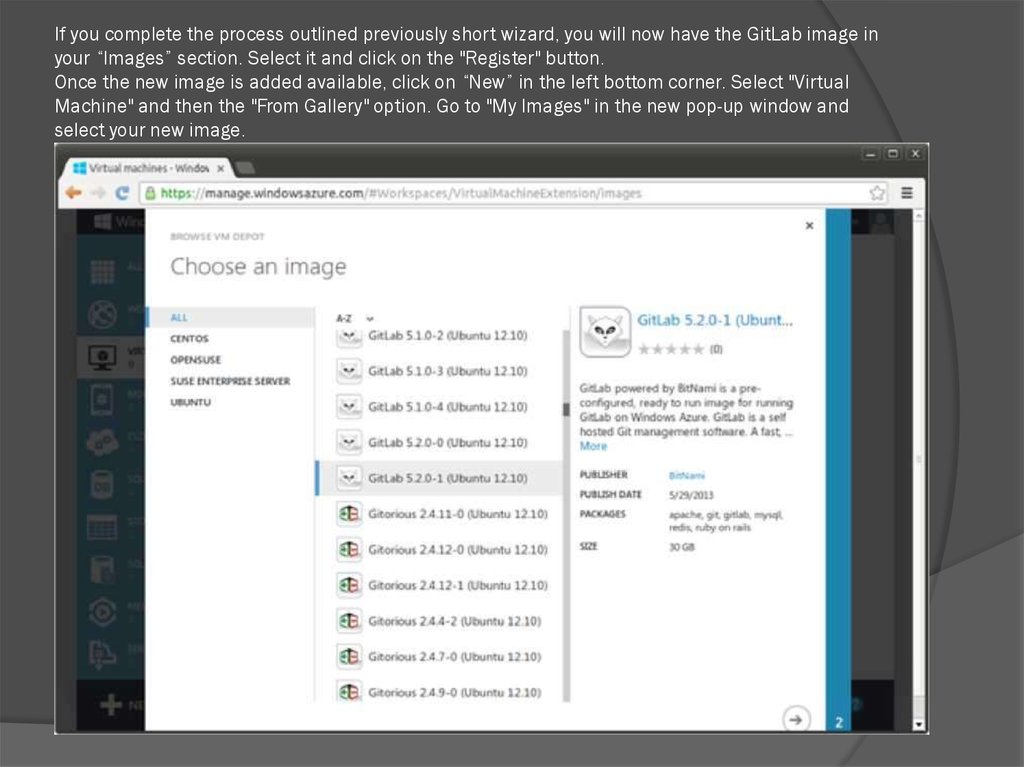
If you complete the process outlined previously short wizard, you will now have the GitLab image inyour “Images” section. Select it and click on the "Register" button.
Once the new image is added available, click on “New” in the left bottom corner. Select "Virtual
Machine" and then the "From Gallery" option. Go to "My Images" in the new pop-up window and
select your new image.
6.
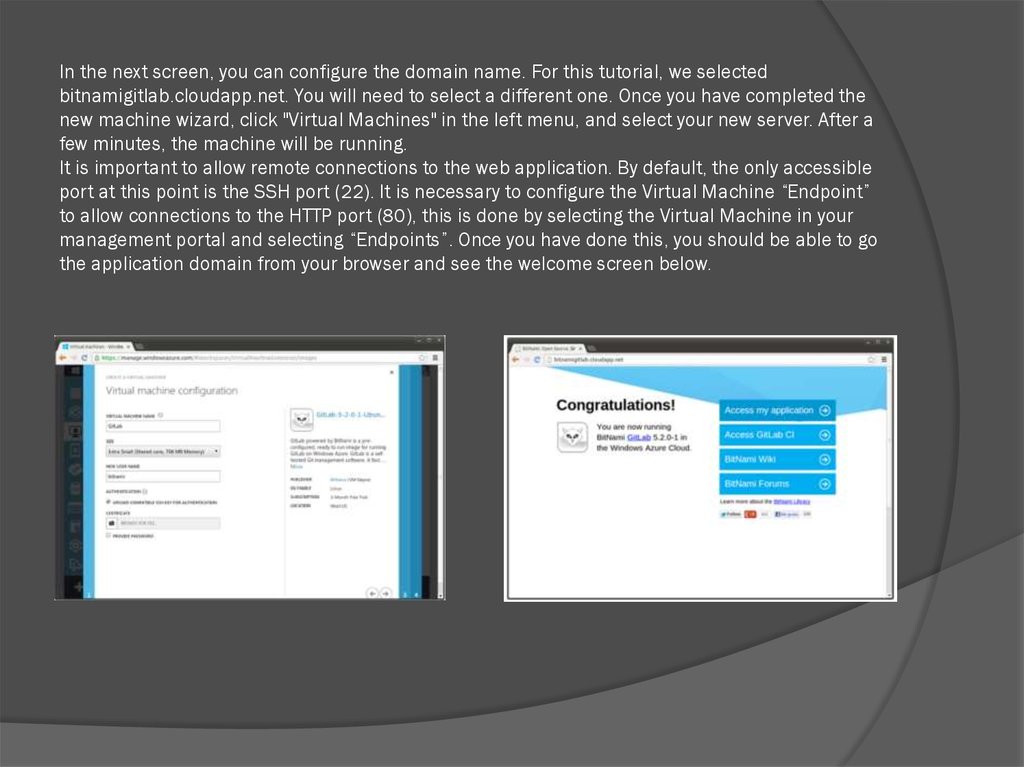
In the next screen, you can configure the domain name. For this tutorial, we selectedbitnamigitlab.cloudapp.net. You will need to select a different one. Once you have completed the
new machine wizard, click "Virtual Machines" in the left menu, and select your new server. After a
few minutes, the machine will be running.
It is important to allow remote connections to the web application. By default, the only accessible
port at this point is the SSH port (22). It is necessary to configure the Virtual Machine “Endpoint”
to allow connections to the HTTP port (80), this is done by selecting the Virtual Machine in your
management portal and selecting “Endpoints”. Once you have done this, you should be able to go
the application domain from your browser and see the welcome screen below.
7.
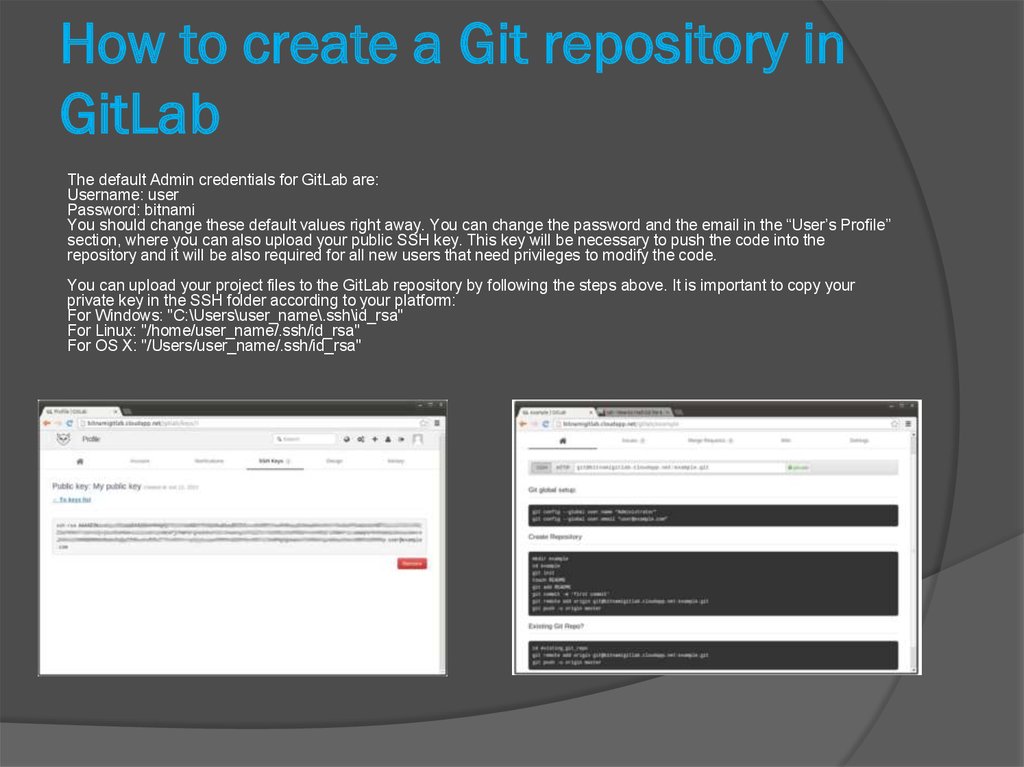
How to create a Git repository inGitLab
The default Admin credentials for GitLab are:
Username: user
Password: bitnami
You should change these default values right away. You can change the password and the email in the “User’s Profile”
section, where you can also upload your public SSH key. This key will be necessary to push the code into the
repository and it will be also required for all new users that need privileges to modify the code.
You can upload your project files to the GitLab repository by following the steps above. It is important to copy your
private key in the SSH folder according to your platform:
For Windows: "C:\Users\user_name\.ssh\id_rsa"
For Linux: "/home/user_name/.ssh/id_rsa"
For OS X: "/Users/user_name/.ssh/id_rsa"
8.
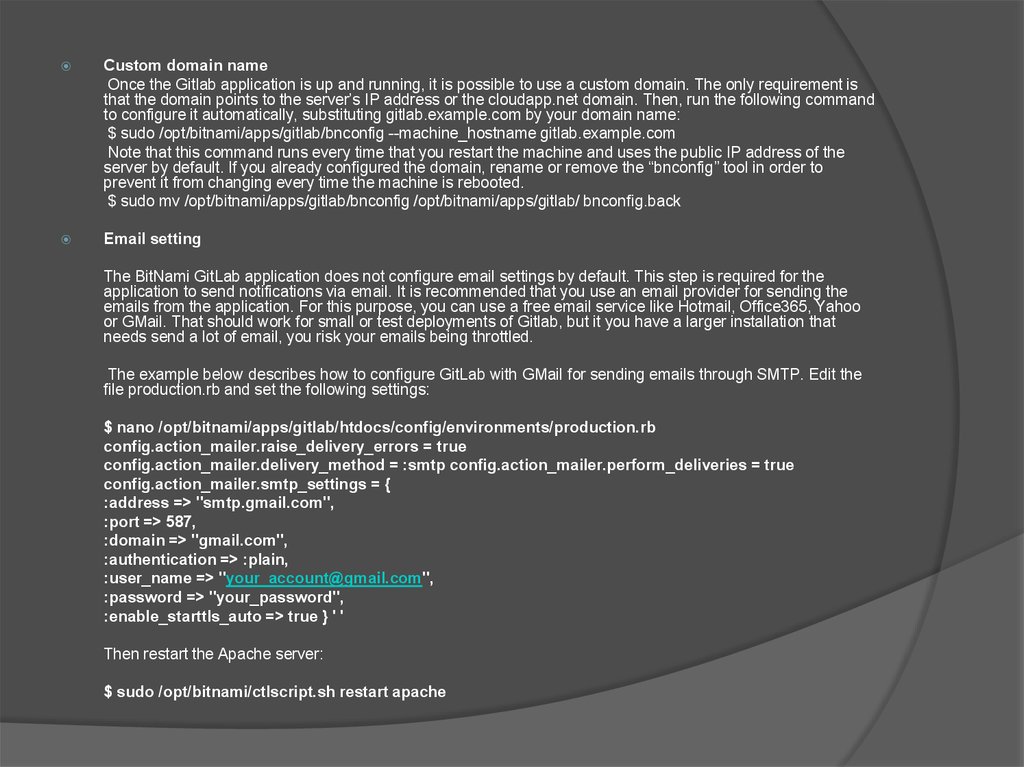
Custom domain nameOnce the Gitlab application is up and running, it is possible to use a custom domain. The only requirement is
that the domain points to the server’s IP address or the cloudapp.net domain. Then, run the following command
to configure it automatically, substituting gitlab.example.com by your domain name:
$ sudo /opt/bitnami/apps/gitlab/bnconfig --machine_hostname gitlab.example.com
Note that this command runs every time that you restart the machine and uses the public IP address of the
server by default. If you already configured the domain, rename or remove the “bnconfig” tool in order to
prevent it from changing every time the machine is rebooted.
$ sudo mv /opt/bitnami/apps/gitlab/bnconfig /opt/bitnami/apps/gitlab/ bnconfig.back
Email setting
The BitNami GitLab application does not configure email settings by default. This step is required for the
application to send notifications via email. It is recommended that you use an email provider for sending the
emails from the application. For this purpose, you can use a free email service like Hotmail, Office365, Yahoo
or GMail. That should work for small or test deployments of Gitlab, but it you have a larger installation that
needs send a lot of email, you risk your emails being throttled.
The example below describes how to configure GitLab with GMail for sending emails through SMTP. Edit the
file production.rb and set the following settings:
$ nano /opt/bitnami/apps/gitlab/htdocs/config/environments/production.rb
config.action_mailer.raise_delivery_errors = true
config.action_mailer.delivery_method = :smtp config.action_mailer.perform_deliveries = true
config.action_mailer.smtp_settings = {
:address => "smtp.gmail.com",
:port => 587,
:domain => "gmail.com",
:authentication => :plain,
:user_name => "your_account@gmail.com",
:password => "your_password",
:enable_starttls_auto => true } ' '
Then restart the Apache server:
$ sudo /opt/bitnami/ctlscript.sh restart apache
9.
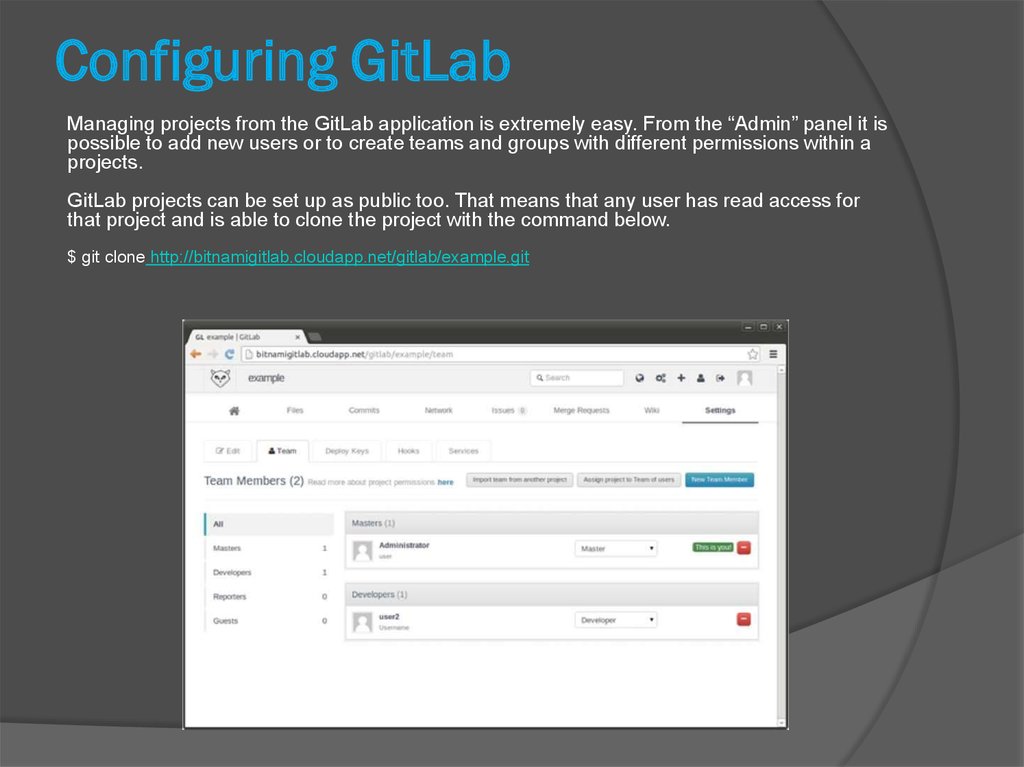
Configuring GitLabManaging projects from the GitLab application is extremely easy. From the “Admin” panel it is
possible to add new users or to create teams and groups with different permissions within a
projects.
GitLab projects can be set up as public too. That means that any user has read access for
that project and is able to clone the project with the command below.
$ git clone http://bitnamigitlab.cloudapp.net/gitlab/example.git
10.
Server managementIt is possible to manage all the GitLab servers using the
“/opt/bitnami/ctlscript.sh” tool. GitLab requires the following servers:
A MySQL database
An Apache server configured with a Passenger module for Ruby on Rails
apps
A Redis server for storing the job messages
A GitLab Sidekiq server for processing the jobs in the background
You can log into the server through SSH and check the status of the servers
with the command below:
$ sudo /opt/bitnami/ctlscript.sh status
For troubleshooting problems with the servers, you can typically find the
required information in each server’s log files:
Apache: /opt/bitnami/apache2/error_log
MySQL: /opt/bitnami/mysql/data/mysqld.log
Redis: /opt/bitnami/redis/var/log/redis-server.log
GitLab Sidekiq: /opt/bitnami/gitlab/htdocs/log/sidekiq.log
GitLab CI Sidekiq: /opt/bitnami/gitlabci/htdocs/log/sidekiq.log
Sidekiq ships a control panel where it is possible to check the logs and the
status of the jobs.
11.
How to integrate GitLab & GitLabCI
This section explains how to fully integrate GitLab and GitLab CI for running tasks
automatically. This example will cover how to run the unit tests of a Ruby on Rails project,
Redmine.
It is necessary to create a public and private key for the “gitlab_ci” user in the server, so this
user will have read access to the chosen repositories. Once logged in the server through
SSH, run the following command and do not specify any password for the key:
$ sudo su gitlab_ci -c "ssh-keygen -t rsa"
Then read the new public key and copy the contents in a file. GitLab will give read-only
privileges to this user account.
In GitLab, go to the project “Settings” and add a new “Deploy Key”. Then copy the public key
created previously. When you copy the key, make sure the key content does not contain
newlines.
12.
Now the “gitlab_ci” user will be able to clone the repository in the serverrunning the commands below.
$ sudo su gitlab_ci $ mkdir repositories $ cd repositories
$ git config --global user.name 'Administrator1 $ git config --global
user.email 'user@example.com'
$ git clone git@bitnamigitlab.cloudapp.net:example.git"
Cloning into 'example'... remote: Counting objects: 3, done.
Receiving objects: 100% (3/3), 201 bytes, done. remote: Total 3 (delta
0), reused 0 (delta 0)
Now it is time to access to the GitLab CI application. In this example GitLab
CI is running at “http://bitnamigitlab.cloudapp.net/gitlabci”.
The default credentials for GitLab CI are:
email: user@example.com
password: bitnami
You will need to change them from in User’s profile section.
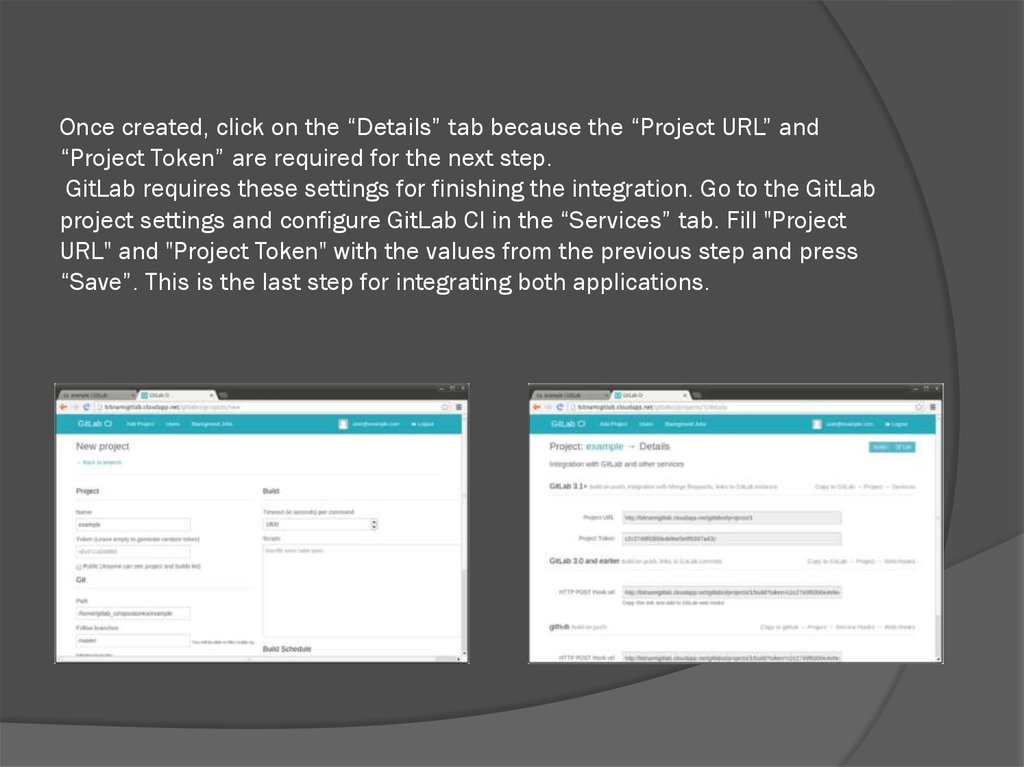
For enabling this new repository in the GitLab CI application, create a new
project and configure the following options:
-Name: Example
-Token: (blank)
-Path: /home/gitlab_ci/repositories/example
-Follow branches: master
13.
Once created, click on the “Details” tab because the “Project URL” and“Project Token” are required for the next step.
GitLab requires these settings for finishing the integration. Go to the GitLab
project settings and configure GitLab CI in the “Services” tab. Fill "Project
URL" and "Project Token" with the values from the previous step and press
“Save”. This is the last step for integrating both applications.
14.
SummaryBitNami GitLab allows you to easily create and
manage your own Git repository in Windows
Azure. Some advantages of running your own
repository in a Cloud include:
Full control of the server
Flexibility to customize the application as
required
Ability to resize your server as needs change
Centralized control panel for managing
administrative tasks