


 Механика
Похожие презентации:


NW Rapid Site Installation
1. NW Rapid Site Installation
NW220GPD2. Typical NW Rapid plant layout
2© Metso
3. Typical NW Rapid plant layout
3© Metso
4. Co-ordinate marking as per layout
Centre line ofCrusher
4
© Metso
5. Positioning of the NW chassis
Drive in the NW, align the NW with respect to centre line and position of the legs.5
© Metso
6. Support the NW on Hydraulic legs
42
3
1
1)
2)
3)
4)
5)
6
5
Support the NW on Landing Legs.
De-couple the Horse
Place the base plate of the Hydraulic legs just below the Legs.
Power up the main Control Centre and start the Hydraulic power pack. Ensure correct rotation.
Operate the Hydraulic valve to lower the legs.
© Metso
7. Support the NW on Hydraulic legs
34
3
1
4
Note : Operate alternate
legs and keep the chassis
horizontal .
2
Cylinder Up
Cylinder Down
1
7
© Metso
2
8. Support the NW on Hydraulic legs
Operation of Hydraulic Legs2
1
Lock Pin
1)
2)
8
Operate (inching) the hydraulic cylinder Up / Down to loose the Lock pin.
Remove the locking Pin.
© Metso
1/2
9. Support the NW on Hydraulic legs
Operation of Hydraulic Legs7
3
6
4
3)
4)
5)
6)
7)
9
5
Turn the lock plate upward and disengage from rack.
Put the lock pin to hold the lock plate in dis-engaged position.
Lower the cylinder to support the NW.
Remove the lock pin and turn the lock plate downward. Operate the cylinder to match the pitch.
Put the lock pin to hold the lock plate in position.
© Metso
2/2
10. Support the NW on Hydraulic legs
Level the NW chassis1470 mm
10
© Metso
11. Unfold the hand rails
11© Metso
12. Install Screen drive
12© Metso
13. Lift the screen
Work2
Transport
1
Cylinder Up
Cylinder Down
1)
2
13
© Metso
2)
All the Screen springs must be locked by using screen transport
lock.
Operate the hydraulic hand valve to lift / lower the screen
14. Lift the screen
11)
2)
14
2
Install the smaller support levers first.
Lift the screen and install bigger support levers.
© Metso
1
2
15. Lift the screen
33)
4)
15
Install the lock pins / washers….
Remember to remove the screen transport lock.
© Metso
3
3
3
16. Isolate Crusher Lubrication Unit
21
1) Support the Lubrication Unit on ground.
2) Remove the bracket to isolate the tank from chassis.
16
© Metso
17. Set the dividing hopper gate as per process requirement
217
© Metso
18. Set Up Cavity Level Sensor
18© Metso
Date Author Title
19. Isolate the Control Centre from NW chassis.
Remove the mounting bolts and support theControl Centre on Telescopic legs.
19
© Metso
Date Author Title
20. Electrical Installation
2021. Electrical Installation
Connect Screen motor power cable.21
© Metso
Date Author Title
22. Electrical Installation
22
© Metso
Date Author Title
Check and change the Incoming voltage of the control
transformer if needed
23. Connect Control Centre Power Cables .
Electrical InstallationDo’s
Don’t
Connect Control Centre Power Cables .
Gland
Incoming
23
© Metso
Ground
Date Author Title
Use proper size cable/gland.
For selection of cable refer Electrical documents.
Incoming cables must be tighten properly
Control centre / chassis must be connected to ground /
earth. Follow local electrical rules for earth pith.
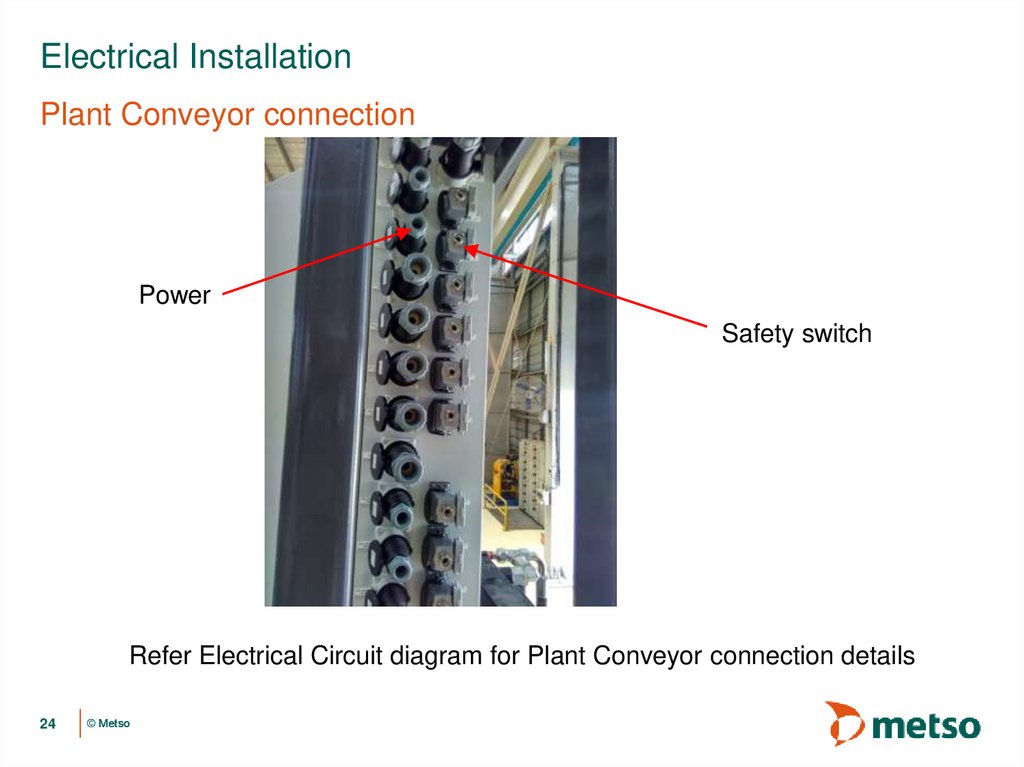
24.
Electrical InstallationPlant Conveyor connection
Power
Safety switch
Refer Electrical Circuit diagram for Plant Conveyor connection details
24
© Metso
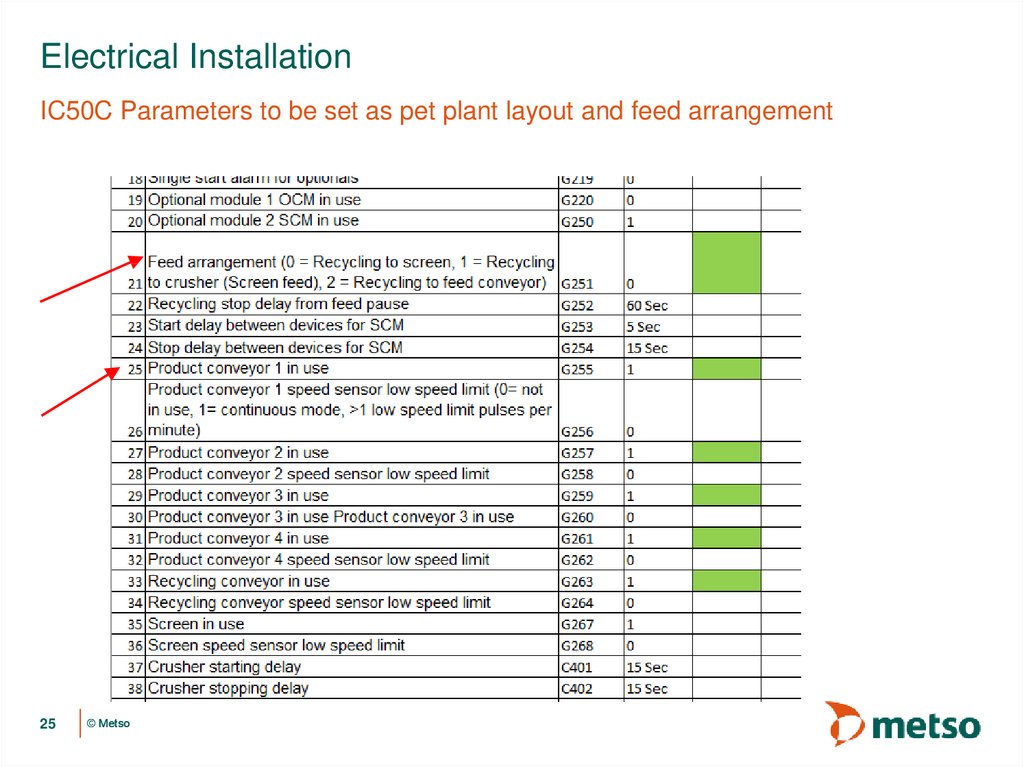
25.
Electrical InstallationIC50C Parameters to be set as pet plant layout and feed arrangement
25
© Metso
26.
www.metso.comcompany/metso
metsoworld
metsogroup
metsoworld
metsogroup